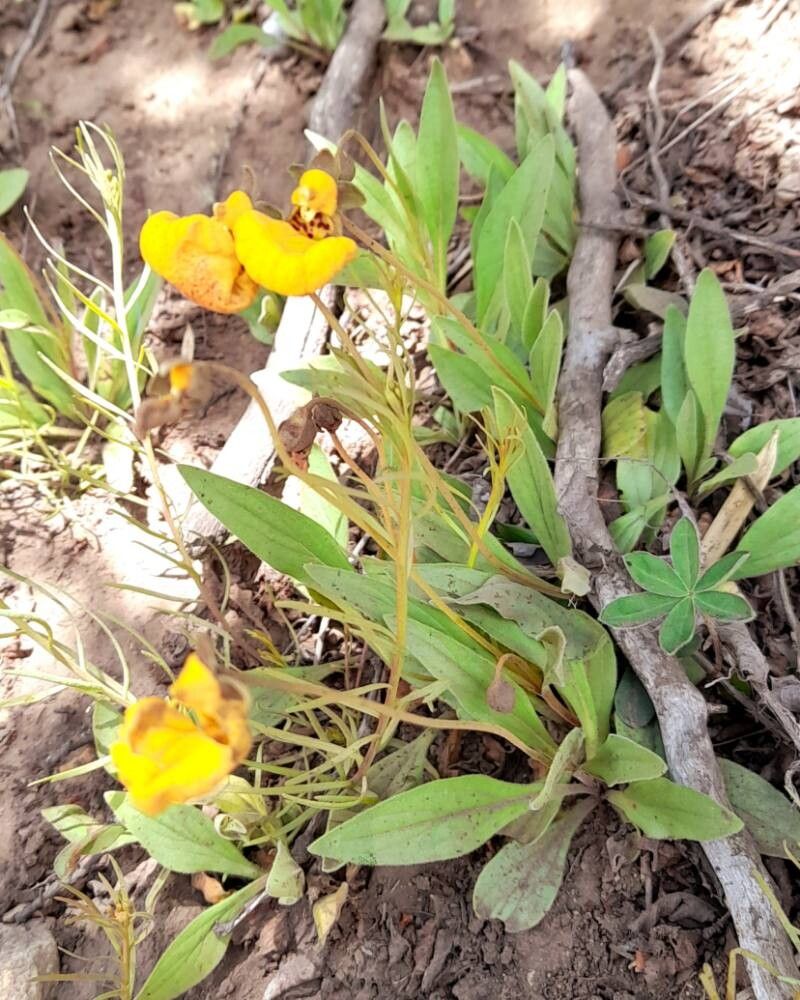
Hello, fellow plant lovers! Today, we’re going to talk about a truly charming little gem: Calceolaria polyrhiza, often called the “Slipper Flower” or “Pocketbook Plant.” Its quirky, pouch-like blooms in shades of yellow and gold are just delightful, adding a whimsical touch to any garden or windowsill. The best part? You can easily multiply this beauty! Propagating Calceolaria polyrhiza is a wonderfully rewarding process that lets you fill your space with more of these cheerful flowers. For beginners, I’d say it’s moderately easy – with a little know-how, you’ll be well on your way to success.
The Best Time to Start
Generally, spring is your prime time for propagating Calceolaria polyrhiza. This is when the plant is actively growing after its winter rest and has plenty of energy to put into new roots. Look for healthy, vigorous stems that aren’t flowering or just finished blooming. You can also often get away with propagating in early summer if you keep things consistently moist and out of harsh sun.
Supplies You’ll Need
Here’s what you’ll want to have on hand before you get started:
- Sharp pruning shears or scissors: Cleanliness is key!
- Rooting hormone (optional but recommended): This helps speed up root development.
- A well-draining potting mix: I recommend a blend of peat moss or coco coir, perlite, and a bit of fine bark – something that doesn’t hold too much water. You can also buy specialized succulent or cactus mix and amend it.
- Small pots or trays: Clean ones, of course!
- A spray bottle: For keeping things humid.
- A plastic bag or propagator lid: To create a mini-greenhouse effect.
Propagation Methods
Calceolaria polyrhiza is quite obliging and can be propagated in a couple of straightforward ways.
Stem Cuttings: My Go-To!
This is my favorite method because it’s reliable and gives you the most consistent results.
- Select healthy stems: Look for non-flowering shoots that are at least 4-6 inches long.
- Make your cut: Using your clean shears, take a cutting from a point just below a leaf node. A leaf node is where a leaf emerges from the stem; this is where roots will most likely form.
- Prepare the cutting: Gently remove the lower leaves, leaving just the top couple of leaves intact. This reduces water loss and prevents leaves from rotting in the soil.
- Apply rooting hormone (if using): Dip the cut end of the stem into your rooting hormone, tapping off any excess.
- Potting up: Fill your small pots with your prepared potting mix. Make a hole with your finger or a pencil and gently insert the cut end of the stem, ensuring the leaf nodes are buried.
- Water gently: Water the soil lightly, just enough to settle it around the cutting.
- Create humidity: Pop a plastic bag over the pot, securing it with a rubber band, or place the pots inside a propagator with a lid. This keeps the humidity high, which is crucial for preventing the cuttings from drying out before they form roots.
- Find a bright spot: Place the pots in a location with bright, indirect light. Avoid direct sun, which can scorch the delicate cuttings.
Division: For Established Plants
If you have a larger, established Calceolaria polyrhiza clump, you can divide it.
- Gently unpot the plant: Carefully remove the whole plant from its container.
- Inspect the root ball: Look for natural breaks where the plant has formed distinct sections.
- Carefully separate: Using your fingers or a clean trowel, gently pull or cut the root ball apart into smaller sections. Try to ensure each division has a good amount of roots and at least one healthy stem.
- Pot up divisions: Pot each new division into its own pot with fresh, well-draining soil.
- Water and place: Water gently and place in a bright spot out of direct sun, just like you would with cuttings.
The “Secret Sauce” (Pro Tips)
Here are a few tricks I’ve learned over the years that can make a big difference:
- Don’t let the leaves touch the water (if using water propagation): While some plants root beautifully in water, Calceolaria polyrhiza can be prone to rot if its leaves are submerged. If you do try water propagation, ensure only the stem is in the water. I personally prefer soil propagation for this one.
- Bottom heat is a game-changer: For really speedy root development, especially if your house is a bit cool, placing your pots on a heating mat designed for seedlings can be incredibly effective. It encourages root growth from below.
- Patience is truly a virtue: Sometimes, propagation takes longer than you expect. Resist the urge to constantly dig up your cuttings to check for roots! You’ll see new growth when they’re ready.
Aftercare & Troubleshooting
Once you see signs of new growth – tiny leaves emerging from the top – it’s a good indicator that roots are forming.
- Gradually acclimate: Once your cuttings are showing good growth, slowly begin to ventilate them by opening the plastic bag or propagator lid for increasing periods each day. This helps them adjust to normal room humidity.
- Watering: Water your new plants when the top inch of soil feels dry to the touch. Be careful not to overwater, as this is the most common cause of rot.
- Common Signs of Failure: The most frequent issue is rot, where the cutting turns mushy and brown. This is usually a result of too much moisture and not enough air circulation. If you see this, it’s best to discard the dead cutting and try again, ensuring your soil drains well and you’re not overwatering. Yellowing leaves on an otherwise healthy-looking cutting can sometimes indicate it’s struggling, but new growth is your best indicator of success.
A Little Encouragement
Watching a new plant sprout from a tiny cutting or division is one of gardening’s greatest joys. Don’t be discouraged if your first attempt isn’t perfect! Every gardener has had failures; it’s all part of the learning curve. Be patient, enjoy the process, and soon you’ll have a delightful collection of your very own Calceolaria polyrhiza. Happy growing!
Resource:
https://identify.plantnet.org/k-world-flora/species/Calceolaria%20polyrhiza%20Cav./data