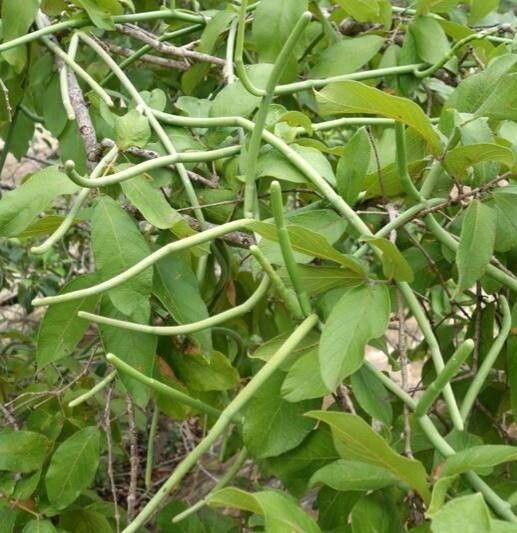
Oh, Combretum molle! It’s one of those plants that just radiates sunshine, isn’t it? With its gorgeous, often velvety leaves and those beautiful, brush-like flowers that attract all sorts of buzzing friends, it’s a real showstopper. I’ve spent many happy hours admiring them in gardens, and I’ll tell you, there’s a special kind of joy in nurturing a brand-new plant from a tiny cutting. It’s like having a little piece of your garden’s magic to share or plant elsewhere. Now, for beginners, Combretum molle can be a bit of a learning curve. It’s not the easiest to root, but with a little patience and the right approach, you can definitely achieve success.
The Best Time to Start
For the best chance of success with Combretum molle, you’ll want to work with semi-hardwood cuttings. These are stems that have started to mature and harden off a bit, but they’re not old and woody. The ideal time for this is usually in late spring or early summer, after the plant has finished its flush of new growth but is still actively growing. You’re looking for stems that are flexible enough to bend without snapping, but firm enough to hold their shape.
Supplies You’ll Need
Here’s what you’ll want to have on hand before you get started:
- Sharp pruning shears or a clean knife: For making clean cuts.
- Rooting hormone: A liquid or powder will work. This is pretty important for Combretum molle!
- A well-draining potting mix: I like a mix of peat moss or coco coir, perlite, and a little bit of compost.
- Small pots or trays: With drainage holes, of course.
- A plastic bag or propagation dome: To create a humid environment.
- Watering can or spray bottle: For gentle watering.
- Labels: To keep track of what you’ve planted.
Propagation Methods
We’ll focus on stem cuttings, which is the most straightforward method for Combretum molle.
- Taking the Cuttings: Select a healthy stem from your Combretum molle. Using your clean shears, take cuttings that are about 6-8 inches long. Make your cut just below a leaf node (the point where a leaf attaches to the stem).
- Prepare the Cuttings: Gently remove the lower leaves from each cutting, leaving just a few at the very top. This prevents leaves from rotting when they’re in the soil or water. If the remaining leaves are very large, you can even cut them in half to reduce water loss.
- Apply Rooting Hormone: Dip the cut end of each stem into your rooting hormone, tapping off any excess. This really gives your cuttings a boost in developing roots.
- Plant the Cuttings: Fill your pots with your well-draining potting mix. Make a small hole in the center of the mix with your finger or a pencil. Insert the prepared cutting into the hole, ensuring the nodes where you removed the leaves are below the soil surface. Gently firm the soil around the cutting.
- Water Gently: Water your cuttings thoroughly but gently, making sure the mix is moist but not waterlogged.
The “Secret Sauce” (Pro Tips)
Here are a few things I’ve learned over the years that can make a big difference:
- Bottom Heat is Your Friend: Combretum molle cuttings absolutely love a bit of warmth from below. A heat mat placed under your pots can significantly speed up root formation. It’s like giving them a cozy, warm bed to encourage root growth.
- Humidity is Key, but Not Drowning: Once your cuttings are in pots, cover them with a plastic bag or pop them under a propagation dome. This creates a humid microclimate that prevents the cuttings from drying out before they can root. The trick is to make sure absolutely no leaves are touching the sides of the bag or the dome. If they do, they can start to rot very quickly. You might need to prop up the bag with a stick or two.
- Don’t Be Afraid to Check Gently: After a few weeks, you can very gently tug on a cutting. If you feel resistance, it means roots are forming! Don’t pull them out entirely, just a little tug to see if there’s any “hold.”
Aftercare & Troubleshooting
Once you see signs of new leaf growth and feel that reassuring tug when you gently check, your Combretum molle is likely rooting! Keep the soil consistently moist but not soggy. Gradually acclimate your new plants to lower humidity by opening the plastic bag or dome for increasing periods over a week or two.
The most common problem you might face is rot. If your cuttings turn black and mushy, it’s usually a sign of too much moisture and not enough air circulation. Make sure your soil is draining well and that you’re not overwatering. If a cutting looks a bit sad and droopy, it might just be stressed from transplanting or not yet rooted. Patience is key here!
A Encouraging Closing
Growing new plants is such a rewarding journey. Don’t get discouraged if not every cutting takes. Gardening is all about experimentation and learning, and even the “failures” teach us something. Keep at it, enjoy the process of nurturing these little green babies, and soon you’ll have your very own Combretum molle family to admire! Happy growing!
Resource:
https://identify.plantnet.org/k-world-flora/species/Combretum%20molle%20R.Br.%20ex%20G.Don/data