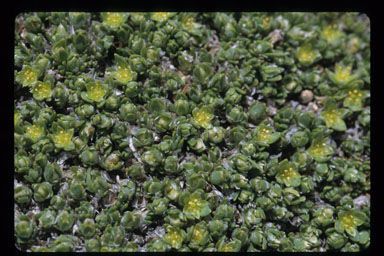
Ah, Paronychia pulvinata! If you’ve ever seen this delightful little plant carpeting a rock garden or spilling over a pot, you know its charm. It’s like a miniature, silvery-green cushion, covered in tiny, papery flowers that look like little white stars. It brings a delicate texture and a touch of softness to even the most rugged landscapes. And the best part? Sharing that beauty by propagating it yourself is wonderfully rewarding. For many gardeners, Paronychia pulvinata is surprisingly straightforward to propagate, which is great news for those just dipping their toes into the world of plant multiplication.
The Best Time to Start
When it comes to getting new Paronychia pulvinata plants going, spring is truly your golden ticket. As the plant wakes up from its winter slumber and starts putting on fresh, tender growth, it’s the perfect time to take cuttings. You can often have success with cuttings taken in early summer too, but spring growth is usually the most vigorous and eager to root. Wait until the plant is actively growing; you’ll see those little shoots stretching out.
Supplies You’ll Need
Gathering your supplies beforehand makes the whole process much smoother. Here’s what I always have on hand:
- Sharp pruning shears or a clean, sharp knife: For taking clean cuts.
- A good quality potting mix: A well-draining blend is crucial. I often use a mix of equal parts peat moss or coco coir and perlite or coarse sand. You can also find specialized succulent or cactus mixes that work wonderfully.
- Rooting hormone (optional but recommended): This little powder or gel can give your cuttings a significant boost.
- Small pots or seedling trays: Make sure they have drainage holes!
- A spray bottle: For gentle misting.
- Labels: So you don’t forget what you’ve planted where!
Propagation Methods
Paronychia pulvinata is a champion for stem cuttings. It’s simple, effective, and you can get quite a few new plants from a single parent.
Stem Cuttings
- Select your cuttings: Look for healthy, non-flowering shoots that are at least 2-3 inches long. Use your clean shears or knife to make a clean cut just below a leaf node (that’s where a leaf joins the stem).
- Prepare the cuttings: Gently remove the lower leaves from the bottom inch or so of the cutting. This prevents them from rotting once planted.
- Apply rooting hormone (if using): Dip the cut end of the stem into the rooting hormone, tapping off any excess.
- Plant the cuttings: Fill your small pots with your prepared potting mix. Make a small hole with your finger or a pencil and insert the cut end of the stem into the mix. Gently firm the soil around it. You can usually fit 3-5 cuttings per 3-4 inch pot, spaced about an inch apart.
- Water gently: Use your spray bottle to lightly water the soil. You want it moist, not soggy.
- Provide a humid environment: This is key! You can cover the pot loosely with a clear plastic bag or a plastic dome to create a mini-greenhouse effect. Make sure the leaves aren’t touching the plastic.
The “Secret Sauce” (Pro Tips)
Over the years, I’ve learned a few tricks that really help boost success rates.
- Bottom Heat is Your Friend: While not strictly essential, placing your pots on a gentle propagation mat can significantly speed up root development. Think “warm feet” for your cuttings. They love that little extra warmth from below.
- Don’t Overwater (Seriously!): This is probably the biggest killer of cuttings. The soil should feel barely moist to the touch. If you press your finger in and feel water, you’ve added too much. A light misting is often all that’s needed until roots form.
- Patience is a Virtue (and a Gardener’s Tool): Don’t be tempted to tug on your cuttings to see if they’ve rooted! Resist the urge. It can take anywhere from 3-6 weeks, sometimes longer, for new root growth to become established. You’ll see new leaves appearing as a sign of success.
Aftercare & Troubleshooting
Once you start to see signs of new growth – tiny leaves unfurling or the growth looking more vigorous – it’s a good sign that roots are forming.
- Gradual Acclimation: If you’ve covered your pots, slowly start to acclimate your new plants to drier air. Gradually lift the plastic cover for longer periods over a week or two.
- Continue Gentle Watering: Keep the soil consistently lightly moist. Avoid letting it completely dry out or become waterlogged.
- First Potting Up: When the cuttings seem well-rooted and are putting on solid growth, you can gently pot them up into individual, slightly larger pots.
Troubleshooting: The most common issue is rot. If your cuttings turn mushy, black, or simply wilt dramatically despite being kept moist, it’s likely due to overwatering or the mix being too heavy. Don’t despair! Just grab more cuttings and try again, remembering those tips about well-draining soil and moderation with water.
A Bit More Greenery
So there you have it! Propagating Paronychia pulvinata is a beautiful way to expand your collection and share this charming plant with friends. Be patient with the process, enjoy the little victories as you see those first signs of life, and soon you’ll have a whole cushion of these delightful plants to admire. Happy propagating!
Resource:
https://identify.plantnet.org/k-world-flora/species/Paronychia%20pulvinata%20A.Gray/data