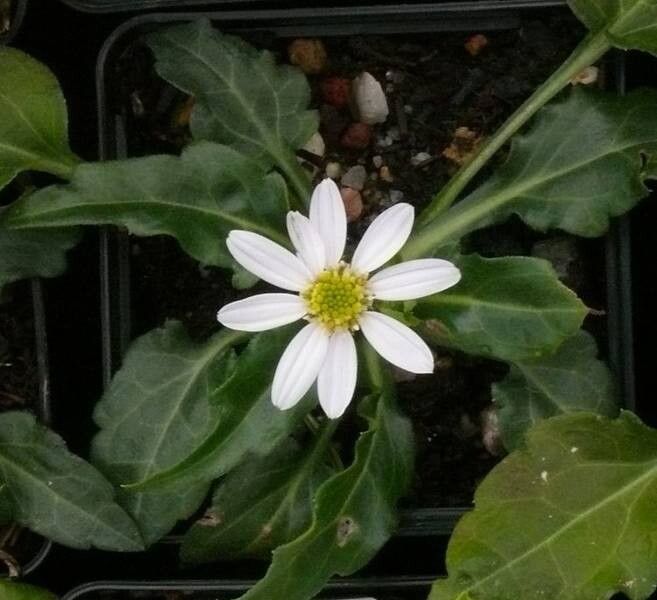
Oh, these little Aster savatieri! Aren’t they just the sweetest things? With their delicate, daisy-like blooms and their charming, often low-growing habit, they’re a joy to have gracing the garden. They bring such a lovely splash of color, especially when many other plants are starting to wane. And honestly, propagating them? It’s incredibly rewarding. Getting more of these beauties for free, and watching that tiny cutting transform into a thriving plant, there’s a special kind of magic in that. For newcomers to the world of plant propagation, I’d say Aster savatieri falls into the “moderately easy” category. You’ll need to pay a little attention, but it’s definitely within reach!
The Best Time to Start
For Aster savatieri, I find the absolute best time to start propagating is in the late spring or early summer. You want to aim for when the plant is actively growing, but not yet in full bloom. This is when cuttings have the most energy to put into developing roots. Think of it as catching them at their peak vitality. Early morning is also a fantastic time to take your cuttings – the plant is well-hydrated from the night, making the stems less likely to wilt immediately.
Supplies You’ll Need
Here’s what I like to have on hand before I get started:
- Sharp Pruning Shears or a Craft Knife: Clean cuts are crucial for healing and root development.
- Rooting Hormone (Optional but Recommended): A powder or liquid to give your cuttings a helpful boost.
- A Well-Draining Potting Mix: I usually use a 50/50 blend of seed-starting mix and perlite or coarse sand. This ensures good aeration and prevents waterlogging.
- Small Pots or Trays: Clean containers are essential. Old yogurt cups with drainage holes poked in the bottom work wonders!
- A Plastic Bag or Dome: To create a mini-greenhouse effect and maintain humidity.
- Water: For, well, watering!
Propagation Methods
Aster savatieri are quite amenable to a couple of different methods. My go-to for this particular aster is usually stem cuttings.
- Taking the Cuttings: Head out to your healthy, established Aster savatieri. Look for new growth that’s still a bit flexible but has started to firm up – we call these semi-hardwood cuttings. Aim for pieces that are about 4-6 inches long. Make your cut just below a leaf node (where the leaves attach to the stem). These nodes are where the magic happens, where roots are most likely to form.
- Preparing the Cuttings: Gently remove the lower leaves from the cutting, leaving just a few at the very top. This prevents them from rotting in the soil. If you’re using rooting hormone, dip the cut end into it, coating about an inch of the stem. Tap off any excess.
- Planting the Cuttings: Fill your small pots with the well-draining potting mix. Make a hole in the center with a pencil or your finger. Carefully insert the prepared cutting into the hole, making sure the leaf nodes are below the soil surface. Gently firm the soil around the stem.
- Creating Humidity: Water the soil lightly until it’s evenly moist but not soggy. Then, cover the pot loosely with a plastic bag or a clear dome. This traps moisture and keeps the humidity high, which is vital for cuttings. Place the pot in a bright spot, but out of direct, harsh sunlight. A south-facing window that gets bright, indirect light is perfect.
This is the method I find most reliable and generally results in the best success rate for Aster savatieri.
The “Secret Sauce” (Pro Tips)
Now, for a couple of little insider tricks that often make all the difference:
- Don’t Let Those Top Leaves Touch the Water: If you’re using a method where the cutting might accidentally touch water in a tray, or if your humidity dome is getting drippy, make sure the remaining leaves aren’t sitting in water. This is a fast track to rot.
- Bottom Heat Can Be Your Best Friend: If you happen to have a heat mat designed for seedlings, popping your pots on top can really speed up root development. It mimics the warmth of the soil in summer and gives those roots an extra encouragement to emerge. I’ve found it makes a noticeable difference, especially if the weather is a bit cooler.
Aftercare & Troubleshooting
Once you’ve got your cuttings planted, the patience game begins! Keep the soil consistently moist, but never waterlogged. You can check this by gently poking your finger into the soil. If it feels dry, it’s time for a drink. Mist the leaves occasionally if you notice them looking a bit thirsty, especially if you don’t have a humidity dome.
You’ll know your cuttings are rooting when you feel a gentle resistance if you try to pull on them lightly. I usually wait for this sign, and then another week or two, before I even think about transplanting them into a slightly larger pot.
What if things go wrong? The most common culprit is rot. If you see your cutting turning black and mushy, or if it just falls over dead, it’s likely too much moisture and not enough air circulation. Sometimes, it’s just a matter of bad luck, or the cutting wasn’t quite strong enough to begin with. Don’t get discouraged! Just toss the failed cutting and try again.
A Encouraging Closing
So there you have it! A little bit of patience, a few simple supplies, and a willingness to try – that’s all it takes to multiply your lovely Aster savatieri. Remember, not every cutting will make it, and that’s perfectly okay. Gardening is a journey, and each attempt teaches you something new. Enjoy the process, celebrate your successes, and before you know it, you’ll have a whole new collection of these delightful blooms to share and enjoy. Happy propagating!
Resource:
https://identify.plantnet.org/k-world-flora/species/Aster%20savatieri%20Makino/data