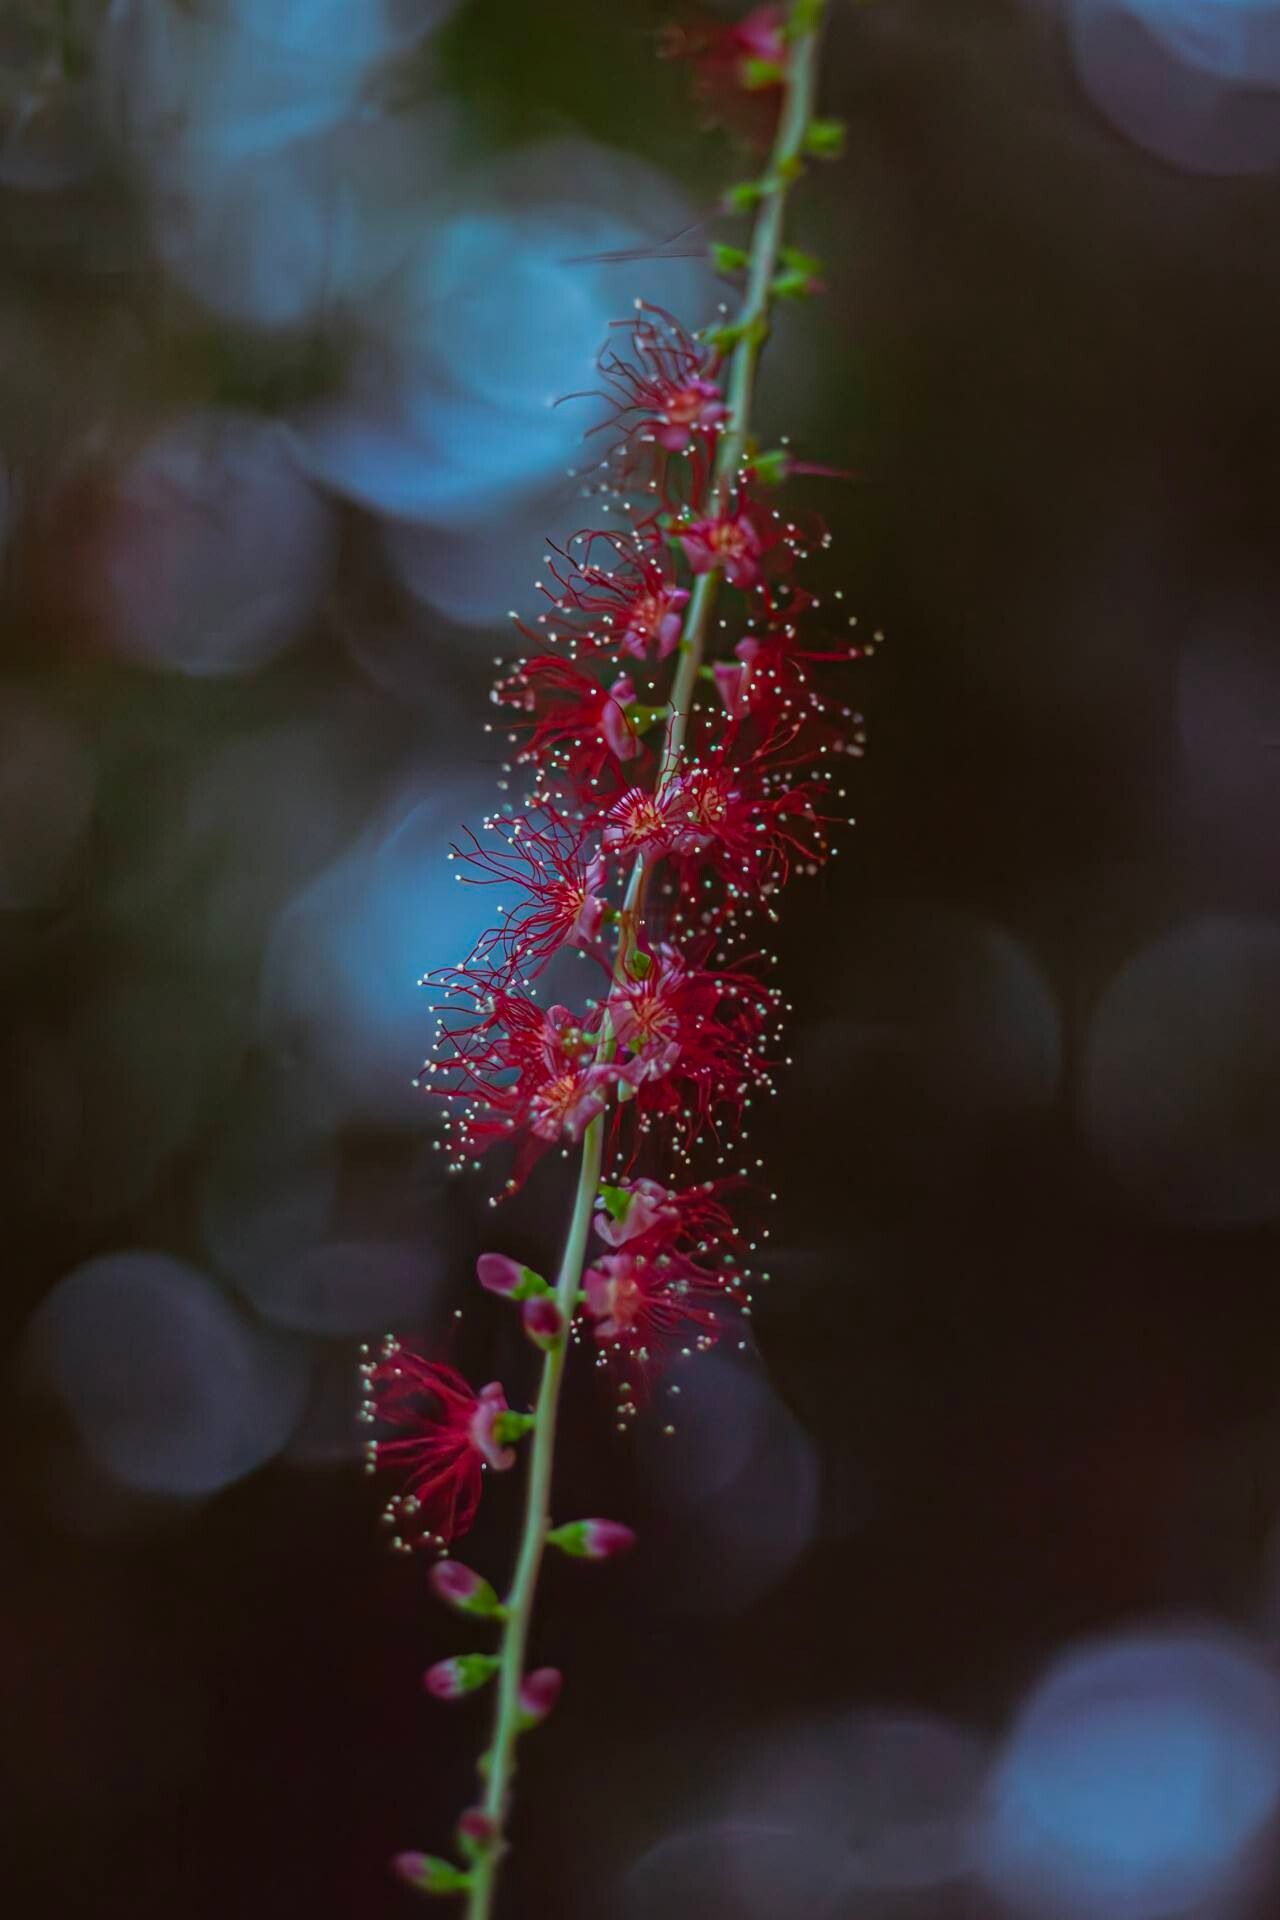
Oh, hello there, fellow plant lover! Grab a mug of your favorite brew, and let’s chat about a truly magnificent tree: Barringtonia acutangula. If you’ve ever been captivated by its cascading, vibrant pink or red blooms, you know what a showstopper it is. And the best part? You can bring that beauty into your own garden, or even share starts with friends, by propagating it yourself!
Now, is it a walk in the park for a complete novice? To be perfectly honest, Barringtonia acutangula can be a tad more demanding than a simple pothos. But with a little patience and the right approach, I promise, it’s absolutely achievable and incredibly rewarding. Don’t let that deter you; let it invigorate you to learn!
The Best Time to Start
For Barringtonia acutangula, the absolute sweet spot for propagation is during its active growing season. That usually means late spring or early summer, when the plant is bursting with energy and eager to put out new growth. You’ll want to select stems that are still somewhat soft and flexible, not hard and woody. Think of it like choosing a ripe fruit – you want that vibrant, youthful growth.
Supplies You’ll Need
Before we get our hands dirty, let’s gather our tools:
- Sharp pruning shears or a clean, sharp knife: For making clean cuts.
- Rooting hormone: This can really give your cuttings a boost. I personally favor a powdered form for stem cuttings.
- Well-draining potting mix: A blend of peat moss, perlite, and a bit of sand works wonderfully. You want something that won’t hold excess moisture.
- Small pots or propagation trays: With drainage holes, of course!
- Plastic bags or propagation dome: To create a humid environment.
- Labeling stakes: So you don’t forget what you planted!
- Watering can with a fine rose: For gentle watering.
- (Optional but recommended) Seed starting heat mat: For maintaining consistent bottom warmth.
Propagation Methods
Barringtonia acutangula is best propagated from stem cuttings. This is my go-to method for this beauty.
Here’s how I do it:
- Select Your Cuttings: Find healthy, vigorous stems that are about 6-12 inches long. They should be current season’s growth – slightly soft but not flimsy.
- Make the Cut: Using your clean shears or knife, make a clean cut just below a leaf node. This is where new roots are most likely to form. Remove any flowers or developing seed pods from the cutting.
- Prepare the Cutting: Gently strip off the lower leaves, leaving just a few at the very top to help with photosynthesis. This prevents leaves from rotting in the propagation medium.
- Apply Rooting Hormone: Dip the cut end of the stem into your rooting hormone, tapping off any excess. This step is crucial for improving your chances of success.
- Potting Up: Fill your small pots or trays with your prepared, well-draining potting mix. Moisten the mix thoroughly but allow excess water to drain away.
- Insert the Cutting: Make a small hole in the soil with your finger or a pencil, and carefully insert the cutting. Firm the soil gently around it.
- Create Humidity: Now, we want to create a mini-greenhouse effect. Cover the pot loosely with a clear plastic bag, making sure the leaves don’t touch the plastic. A propagation dome works even better. Place the pots in a location that receives bright, indirect light.
The “Secret Sauce” (Pro Tips)
Alright, some little secrets from the greenhouse that might just make all the difference:
- Don’t Overwater! This is probably the biggest mistake I see beginners make. The soil should be consistently moist, not soggy. If you can squeeze water out of it, it’s too wet. A little bit of wilting is sometimes okay, but constant saturation leads to rot.
- Bottom Heat is Your Friend: Barringtonia acutangula really benefits from warmth at the roots. Using a seedling heat mat set to around 70-75°F (21-24°C) can significantly speed up root development and increase your success rate.
- Patience and Observation: These cuttings take their sweet time! Don’t be discouraged if you don’t see signs of rooting for several weeks. Check gently for resistance by giving a soft tug. If you feel resistance, that’s a good sign roots are forming.
Aftercare & Troubleshooting
Once you see that magical green growth emerging or feel that solid resistance when gently tugging, your cutting has rooted! Congratulations!
- Gradual Acclimation: Slowly start to reduce the humidity by opening the plastic bag a little more each day over a week. This helps the new plant adjust to your home environment.
- Careful Watering: Continue to water consistently but avoid waterlogging. Allow the top half-inch of soil to dry out between waterings.
- Light: Continue to provide bright, indirect light. As the plant gets stronger, you can gradually introduce it to more sunlight.
- Troubleshooting: The most common enemy here is rot. If you see your cutting turning black and mushy, it’s likely due to overwatering and poor drainage. If this happens, there’s not much that can be done, so learn from it and try again with fresh cuttings and adjusted watering. Another issue is a cutting simply not rooting. This can happen due to poor timing, lack of heat, or using an unsuitable stem; don’t take it personally, it’s part of the learning curve!
A Little Patience Goes a Long Way
Propagating Barringtonia acutangula is a journey, not a race. Be patient with your little cuttings, offer them consistent care, and celebrate every tiny success. Soon enough, you’ll have a beautiful new tree to cherish. Happy propagating!
Resource:
https://identify.plantnet.org/k-world-flora/species/Barringtonia%20acutangula%20(L.)%20Gaertn./data