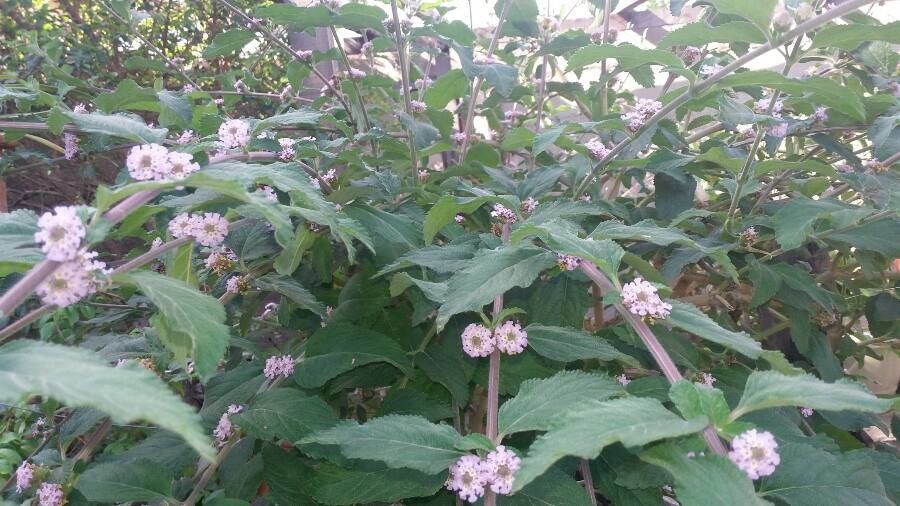
Oh, hello there! I’m so glad you stopped by. Today, we’re going to chat about a plant that brings such a lovely, fresh scent and a touch of grace to any garden: Melissa axillaris, or Western or California Balm. If you’ve ever admired its delicate, often subtly fragrant leaves and its charming, woodland feel, you’re in for a treat. Propagating this beauty is a wonderful way to share its charm with friends, fill in gaps in your own landscape, or just experience the sheer joy of growing something from a tiny start.
For beginners, I’d say Melissa axillaris sits comfortably in the “moderately easy” category. It’s not a finicky diva by any means, but a little attention to detail goes a long way towards success. It’s a truly rewarding plant to work with!
The Best Time to Start
My go-to time for propagating Melissa axillaris is definitely late spring to early summer. By this point, the plant is actively growing, and the new shoots are vigorous and full of life. This vigorous growth means they’ll have the energy to put into developing roots. You can also have some success with cuttings taken in late summer, but I find the spring ones take off a little faster and stronger.
Supplies You’ll Need
Before we dive in, let’s make sure you have your toolkit ready. Here’s what I usually gather:
- Clean trimming shears or a sharp knife: For making nice, clean cuts.
- Small pots or trays: With good drainage holes, of course!
- A well-draining potting mix: I love a blend of equal parts peat moss or coir, perlite, and a good quality seed-starting mix. This combination is light and airy.
- Rooting hormone (optional but helpful): A powder or liquid type works well.
- A mister or spray bottle: For keeping things humid.
- A plastic bag or clear plastic dome: To create a mini-greenhouse effect.
- Labels: So you don’t forget what you’ve planted!
Propagation Methods
Melissa axillaris is wonderfully amenable to a couple of propagation methods, but I find stem cuttings to be the most reliable and rewarding.
Stem Cuttings
- Select your stems: Look for healthy, non-flowering stems that are about 4-6 inches long. You want stems that have started to firm up a bit but are still somewhat flexible – not too woody, and not too soft and floppy.
- Make the cut: Using your clean shears, make a clean cut just below a leaf node. A leaf node is where a leaf attaches to the stem; this is where roots tend to emerge.
- Prepare the cutting: Gently remove the lower leaves from the stem, leaving just a few leaves at the top. This prevents the submerged leaves from rotting. If you’re using rooting hormone, dip the cut end into the hormone powder or liquid according to the product’s instructions.
- Plant your cuttings: Fill your pots or trays with your prepared potting mix. Make a small hole in the mix with your finger or a pencil. Insert the cutting into the hole, ensuring the leaf nodes are buried in the soil. Gently firm the soil around the stem.
- Water and cover: Water the cuttings lightly. Then, cover the pot or tray with a plastic bag or a clear dome. This creates a humid environment that helps the cuttings from drying out while they root.
- Placement: Place the pots in a bright location, but out of direct, harsh sunlight. A windowsill that gets bright, indirect light is perfect.
Division (A Simpler Approach)
If you have a mature clump of Melissa axillaris, division is a fantastic, straightforward option.
- Dig it up: In spring, before it gets too hot, carefully dig up the entire plant.
- Separate the roots: Gently pull the root ball apart. You can often do this with your hands, but sometimes a clean trowel or spade is needed to help divide larger clumps. Make sure each section has both roots and some healthy shoots.
- Replant: Immediately replant the divisions into their new homes, either back in the garden or in pots. Water them in well.
The “Secret Sauce” (Pro Tips)
Here are a few little tricks I’ve learned over the years that really boost my success rate:
- Don’t let the leaves touch the water: If you happen to be doing water propagation (which I sometimes do for a quick check on root development), make absolutely sure that no leaves are submerged in the water. They need to be above the waterline to prevent rot.
- Bottom heat is your friend: If you have access to a heated propagation mat, using it under your pots can significantly speed up root formation. It mimics the warmth of spring soil and really encourages those roots to wake up and grow.
- Patience with the misting: Keep the soil consistently moist but not soggy. I like to mist my cuttings daily, or at least every other day, especially if the environment is dry. The key is to see humidity building up inside the plastic cover.
Aftercare & Troubleshooting
Once you see new growth emerging from your cuttings, that’s usually a good sign that roots are forming! You can gently tug on a cutting – if there’s resistance, you’ve got roots!
- Acclimatize slowly: Once roots are established (this can take anywhere from 3-6 weeks), gradually introduce your new plants to normal air. First, open the plastic bag or dome for a few hours each day, then remove it entirely. This prevents a shock to the system.
- Watering: Water your newly rooted plants when the top inch of soil feels dry.
- Potting up: Once they have a decent root system and are looking vigorous, you can pot them into slightly larger containers or transplant them into the garden.
The most common sign of trouble is rot. If your cuttings become mushy, black, or fall over limp, they’ve likely succumbed to rot. This is usually due to too much moisture coupled with poor air circulation. Just toss the affected cuttings, clean your pots, and try again, paying close attention to drainage and humidity levels.
A Encouraging Closing
Propagating Melissa axillaris is a beautiful journey. Don’t be discouraged if your first few attempts aren’t perfect; gardening is all about learning and trying. Enjoy the process, celebrate each tiny success, and soon you’ll have an abundance of this lovely plant to enjoy and share. Happy growing!
Resource:
https://identify.plantnet.org/k-world-flora/species/Melissa%20axillaris%20(Benth.)%20Bakh.f./data