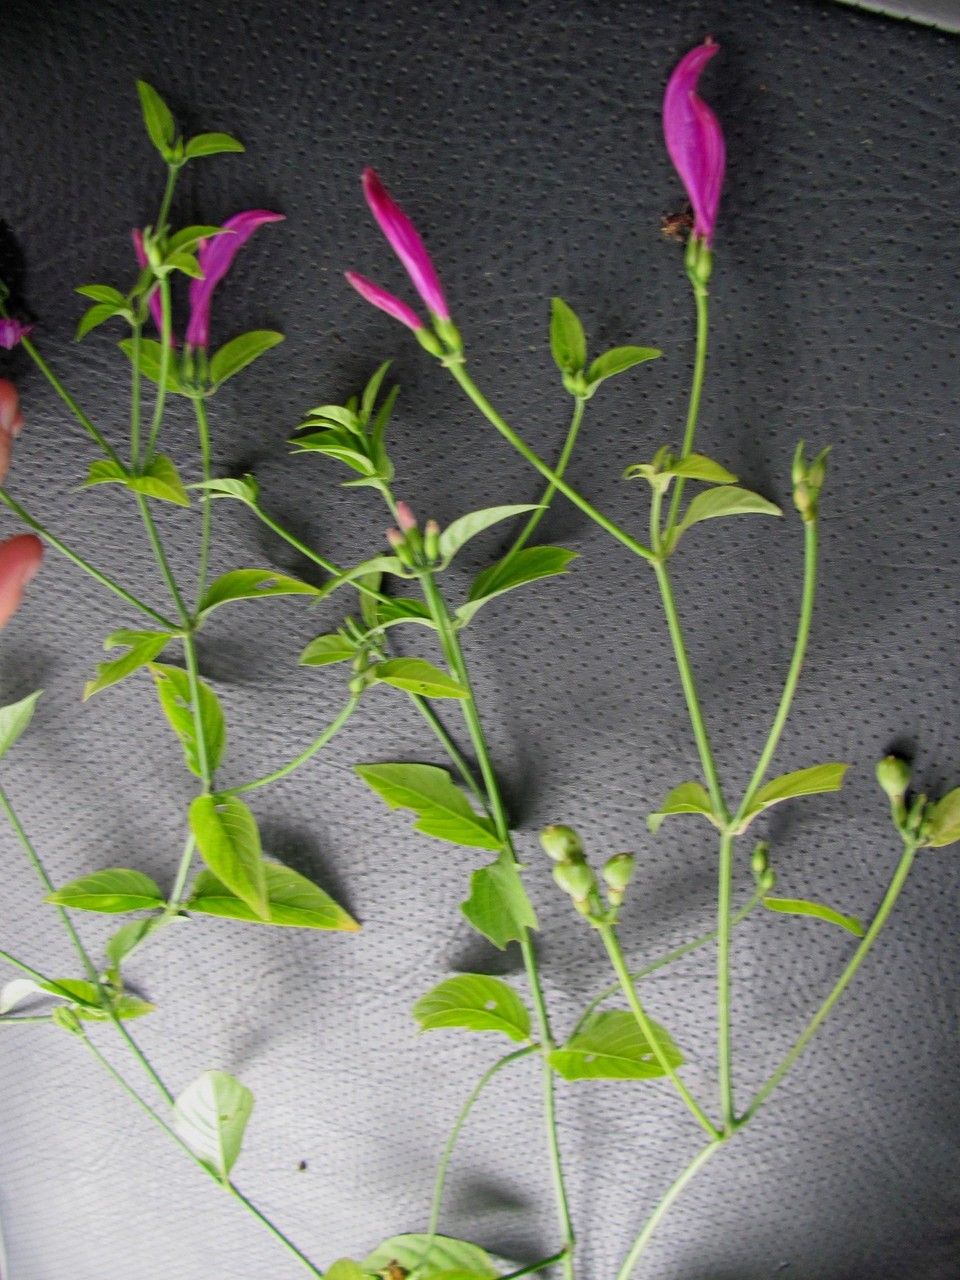
Hello fellow plant lovers! Today, we’re going to dive into the delightful world of propagating Dicliptera trifurca. If you’re drawn to its charming, often vibrantly colored foliage and delicate blooms, you’re in for a treat. There’s something incredibly satisfying about taking a piece of a beloved plant and coaxing it into a brand new life. And the good news? For Dicliptera trifurca, propagation is generally quite straightforward, making it a rewarding project even for those new to the plant parent journey.
The Best Time to Start
When it comes to getting those enthusiastic roots going, spring and early summer are your best friends. This is when the plant is in its most vigorous growth phase, and cuttings taken now have the best chance of establishing themselves quickly. Look for healthy, non-flowering growth on your established plant.
Supplies You’ll Need
Gathering your tools beforehand makes the whole process smoother. Here’s what I usually grab:
- Sharp pruning shears or a clean knife: For making clean cuts.
- Potting mix: A well-draining blend is key. I often use a mix of equal parts perlite and peat moss, or a good quality seed starting mix.
- Small pots or propagation trays: Clean and with drainage holes.
- Rooting hormone (optional but recommended): A powder or gel can give your cuttings a helpful boost.
- Watering can: With a fine rose for gentle watering.
- Plastic bag or propagator lid: To create a humid environment.
Propagation Methods
Dicliptera trifurca is wonderfully adaptable, and stem cuttings are my go-to method.
Stem Cuttings:
- Take your cuttings: Using your sharp shears, select a healthy stem and cut it just below a leaf node (where a leaf attaches to the stem). Aim for cuttings that are about 3-4 inches long.
- Prepare the cutting: Gently remove the lower leaves, leaving just a couple of sets at the top. This helps prevent them from rotting once planted.
- Apply rooting hormone (optional): Dip the cut end of the stem into your rooting hormone powder or gel. Tap off any excess.
- Plant your cutting: Fill your small pots with your prepared potting mix. Make a small hole with your finger or a pencil, and gently insert the cutting, ensuring the leaf nodes you trimmed are below the soil surface. Firm the soil gently around the base.
- Water gently: Water the soil thoroughly but gently. You don’t want to wash the cutting away.
- Create a humid environment: Place the pot inside a clear plastic bag or cover it with a propagator lid. This traps moisture, creating the high humidity that cuttings love. Ensure the leaves don’t touch the plastic.
Water Propagation (for the impatient among us!):
While I prefer soil propagation for long-term success, you can start Dicliptera trifurca in water.
- Prepare the cutting: Follow steps 1 and 2 above for taking and preparing cuttings.
- Place in water: Put the cuttings in a clean jar or glass filled with fresh water.
- Ensure leaf clearance: Crucially, make sure no leaves are submerged in the water. They will rot quickly.
- Change water regularly: Replace the water every few days to keep it fresh and oxygenated.
- Wait for roots: You should start to see tiny white roots forming within a few weeks. Once the roots are about an inch long, it’s time to carefully pot them into soil.
The “Secret Sauce” (Pro Tips)
- Bottom Heat is Your Friend: If you have a heat mat, placing your pots on it can significantly speed up root development. It mimics the warmth of spring soil and gives those roots a real nudge.
- Don’t Be Afraid to Pinch: Once your cutting has rooted and started to show new growth, pinch off the very tip of the stem. This encourages the plant to branch out, resulting in a bushier, more attractive specimen.
- Sterilize Everything: This is such a simple step but it’s a game-changer for preventing disease. Always use clean pots, clean tools, and even clean your hands before you begin.
Aftercare & Troubleshooting
Once you see new leaf growth emerging from your cuttings, that’s a good sign roots are forming!
- Acclimate slowly: Gradually remove the plastic bag or propagator lid over a few days to let the new plant adjust to normal humidity.
- Watering: Keep the soil consistently moist but not soggy. Water when the top inch of soil feels dry.
- Light: Place your new plants in bright, indirect light. Direct sun can scorch tender new growth.
The most common issue you might encounter is rot. This usually happens because the soil is too wet, there’s not enough air circulation, or (in water propagation) leaves are sitting in water. If your cutting looks mushy or discolored, sadly, it might be best to discard it and try again, focusing on ensuring good drainage and air flow.
A Little Patience Goes a Long Way
Propagating plants is a beautiful dance between nature and our care. There might be a few disappointments along the way, but each attempt teaches you something new. Celebrate the successes, learn from the setbacks, and most importantly, enjoy the wonderful process of bringing more green life into your home. Happy propagating!
Resource:
https://identify.plantnet.org/k-world-flora/species/Dicliptera%20trifurca%20Oerst./data