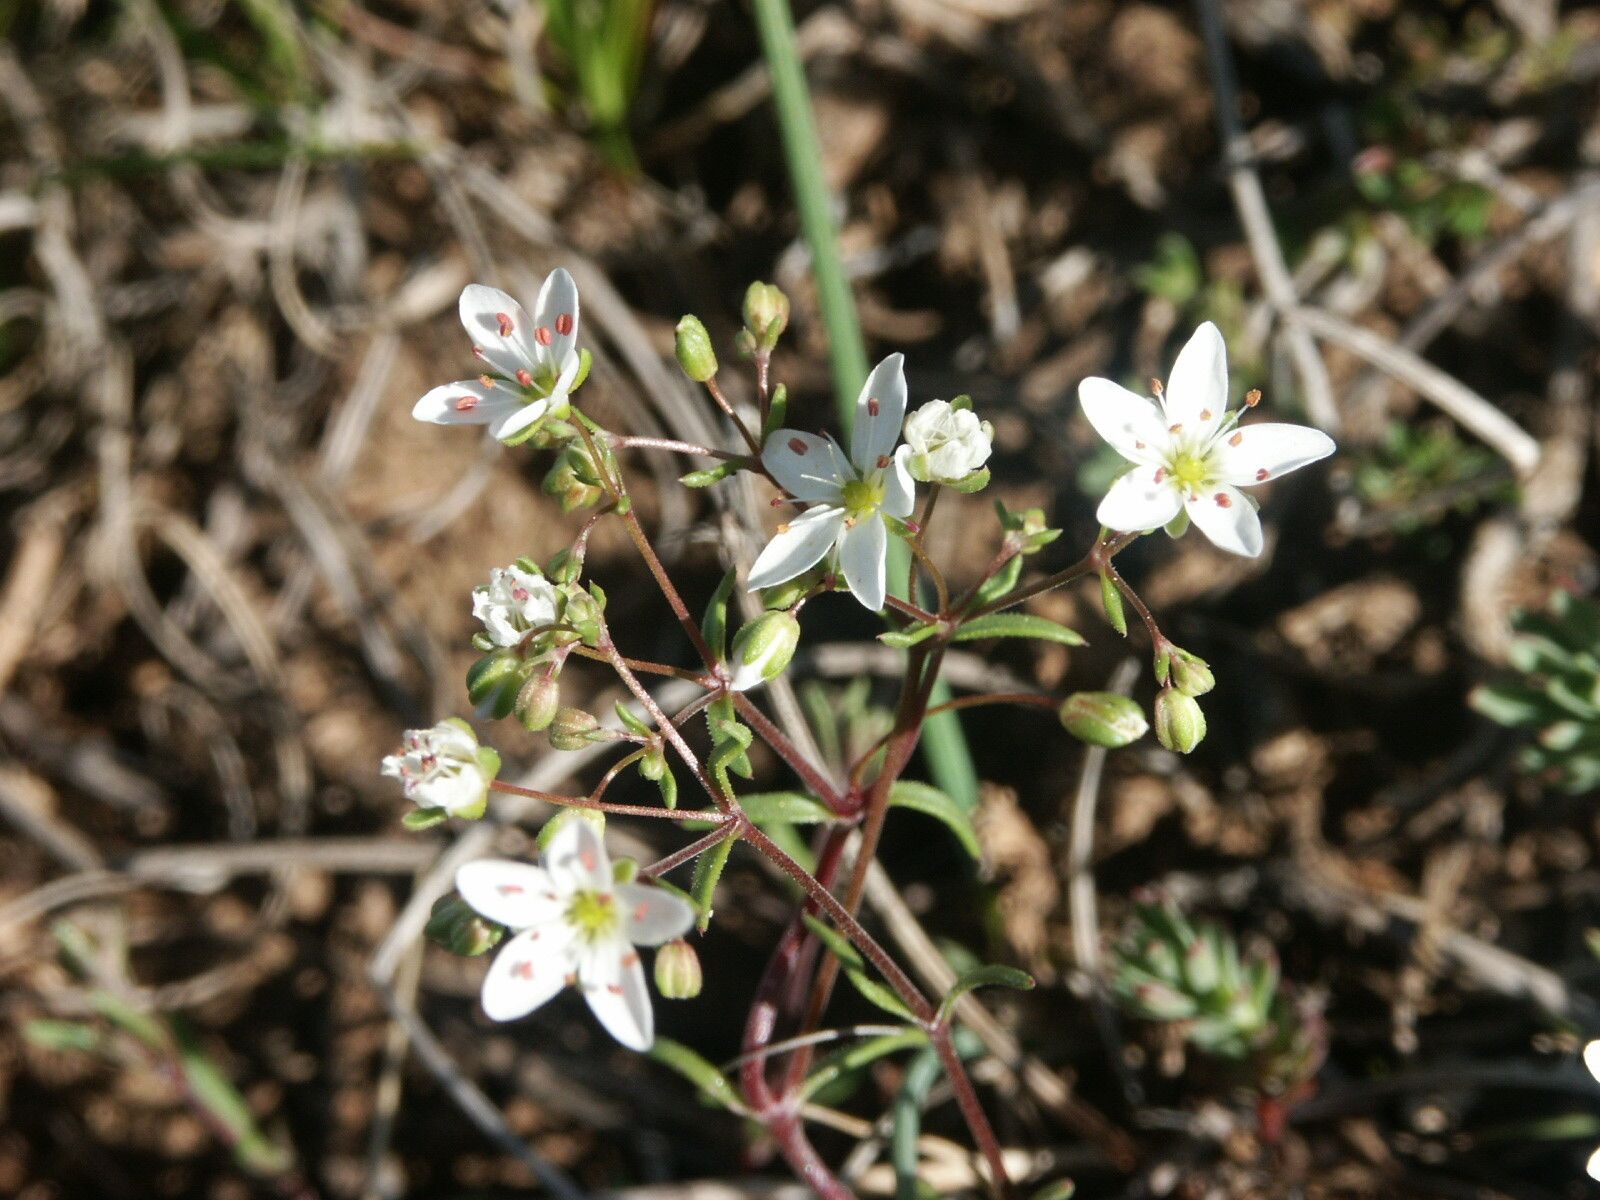
Well hello there, fellow plant lover! It’s so nice to have you join me today. We’re going to dive into the world of one of my favorite little groundcovers: Arenaria obtusiflora. If you’ve ever admired that dense, mat-forming carpet of tiny, star-like white flowers, you know exactly what I’m talking about. It brings such charm to rock gardens, pathways, or even spilling over the edges of pots. And the best part? It’s surprisingly straightforward to multiply!
For beginners, propagating Arenaria obtusiflora is a very approachable project. It’s one of those plants that really rewards your efforts, giving you more of that delightful visual texture and bloom power to share with friends or to fill in gaps in your own garden.
The Best Time to Start
When it comes to getting the most bang for your buck with new Arenaria babies, I’ve found that late spring to early summer is your sweet spot. This is when the plant is in a vigorous growth phase, actively producing new shoots that are perfect for taking cuttings. Waiting until the hottest part of summer can sometimes stress the young cuttings, so aim for those milder, longer days.
Supplies You’ll Need
Before we get our hands dirty, let’s gather our tools. You won’t need a whole lot for this, which is part of the joy!
- Sharp pruning shears or a clean, sharp knife: For making clean cuts on your cuttings.
- Rooting hormone (optional but recommended): Helps to speed up and improve root development. I like the powdered kind.
- Small pots or seed trays: Two to four-inch pots are usually perfect. Make sure they have drainage holes!
- Well-draining potting mix: A seed starting mix or a blend of peat moss and perlite (about a 50/50 ratio) works wonderfully. You want something that won’t hold too much moisture.
- Watering can or spray bottle: For gentle watering.
- Clear plastic bag or propagator lid: To create a humid environment for your cuttings.
- Labeling stakes: So you don’t forget what you’ve planted where!
Propagation Methods
Arenaria obtusiflora is a champion propagator, and the easiest way to increase your stock is through stem cuttings. It’s tried and true!
- Take Your Cuttings: Head out to your healthy Arenaria plant. Look for plump, non-flowering stems that are about 3-4 inches long. Using your clean shears, make a cut just below a leaf node (where a leaf attaches to the stem). These nodes are where new roots are most likely to form.
- Prepare the Cuttings: Gently remove the lower leaves from the bottom inch or so of each cutting. This prevents them from rotting in the soil.
- Apply Rooting Hormone (Optional): If you’re using rooting hormone, dip the cut end of each stem into the powder, tapping off any excess.
- Plant Your Cuttings: Fill your small pots with your chosen potting mix. Make a small hole in the center of the soil with your finger or a pencil. Insert the cut end of the Arenaria cutting into the hole, ensuring the previous leaf nodes are below the soil surface. Gently firm the soil around the stem. You can place 3-4 cuttings per pot if you have limited space.
- Water Gently: Water the soil thoroughly but gently. You want it to be moist, not waterlogged. A spray bottle is excellent for this initial watering to avoid disturbing the cuttings.
- Create Humidity: Place the pots inside a clear plastic bag, sealing it loosely, or cover them with a propagator lid. This traps moisture and creates a mini-greenhouse effect, which is crucial for successful rooting.
- Provide Bright, Indirect Light: Place your pots in a spot that receives bright, indirect sunlight. Avoid direct sun, as it can scorch the delicate cuttings.
The “Secret Sauce” (Pro Tips)
Here are a couple of little tricks I’ve picked up over the years that can really boost your success rate:
- Don’t Overcrowd Your Cuttings: While it’s tempting to cram as many cuttings as possible into a pot, give them a little breathing room. This improves air circulation and reduces the risk of fungal diseases, which are the enemy of tender young plants. If you do group them, ensure the leaves aren’t touching each other if possible.
- A Little Warmth Goes a Long Way: While not strictly essential, placing your cuttings on a propagator mat or a warm windowsill can significantly speed up the rooting process. This gentle bottom heat mimics spring conditions and encourages root development from below.
Aftercare & Troubleshooting
Once your cuttings have rooted – and you’ll know this when you see new growth appearing or feel gentle resistance when you tug on a cutting – it’s time for them to start their independent lives.
- Gradual Acclimatization: Slowly start to acclimatize your new plants to normal room humidity by opening the plastic bag or propagator lid for increasing periods over a week.
- Watering: Water them when the top inch of soil feels dry. Always aim for even moisture, never let them dry out completely or sit in soggy soil.
- Transplanting: Once they have a decent root system and are showing good top growth, you can transplant them into individual pots with a standard potting mix.
- Common Pitfalls: The most common issue you might encounter is rot. If your cuttings turn mushy and black at the base, it’s usually a sign of too much moisture and poor air circulation. Unfortunately, these are usually a lost cause. If you see wilting that isn’t due to dryness, check for rot or other pests. Good drainage is your best defense!
A Encouraging Closing
Watching those tiny roots develop and new growth emerge is one of the most satisfying parts of gardening. Be patient with your Arenaria cuttings! Not every single one will take, and that’s perfectly okay. Just keep trying, learn from each batch, and soon you’ll have an abundance of this charming plant to enjoy. Happy propagating!
Resource:
https://identify.plantnet.org/k-world-flora/species/Arenaria%20obtusiflora%20Kunze/data