Oh, hello there! Come on in and grab a mug. Let’s chat about one of my all-time favorites: Microgramma tecta. You know, that gorgeous fern with the delicate, almost ethereal fronds? If you’ve ever admired one of these beauties and thought, “I wish I had more!” then you’re in the right place. Propagating them is a truly rewarding journey, and while they might seem a little fussy at first glance, I promise, it’s more achievable than you think.
The Joy of More Microgrammas
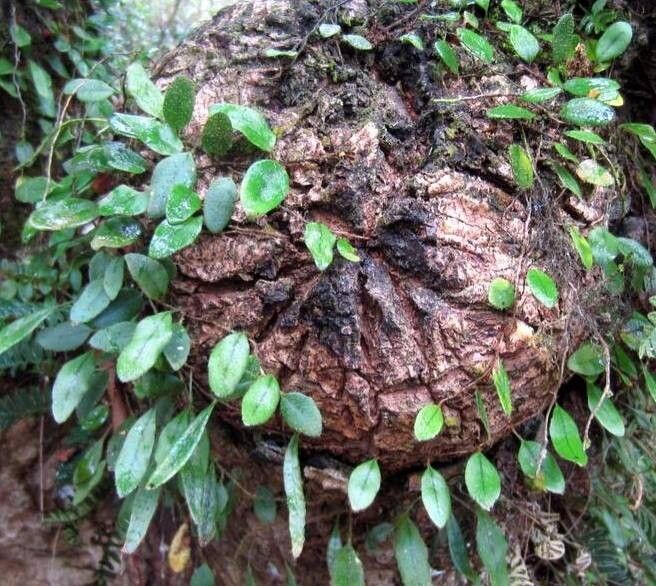
Honestly, the appeal of Microgramma tecta is its understated elegance. Its creeping rhizomes and lacy fronds bring such a unique texture to any plant collection, especially when draped over a pot or allowed to cascade. And the joy of creating new life from an existing plant? There’s nothing quite like it. For beginners, I’d say it’s slightly more of a patient endeavor than shoving a stick in some dirt, but with a little care, you’ll be a pro in no time.
When to Get Your Hands Dirty
The absolute best time to embark on this propagation adventure is during the active growing season. Think late spring through summer. This is when the plant is full of vigor, pushing out new growth, and has all the energy it needs to develop new roots. Trying to propagate during the plant’s rest period is like asking someone to run a marathon after a long winter – they’re just not feeling it!
Your Propagation Toolkit
Here’s what you’ll want to have on hand. Don’t worry, it’s not anything too exotic!
- Sharp, clean pruning shears or a razor blade: Sterilize them with rubbing alcohol each time you use them to prevent disease.
- Well-draining potting mix: I like a blend of equal parts peat moss, perlite, and a bit of horticultural charcoal. This gives good aeration and moisture retention. Some folks also swear by a sphagnum moss base.
- Small pots or propagation trays: Whatever you have that can hold your cuttings and soil.
- Plastic bags or a propagation dome: This is our little greenhouse to keep humidity high.
- Rooting hormone (optional but helpful): A powder or gel can give your cuttings an extra boost of confidence.
- Spray bottle: For misting.
- Water: Of course! Clean, room-temperature water.
Bringing New Ferns to Life
Microgramma tecta is best propagated through stem cuttings, specifically from its rhizomes. It’s a bit like propagating a rhizomatous begonia, but with these lovely ferns.
- Find Your Cutting Material: Look for a healthy, actively growing stem that has at least two or three nodes (those little bumps on the rhizome where leaves emerge). The rhizome should be firm and green, not dried out or mushy.
- Make the Cut: Using your sterilized shears or blade, carefully cut the rhizome section. Try to make a clean cut. If the cutting has a few small fronds, that’s great. If it’s just a bare rhizome with a few nubs, that’s also fine!
- Prepare the Cutting: If your cutting has any large fronds, you can trim them down to reduce water loss. You don’t want all that energy going to leaves when we need it for roots. Sometimes, I’ll even cut large fronds in half lengthwise.
- Dip in Rooting Hormone (If Using): Lightly dip the cut end of the rhizome into rooting hormone to encourage quicker root development. Tap off any excess.
- Plant It Up: Fill your small pot or propagation tray with your prepared potting mix. Make a little divot in the center and gently lay the rhizome cutting on top of the soil, or lightly press it just so it makes contact. The goal isn’t to bury it deep, but to have it sitting on or just barely covered by the substrate.
- Create a Humid Environment: Water the soil lightly until it’s evenly moist but not soggy. Then, cover the pot with a plastic bag, securing it with a rubber band, or place it under a propagation dome. This is crucial for maintaining the high humidity these ferns crave.
Our Little Green Secrets
Now, for a couple of insider tricks that make all the difference:
- My absolute favorite trick is to use bottom heat. A gently warming seedling mat placed underneath your propagation tray can significantly speed up root formation. It mimics the warmth of the soil surface that the rhizomes are used to. The warmth encourages cell activity without drying out your substrate too quickly.
- When you’re using the plastic bag method, make sure that the plastic doesn’t constantly touch the active growth (the fronds!). If the leaves are pressed against a damp bag, they can quickly develop fungal issues. A few small twigs or even popsicle sticks inserted into the pot can help prop the bag up and keep it away from the foliage.
Nurturing Your New Growth
Once you see new fronds unfurling or feel a gentle tug when you lightly pull on the rhizome (a sign of roots!), it’s time to introduce your new baby to the world.
- Gradually Acclimate: For the first week or so, slowly increase ventilation. Poke a few holes in the plastic bag or lift the dome for a few hours each day. This helps your new plant adjust to normal room humidity.
- Continue Consistent Moisture: Keep the soil consistently moist but never soggy. Overwatering is the fastest way to kill a new cutting.
- Bright, Indirect Light: Place your new plant in a spot with bright, indirect light. No direct sun, ever!
- Watch for Rot: The biggest sign of trouble is mushy, black rot on the rhizome or stem cutting. If you see this, it’s usually a goner. This often happens from too much moisture and not enough air circulation. Yellowing leaves can also indicate too much or too little water, or insufficient light. Don’t panic if a leaf or two isn’t perfect; focus on the unfurling new growth.
Happy Fern Growing!
So there you have it! Propagating Microgramma tecta is a thoughtful process, one that requires a bit of patience but is incredibly rewarding. Don’t be discouraged if your first attempt isn’t a roaring success. Every gardener has their learning curve, and that’s part of the fun. Just keep experimenting, observe your plants, and enjoy the magical journey of coaxing new life from your existing green friends. Happy propagating!
Resource:
https://identify.plantnet.org/k-world-flora/species/Microgramma%20tecta%20(Kaulf.)%20Alston/data