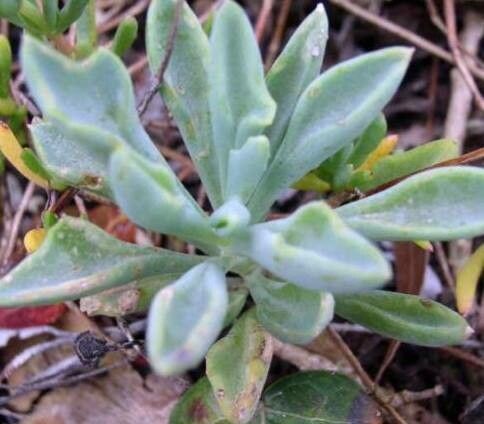
Hey there, fellow plant lovers! Let’s chat about a really delightful succulent that’s been bringing a smile to my face for years: Kleinia kleinioides. You know the ones – those plump, jellybean-like leaves that cascade so gracefully? They’re just bursting with charm and add such a unique texture to any space.
Propagating these beauties is incredibly rewarding. It’s like magic, watching a tiny snippet transform into a whole new plant! And the best part? If you’re new to the plant world, you’re in luck. Kleinia kleinioides is quite forgiving, making it a wonderful plant to start your propagation journey with.
The Best Time to Start
When it comes to getting new Kleinia plants going, spring is your best friend. This is when the plant is actively growing and has the most energy to put into rooting. You can really see them take off! While you might have some success at other times, spring just seems to give them that extra boost.
Supplies You’ll Need
Gathering your supplies before you begin makes the whole process smoother. Here’s what I usually have on hand:
- Sharp pruners or a clean knife: For making nice, clean cuts.
- A well-draining potting mix: I like a mix specifically for succulents, or I’ll create my own by combining equal parts potting soil, perlite, and coarse sand.
- Small pots or containers: Terracotta pots are great because they breathe.
- Rooting hormone (optional but helpful): A little dip can encourage faster root development.
- A spray bottle: For gentle watering.
- Labels and a pen: To keep track of your new babies!
Propagation Methods
Thankfully, Kleinia kleinioides is super easy to propagate from stem cuttings. It’s my go-to method, and I bet it will be yours too!
- Take Your Cuttings: Select a healthy, established Kleinia. Using your clean pruners or knife, make a cut just below a leaf nodule (where the leaf attaches to the stem). You want cuttings that are at least 3-4 inches long. Remove the lower leaves gently, leaving a few at the top.
- Let Them Callus: This is a super important step! Lay your cuttings on a dry surface in a bright spot, but out of direct sun, for 3-5 days. This allows the cut end to dry and form a callus. This prevents rot when you plant them. It might look a little odd, but trust me, it’s crucial!
- Plant Your Cuttings: Once callused, you can dip the cut end in rooting hormone if you’re using it. Then, gently insert the callused end into your prepared potting mix. Don’t bury them too deep, just enough so they stand upright.
- Water Sparingly: It’s easy to overwater at this stage. I usually wait a day or two after planting before giving them their first light watering. Use your spray bottle to moisten the soil surface.
The “Secret Sauce” (Pro Tips)
Here are a couple of little tricks I’ve picked up over the years that really make a difference:
- Don’t let the leaves touch the soil for too long: Especially when first planted, try to position the cutting so the existing leaves aren’t resting directly on the damp soil. This can encourage rot. Sometimes just tilting the pot slightly for the first week helps.
- Bottom heat works wonders: If you can provide a little gentle warmth from below (like a seedling heat mat set on low), it can significantly speed up root formation. It mimics that lovely spring soil temperature.
Aftercare & Troubleshooting
Once your cuttings are happily planted, keep them in a bright spot with indirect sunlight. Continue to water very sparingly, only when the soil feels dry to the touch. You’re aiming for slightly moist, not wet. To check for roots, very gently tug on the cutting. If you feel resistance, you’ve got roots!
The most common issue you might run into is rot. This usually happens from overwatering. If a cutting starts to look mushy, brown, or black, it’s likely rotted. Unfortunately, you’ll probably need to discard it and learn from the experience. Don’t get discouraged! Rot is a sign that the conditions were too wet for the plant to establish roots.
A Encouraging Closing
Be patient with your new Kleinia babies! Rooting can take anywhere from a few weeks to a couple of months. Enjoy the process of watching them grow. It’s a wonderfully fulfilling part of gardening, and soon you’ll have a whole collection of these adorable plants to share (or keep all to yourself – no judgment here!). Happy propagating!
Resource: