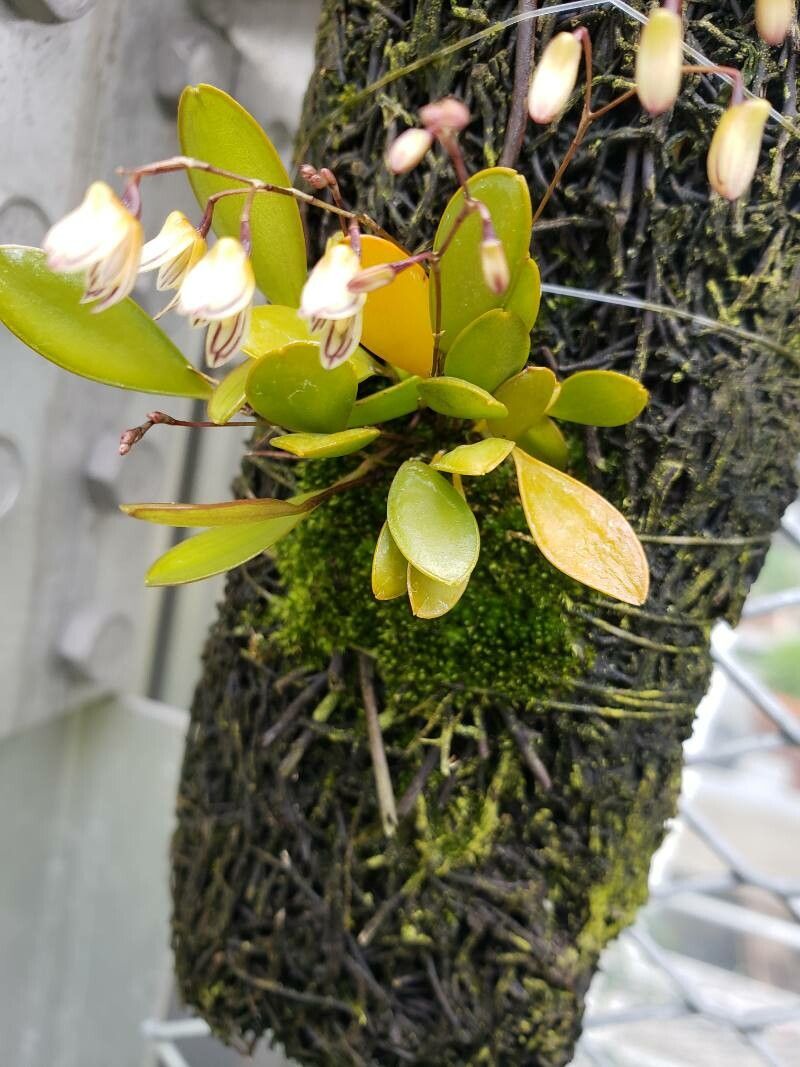
Hey there, fellow plant lovers! If you’ve ever admired the delicate beauty of Pabstiella elegantula, you know it’s a gem. Its dainty blooms and graceful habit can truly transform a humble plant shelf into a miniature wonderland. And the best part? Sharing that beauty is entirely within your reach! Propagating these little darlings is incredibly rewarding, offering you more plants to love, trade, or gift. For beginners, I’d say Pabstiella elegantula leans a bit towards being a thoughtful project rather than a completely foolproof one. It requires a gentle hand and a bit of patience, but with these tips, you’ll be well on your way to success.
When’s the Magic Moment?
The absolute best time to get your hands dirty with Pabstiella elegantula propagation is during its active growth period. For most of these lovely orchids, that’s typically in the spring or early summer, right after they’ve finished their blooming cycle. You want to work with a plant that’s energized and ready to put out new roots. Trying to propagate when the plant is dormant or stressed is a recipe for disappointment.
What You’ll Need to Get Started:
Gathering your tools beforehand makes the whole process much smoother. Here’s what I always have on hand:
- Sharp, sterile pruning shears or a clean razor blade: Essential for making clean cuts.
- Orchid potting mix: Airaerate and well-draining is key. I often use a blend of bark, perlite, and a bit of sphagnum moss.
- Small pots or propagators: Clean and appropriately sized for your cuttings.
- Rooting hormone (optional but recommended): A good quality willow bark extract or a synthetic rooting powder can give your cuttings a boost.
- Water: Fresh, lukewarm water is best. If your tap water is very hard, consider using filtered or distilled water.
- Spray bottle: For maintaining humidity.
- Labels and a pen: To keep track of your projects!
Let’s Get Propagating!
Pabstiella elegantula is usually propagated through stem cuttings or, if the plant is mature and growing vigorously, through division. Let’s focus on cuttings, as it’s often the most accessible method.
Stem Cuttings:
- Identify a healthy stem: Look for a mature stem with at least two or three healthy pseudobulbs (the swollen, stem-like structures). Avoid old, woody stems or those that look weak.
- Make the cut: Using your sterilized pruners or razor, make a clean cut just below a pseudobulb. Aim for a cutting that’s about 3-6 inches long. If your cutting has leaves, that’s great!
- Prepare the cutting: If you’re using rooting hormone, you’ll want to lightly dip the cut end into it. Follow the product instructions carefully.
- Planting the cutting: Gently insert the cut end about an inch deep into your prepared potting mix. You can also propagate these by placing them directly into a tray of moist sphagnum moss.
- Watering: Water thoroughly once after planting. From this point on, you want the potting mix to remain consistently moist but not waterlogged. Overwatering is the quickest way to ruin a good cutting.
My Little “Secret Sauce”
Over the years, I’ve picked up a few tricks that seem to make a real difference with these particular orchids:
- Humidity is King: Pabstiella elegantula absolutely adores humidity. Once you’ve planted your cuttings, mist them regularly with water. You can even place a clear plastic bag over the pot, secured with a rubber band, to create a mini-greenhouse. Just open it daily for a few minutes to allow for air circulation and prevent fungal issues. Removing this “tent” gradually as the plant establishes will be your next step.
- The Power of Bottom Heat: Especially if your home tends to be on the cooler side, placing your propagators on a gentle heated mat can work wonders. This subtle warmth encourages root development from the bottom up, giving your cuttings a significant advantage. Don’t overdo it; warm to the touch is all you need.
Nurturing Your New Roots and What to Watch For
Once your cuttings have begun to show signs of life – usually new leaf growth or tiny root tips peeking out – you’re on the right track!
- Gradual Acclimation: Slowly start to reduce the humidity by opening that plastic tent more each day, or by taking it off for longer periods. Once roots are clearly visible and the plant is producing new growth, you can start watering slightly less often, allowing the potting mix to dry out just a bit more between waterings.
- Common Pitfalls: The biggest enemy here is rot. If you see your cutting turning mushy, blackening, or developing fuzzy mold, it’s usually a sign of too much moisture and not enough air circulation. Unfortunately, a rotting cutting cannot be saved. On the flip side, if the leaves are shriveling and the cutting remains stubbornly unresponsive, it might not have been able to form its own roots. Don’t be discouraged; every gardener experiences these setbacks!
Propagating Pabstiella elegantula is a journey of patience and observation. Don’t rush the process, and let yourself enjoy the small victories, like seeing that first tiny root emerge. Nature has its own rhythm, and by working with it, you’ll be rewarded with the immense joy of creating new life. Happy growing!
Resource:
https://identify.plantnet.org/k-world-flora/species/Pabstiella%20elegantula%20(Cogn.)%20Luer/data