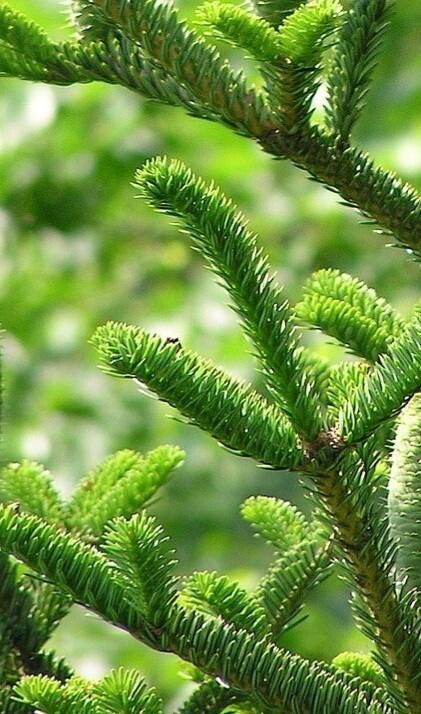
Oh, the Sicily Fir! Abies nebrodensis. What a magnificent tree! If you’ve ever seen one, you know its graceful, pyramidal shape and the deep, rich green of its needles. It’s a real statement piece in any landscape, even if its natural habitat is quite specific. Growing your own from seed or cuttings is such a rewarding endeavor. You’re not just getting a beautiful tree; you’re playing a part in preserving a piece of botanical history. Now, I won’t lie to you, Abies nebrodensis isn’t exactly beginner-friendly for propagation. It requires a bit more patience and attention to detail than, say, a geranium, but the satisfaction of success makes it absolutely worth the effort.
When to Get Your Hands Dirty
The absolute best time to try your hand at propagating Abies nebrodensis is in late spring or early summer. This is when the plant is actively growing, and its tissues are more pliable and receptive. You’ll want to collect cuttings when the new growth has hardened slightly but isn’t fully mature. Think of it as that moment when the new shoots are no longer floppy and green but have a bit of structure to them.
Your Propagation Toolkit
To give yourself the best chance of success, gather these supplies:
- Sharp, sterilized pruning shears or a sharp knife: Cleanliness is key to preventing disease.
- Rooting hormone powder or gel: This is a game-changer for encouraging root development.
- A well-draining potting mix: I highly recommend a mix of perlite, peat moss, and a bit of coarse sand. You want it airy so the cuttings don’t get waterlogged. A good ratio might be 2 parts perlite, 2 parts peat, and 1 part sand.
- Small pots or seed trays: Clean ones, of course!
- A clear plastic bag or humidity dome: This is crucial for keeping the cuttings moist.
- A small trowel or dibber: For making holes for your cuttings.
- Optional: Bottom heat mat: This can really speed up root formation.
Getting Those New Firs Started
For Abies nebrodensis, we’re going to focus on stem cuttings. Seed propagation is possible, but it can be a slower and more unpredictable route, and obtaining viable seeds can also be a challenge.
- Select Your Cuttings: Gently inspect your Sicily Fir. Look for healthy, semi-hardwood cuttings that are about 4-6 inches long. These often come from the current year’s growth. Carefully use your sterilized shears to make a clean cut just below a leaf node (where a leaf attaches to the stem). Remove any lower needles or small side branches, keeping about 2-3 sets of needles at the top.
- Prepare the Cutting: Dip the cut end of the stem into your rooting hormone. Make sure it’s coated evenly. Gently tap off any excess.
- Planting the Cutting: Using your trowel or dibber, make a hole in your prepared potting mix that’s deep enough for the cutting. Gently insert the hormonized end of the cutting into the hole. Firm the soil around the base of the cutting to ensure good contact.
- Create a Humid Environment: Water gently from the bottom of the pot or tray until the soil is evenly moist. Then, cover the pot or tray with a clear plastic bag or a humidity dome. You want to create a mini greenhouse effect. If using a bag, you can use stakes to keep it from touching the foliage.
My Little Secrets for Extra Success
- Don’t Over-Water: This is perhaps the most common mistake for beginners! While they need moisture, soggy soil is a death sentence for cuttings. The plastic bag is your friend here; it traps the moisture released by the leaves, so you won’t need to water frequently. Check the soil moisture periodically by touch – it should feel like a wrung-out sponge, not saturated.
- Give Them Some Warmth: As I mentioned in the supplies list, bottom heat can make a huge difference. A gentle warmth from below (around 70-75°F or 21-24°C) encourages root development much faster than ambient room temperature. You can find affordable heating mats designed for propagation.
Nurturing Your Little Saplings
Once your cuttings are planted, place them in a bright, indirect light location. Avoid direct sunlight, which can scorch the tender cuttings inside their plastic domes. Be patient! Rooting can take anywhere from 6 weeks to several months. You’ll know they’re rooting when you feel a gentle resistance if you try to pull on the cutting. It shouldn’t come out easily.
The most common sign of failure is rot, which will present as mushy, brown stems, often with a foul smell. If you see this, unfortunately, that cutting is likely lost. It’s usually a sign of too much moisture and poor air circulation. Remove any affected cuttings immediately to prevent it from spreading.
Keep Going, Little Gardener!
So there you have it – a journey into propagating your very own Abies nebrodensis. It’s a process that demands a keen eye and a dose of patience, but seeing those tiny roots emerge and eventually grow into a new tree is incredibly rewarding. Don’t be discouraged if your first few attempts aren’t perfect. Every gardener has their learning curve. Just remember to be gentle, keep things clean, and give them the right conditions. Happy propagating!
Resource:
https://identify.plantnet.org/k-world-flora/species/Abies%20nebrodensis%20(Lojac.)%20Mattei/data