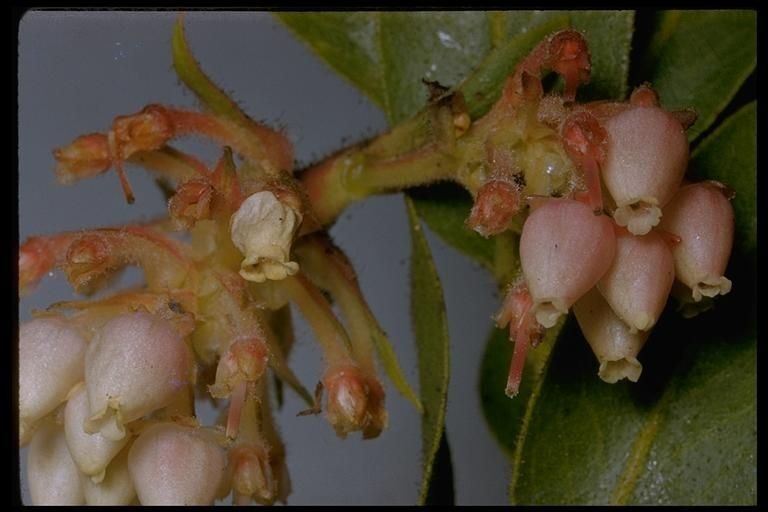
Oh, hello there, fellow garden enthusiast! I’m so glad you’ve stopped by. Today, we’re diving into the wonderful world of propagating Arctostaphylos virgata. If you’ve ever admired these beautiful manzanitas, with their smooth, cinnamon-red bark and clusters of delicate flowers, you know what a treat they are. And the joy of coaxing a new little one into existence from a piece of your existing plant? Pure magic, I tell you.
Now, let’s be real. Arctostaphylos virgata can be a bit of a diva to propagate. It’s not the absolute easiest plant for a beginner, but don’t let that scare you off! With a little patience and these tips, you’ll be well on your way to success. The reward of seeing your success is truly worth the effort.
The Best Time to Start
For manzanitas like Arctostaphylos virgata, late spring to early summer is your golden window. This is when the plant is actively growing after its spring bloom, and the stems are developing new, semi-hardwood growth. Think of it as the plant’s most energetic phase – ripe for new beginnings!
Supplies You’ll Need
Gathering your tools beforehand makes the whole process so much smoother. Here’s what I usually have on hand:
- Sharp, clean pruning shears or a sharp knife: For making clean cuts.
- Rooting hormone: This really gives your cuttings a boost. I prefer powdered hormone for stem cuttings, but liquid works too.
- Well-draining potting mix: A crucial ingredient! I like a mix of perlite, sand, and a good quality peat moss or coco coir. You want about a 50/50 mix.
- Small pots or trays: Clean ones, of course! Terracotta pots are lovely as they breathe, but plastic works fine too.
- Plastic bags or a propagation dome: To create a humid environment.
- Watering can with a fine rose or a spray bottle: Gentle watering is key.
- Optional: Heating mat: For bottom heat, which can really speed things up.
Propagation Methods
I’ve found stem cuttings to be the most reliable method for Arctostaphylos virgata. Here’s how I do it:
- Take Your Cuttings: On a cool morning, use your sharp shears to take cuttings from healthy, current-season growth. Look for stems that are about 4-6 inches long and feel slightly firm but not brittle. Pinch off any lower leaves.
- Prepare the Cuttings: Dip the cut end into your rooting hormone, tapping off any excess. This step is important to encourage root development and protect against rot.
- Plant the Cuttings: Fill your pots with your chosen well-draining mix. Make a hole with a pencil or your finger, and gently insert the cutting. Press the soil gently around the stem to ensure good contact. Don’t bury the leaves!
- Water Gently: Water thoroughly but gently. You want the soil to be moist, not soggy.
- Create a Humid Environment: Cover the pots with a plastic bag or place them under a propagation dome. This traps humidity, which is vital for cuttings to root without drying out. Just make sure the leaves don’t touch the plastic if you can help it. You can prop up the bag with sticks.
- Find the Right Spot: Place your pots in a location with bright, indirect light. Avoid direct sun, which can scorch the cuttings.
The “Secret Sauce” (Pro Tips)
After years of tinkering, I’ve picked up a few little tricks that seem to make all the difference:
- The “Heel” Trick: Sometimes, when you’re taking cuttings, try to grab a piece of the older wood along with the new growth, creating what’s called a “heel.” This can give the cutting a bit more material to form roots from. It’s not always possible, but worth trying!
- Bottom Heat is Your Friend: If you have a propagation mat, using bottom heat is a game-changer. It keeps the soil consistently warm, mimicking perfect growing conditions and significantly speeding up the rooting process. Keep it at a cozy 70-75°F (21-24°C).
- Don’t Rush the “Pull Test”: When you think they might be rooted, resist the urge to tug on them vigorously. Instead, give a very gentle tug. If you feel resistance, roots are forming! If they come out easily, they aren’t ready yet or haven’t rooted.
Aftercare & Troubleshooting
Once you start to see new growth – a tiny leaf unfurling or a baby shoot appearing – you’re on the right track! That’s usually a sign that roots are developing.
- Gradually Acclimate: As roots form, start to gradually increase airflow by opening the plastic bag a little each day. This helps the new plant adjust to life outside its humid bubble.
- Watering: Continue to keep the soil consistently moist but never waterlogged. As the plant grows stronger, you can start watering a little less frequently.
- Signs of Trouble: The most common issues? Rotting is a big one. If your cuttings turn black and mushy, it’s usually a sign of too much moisture and not enough drainage. On the flip side, wilting and drying out means it’s not getting enough humidity or the soil is too dry.
A Encouraging Closing
So there you have it! Propagating Arctostaphylos virgata is a process that rewards patience. Don’t get discouraged if your first few attempts aren’t perfect. Each try is a learning opportunity. Enjoy the quiet satisfaction of watching a tiny cutting slowly transform into a proud, new plant. Happy propagating, and may your garden ever bloom!
Resource:
https://identify.plantnet.org/k-world-flora/species/Arctostaphylos%20virgata%20Eastw./data