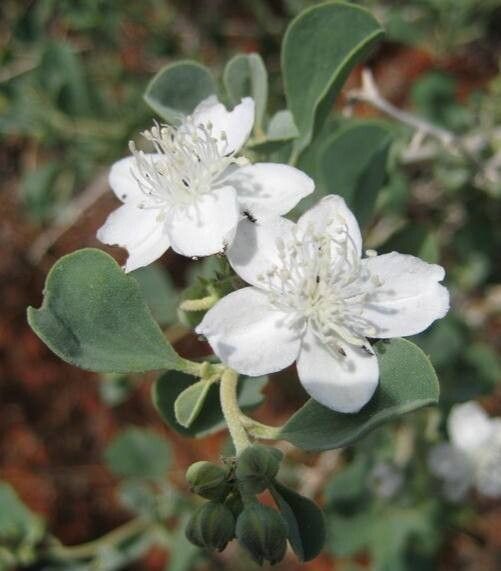
Hello fellow plant lovers! Today, we’re diving into the wonderful world of propagating Nitraria retusa, also known as the Saltbush or Tangletuft. This resilient desert native is a real beauty, with its delicate silvery foliage and charming architectural form. Growing it from scratch is incredibly satisfying, and honestly, not as daunting as you might think. It’s a fantastic plant for those starting their propagation journey, offering a good chance of success with a little bit of care.
The Best Time to Start
For Nitraria retusa, the spring is your golden ticket. Think of it as when the plant is waking up and ready to put on a growth spurt. Starting your propagation just as new growth begins to emerge in early to mid-spring gives you the best shot. The days are getting longer, and the temperatures are warming up, creating the perfect conditions for cuttings to root.
Supplies You’ll Need
Gathering your supplies beforehand makes the whole process smoother. Here’s what I usually have on hand:
- Sharp pruning shears or a clean knife: For making clean cuts.
- Rooting hormone (optional but recommended): A powder or gel to encourage root development.
- A good potting mix: I prefer a well-draining mix – something like a cactus and succulent blend, or a regular potting soil mixed with perlite and coarse sand.
- Small pots or trays: Clean containers are a must to prevent disease.
- Watering can or spray bottle: For gentle watering.
- Clear plastic bag or propagation dome: To create a humid environment.
- Labels: To keep track of what you’ve planted!
Propagation Methods
Nitraria retusa is a trooper and readily propagates from stem cuttings. This is my go-to method for this plant.
Stem Cuttings:
- Take Your Cuttings: In spring, select healthy, non-flowering stems about 4-6 inches long. Use your sharp pruning shears to make a clean cut just below a leaf node (where a leaf attaches to the stem). Remove the leaves from the bottom half of the cutting.
- Apply Rooting Hormone (Optional): Dip the cut end of the stem into rooting hormone, tapping off any excess. This isn’t strictly necessary for Nitraria retusa, but it can give your cuttings an extra boost.
- Plant Your Cuttings: Fill your small pots with your well-draining potting mix. Make a small hole in the center of the soil with your finger or a pencil. Gently insert the cut end of the stem into the hole, ensuring the bottom leaf nodes are buried.
- Water Gently: Water the soil lightly to settle it around the cutting. Avoid waterlogging.
- Create Humidity: Place the pots in a bright spot, out of direct sunlight. Cover the pots loosely with a clear plastic bag or place them under a propagation dome. This will help retain moisture and create a humid microclimate, which is crucial for rooting. Make sure the leaves aren’t touching the inside of the bag.
The “Secret Sauce” (Pro Tips)
Here are a few little tricks that have served me well over the years:
- Bottom Heat is Your Friend: If you have a seedling heat mat, placing your pots on it can significantly speed up rooting. It mimics the warmth a plant would feel from the sun-baked earth.
- Patience with the Leaves: Don’t over-water! It’s tempting, but soggy soil is the fastest way to rot your cuttings. Let the top inch of soil dry out slightly between waterings.
- Watch for the ‘Pull Test’: After a few weeks, you can give a cutting a very gentle tug. If it resists a little, that’s a good sign roots are forming. Don’t yank it out to check!
Aftercare & Troubleshooting
Once you see signs of new growth – tiny leaves or perhaps a little stretch – you know your cuttings are on their way!
- Gradual Acclimation: Once roots have formed and you see new growth, gradually reduce humidity by opening the plastic bag or dome a little more each day over a week.
- Light and Water: Continue to provide bright, indirect light. Water when the top inch of soil feels dry.
- Common Issues: The most frequent problem you’ll encounter is rot. If a cutting turns mushy, black, or smells bad, it’s likely rotted. This is a sign of too much moisture and poor air circulation. If you spot this early, you might be able to salvage a healthy tip if you act fast. Prevention is key: use clean tools, sterile pots, and a well-draining medium.
Don’t be discouraged if every single cutting doesn’t make it. It’s all part of the learning process! The joy of nurturing a new plant from a simple stem is immense. Be patient, enjoy the journey, and before you know it, you’ll have a whole new collection of these lovely Nitraria retusa. Happy propagating!
Resource:
https://identify.plantnet.org/k-world-flora/species/Nitraria%20retusa%20(Forssk.)%20Asch./data