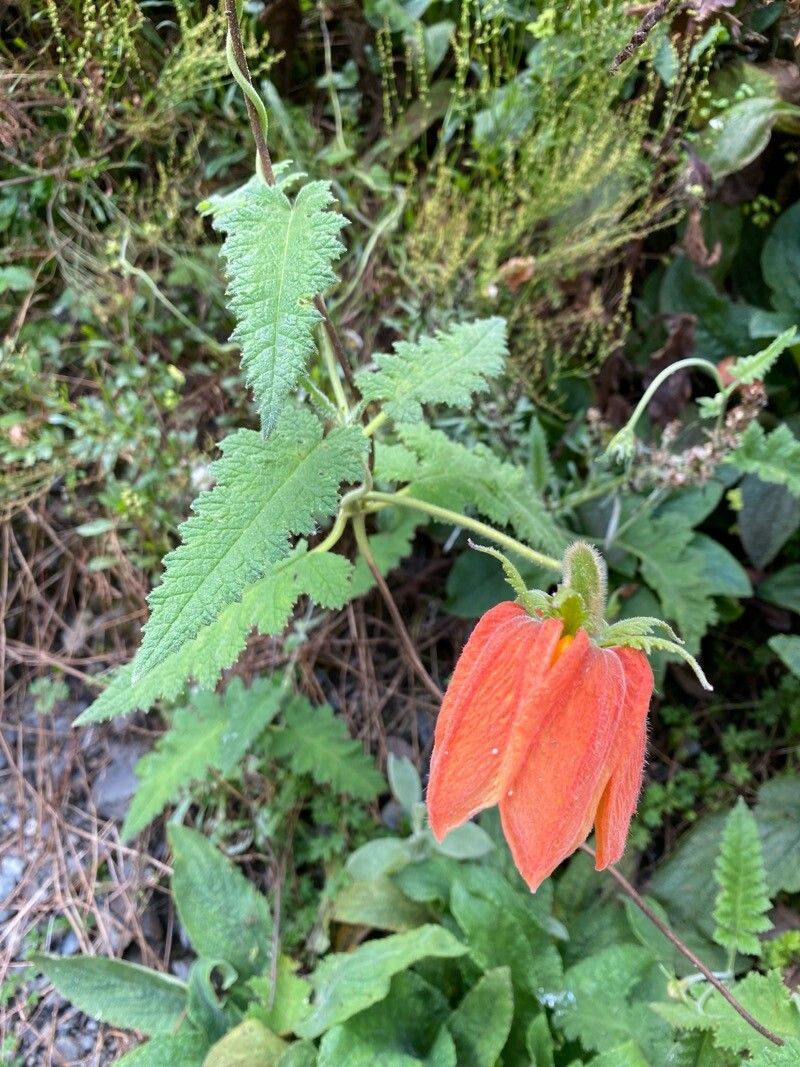
Oh, Caiophora pedicularifolia! What a delightful plant to have in the garden. It’s one of those treasures that catches your eye with its unique charm, and honestly, getting more of them to grow yourself is incredibly rewarding. Think of it as growing your collection and sharing the joy! Now, is it a beginner-friendly plant to propagate? I’d say it’s moderately easy. You’ll need a little patience and attention to detail, but it’s absolutely achievable, even if you’re just starting out on your propagation journey.
The Best Time to Start
For Caiophora pedicularifolia, spring is your golden ticket. I find that starting in early spring, right as new growth begins to emerge, gives you the best chance of success. The plant is waking up and has plenty of energy to dedicate to putting out strong roots. You can also have success with cuttings taken in early summer, but make sure you give them plenty of time to establish before the cooler weather sets in.
Supplies You’ll Need
Having the right tools makes all the difference! Here’s what I always have on hand:
- Sharp, clean pruning shears or a small knife: You want a clean cut for the best healing.
- Rooting hormone powder or gel: This is a game-changer for encouraging robust root development.
- Well-draining potting mix: I often mix my own – about 2 parts peat moss or coco coir to 1 part perlite or coarse sand. This ensures no waterlogging.
- Small pots or propagation trays: Individual pots are usually best for this plant.
- Plastic bags or a propagation dome: This helps maintain humidity around your cuttings.
- Labels and a marker: Trust me, you’ll thank yourself later!
Propagation Methods
I’ve found the most reliable way to propagate Caiophora pedicularifolia is through stem cuttings.
- Take Your Cuttings: With your sharp pruning shears, select a healthy, non-flowering stem from a mature plant. Look for a section that’s about 4-6 inches long, ideally with a few sets of leaves. Make your cut just below a leaf node (where a leaf meets the stem).
- Prepare the Cutting: Gently remove the lower leaves from your cutting, leaving just the top two or three sets. This prevents them from rotting when you bury the stem.
- Apply Rooting Hormone: Dip the cut end of the stem into your rooting hormone powder or gel. Tap off any excess. This step is really crucial for encouraging those roots to form quickly.
- Potting Up: Fill your small pots with your well-draining potting mix. Make a small hole in the center of the soil with your finger or a pencil.
- Plant the Cutting: Gently insert the hormone-dipped end of the cutting into the hole. Firm the soil gently around the base to secure it.
- Water and Cover: Water the soil thoroughly until it’s evenly moist but not soggy. Then, cover the pot with a plastic bag or place it under a propagation dome. This creates a mini-greenhouse effect, keeping humidity high.
The “Secret Sauce” (Pro Tips)
Here are a few tricks I’ve learned over the years that really boost success:
- Bottom Heat is Your Friend: If you can, place your pots on a heating mat designed for propagations. This gentle warmth from below encourages root development significantly faster. It’s like giving your little cuttings a warm bed to grow in.
- Air Circulation Matters: While you want high humidity, you don’t want stagnant air, which can lead to fungal issues. Every couple of days, lift the plastic bag or dome for a few minutes to allow fresh air to circulate. Think of it as giving your cuttings a refreshing breath of air.
- Don’t Rush the Dip: When using rooting hormone, make sure the end of the stem is slightly damp before dipping into the powder. This helps the hormone adhere better. If you’re using gel, it’s already sticky, so no need to pre-dampen.
Aftercare & Troubleshooting
Once you’ve planted your cuttings, place them in a bright spot that receives indirect sunlight. Direct sun can scorch those tender new growth. Keep the soil consistently moist but not waterlogged.
You’ll know your cutting is rooting when you see new growth appearing and feel a slight tug when you gently pull on it. This usually takes anywhere from 4 to 8 weeks, depending on the conditions. Once roots are well-established, you can gradually remove the plastic bag or dome and begin watering as you would a mature plant.
What if things go wrong? The most common issue is rot. If your cutting looks sad, mushy, or black at the base, it’s likely rotted. This is usually due to too much moisture and not enough drainage or air circulation. Unfortunately, once rot sets in, it’s hard to save. Don’t get discouraged! Just clean out your pot and try again.
A Encouraging Closing
Propagating plants is a process, and like any good garden project, it requires a bit of patience. Don’t be afraid to experiment and learn. Every successful cutting you nurture into a new plant will bring you so much joy. Happy propagating!
Resource:
https://identify.plantnet.org/k-world-flora/species/Caiophora%20pedicularifolia%20Killip/data