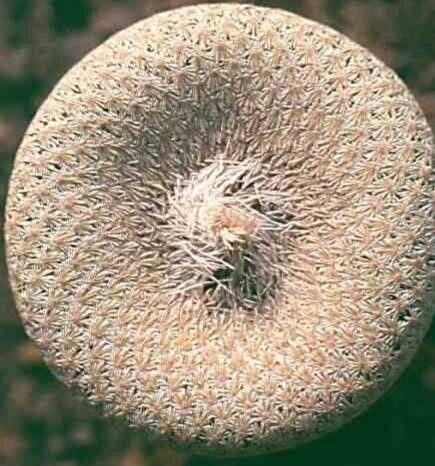
Oh, hello there! Come on in and grab a mug. We’re going to chat about a truly delightful little cactus today – Epithelantha micromeris, or the button cactus as it’s often affectionately called. Isn’t that just the sweetest name? I’ve been growing these beauties for years, and I can tell you, coaxing new life from them is an incredibly rewarding journey. If you’re new to cactus propagation, this one might be a gentle challenge, but trust me, with a little patience and these tips, you’ll be well on your way.
The Best Time to Start
For Epithelantha micromeris, spring and early summer are your golden windows. This is when the plant is actively growing, fueled by longer daylight hours and warmer temperatures. Trying to propagate during its dormant period in winter is like asking a sleepy bear to build a den – it’s just not going to work as well. Look for healthy, new growth that’s firm and not at all mushy.
Supplies You’ll Need
Gathering your tools beforehand makes everything so much smoother. Here’s what I always have on hand:
- A well-draining soil mix: I like a gritty blend. Think of it as a cappuccino for your cactus – about 50% cactus/succulent potting soil mixed with 50% perlite or coarse sand.
- Sharp, sterile pruning shears or a clean, sharp knife: We want to make clean cuts to prevent disease.
- Rooting hormone (optional but helpful): A powder or gel will give your cuttings a nice little boost.
- Small pots or seed trays: Ones with drainage holes are a must!
- A spray bottle: For gentle watering.
- Newspaper or a clean surface: To let your cuttings callous.
Propagation Methods
While division is technically possible, the most successful and gratifying way to propagate Epithelantha micromeris is through offsets or pup removal. These little treasures are practically their own plants already!
- Identify the Offsets: Look around the base of your main plant. You’ll often see small, baby cacti budding off the mother plant. They’ll look like miniature versions of the parent.
- Carefully Detach: This is where your sterile shears or knife come in. Gently cut or twist the offset away from the parent plant, making sure to get a small bit of the base attached. Try not to damage the main plant too much.
- Let Them Callous: This is crucial! Place the detached offsets on a dry piece of newspaper or a clean surface in a bright, airy spot – away from direct sunlight. They need to dry out and form a protective scab over the cut. This can take anywhere from a few days to a week, or even longer. You’ll know they’re ready when the cut end looks dry and healed.
- Planting Time: Once calloused, fill your small pots with your prepared gritty soil mix. Gently press the calloused end of the offset into the soil. Don’t bury it too deeply, just enough so it stands upright.
- Initial Watering (Be Gentle!): Wait a few days after planting before the first watering. This gives any tiny wounds time to settle. Then, lightly mist the soil surface with your spray bottle. We’re not trying to drown them; just provide a tiny bit of encouragement.
The “Secret Sauce” (Pro Tips)
Now for a couple of my little tricks that have really made a difference for me:
- Bottom Heat is Your Friend: While not strictly essential, placing your pots on a gentle heating mat can significantly speed up root development. It mimics the warm soil of their natural habitat. Just keep the temperature around 70-75°F (21-24°C) – you don’t want to cook them!
- Patience with the First Water: I know it’s tempting to water right away, but resist the urge for at least a week after planting the calloused offsets. This dryness is their natural signal to start searching for moisture, which encourages root growth.
Aftercare & Troubleshooting
Once you see signs of roots – often a slight swelling at the base or the offset looking a bit more firm – you can start watering more regularly. Still, keep it on the drier side. Water only when the soil is completely dry, which might be every 1-2 weeks depending on your conditions.
The most common issue you’ll face is rot. This happens when the soil stays too wet and the offset can’t establish roots before moisture causes decay. If you notice an offset becoming soft, mushy, or discolored, it’s likely rotted. You can try to cut away the rotten parts and let the remaining healthy bit callous and try again, but sometimes, sadly, it’s a lost cause. Don’t get discouraged!
A Encouraging Closing
See? It’s all about understanding what your little button cactus needs. Propagation is a dance, a slow and steady rhythm of observation and gentle intervention. Be patient, enjoy the process, and celebrate each tiny success. Soon, you’ll have a whole little army of these charming button cacti! Happy growing!
Resource: