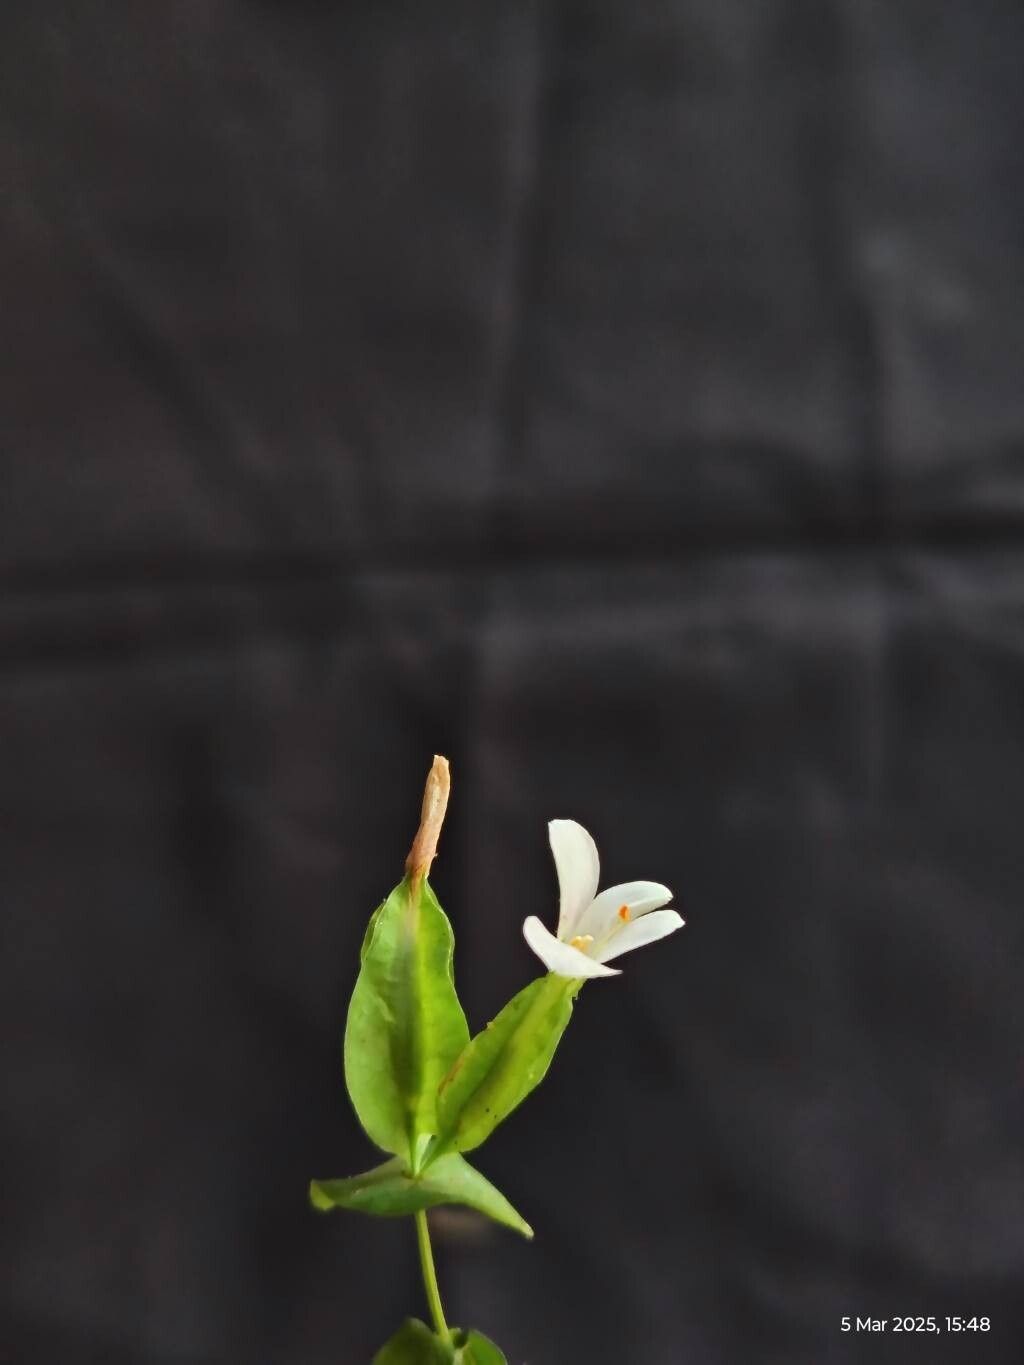
Gather ’round, fellow plant lovers! I’m so excited to talk about a real gem today: Canscora alata. If you’re looking for a plant that brings a touch of delicate elegance to your space, this is it. With its airy, winged stems and lovely, star-shaped flowers, it’s like a little piece of sunshine captured in a pot.
The truly magical part? You can create more of these beauties yourself! Propagating Canscora alata is incredibly rewarding. It’s a wonderful way to expand your collection, share with friends, or simply experience the joy of nurturing new life. Now, I’ll be honest, while it’s not impossibly difficult, it does have a few quirks that make it a bit more of a moderately easy project for beginners. But don’t let that deter you! With a little care and attention, you’ll be well on your way.
The Best Time to Start
For the highest success rate with Canscora alata, I always recommend early spring or late summer. This is when the plant is actively growing and has the most energy reserves to put into forming new roots. Trying to propagate during the plant’s dormant period is like asking a sleepy bear to run a marathon – it’s just not going to happen! Look for healthy, well-established parent plants that are showing vigorous new growth.
Supplies You’ll Need
Before we get our hands dirty, let’s make sure we have everything ready:
- Sharp, clean pruning shears or a sharp knife: Vital for making clean cuts.
- Small pots or seed trays: Whatever you prefer for starting your cuttings. Make sure they have drainage holes!
- Well-draining potting mix: A good quality seedling starter mix or a blend of peat moss, perlite, and a little bit of compost works wonderfully.
- Rooting hormone (optional, but recommended): This isn’t strictly necessary for Canscora alata, but it can certainly give your cuttings a helpful boost.
- Clear plastic bag or a small greenhouse: To create a humid environment.
- Watering can with a fine rose or a spray bottle: For gentle watering.
- Optional: Heat mat: Especially beneficial if your propagation area is cool.
Propagation Methods
Canscora alata is primarily propagated through stem cuttings. It’s a straightforward process once you get the hang of it.
Stem Cuttings:
- Take Your Cuttings: Using your clean shears or knife, select a healthy stem that’s at least 4-6 inches long. Make a clean cut just below a leaf node (the point where a leaf attaches to the stem). Remove the lower leaves, leaving just the top few. If your cutting has any flower buds, it’s best to gently pinch these off to encourage the plant to focus its energy on root development.
- Apply Rooting Hormone (If Using): If you’re using rooting hormone, dip the cut end of the stem into the powder, tapping off any excess.
- Plant Your Cuttings: Fill your small pots or seed tray with your prepared potting mix. Make a small hole with your finger or a pencil and gently insert the cut end of the stem. Firm the soil gently around the cutting to ensure good contact. You can usually fit several cuttings in one pot, spaced a few inches apart.
- Water Gently: Water the soil thoroughly but gently until water runs out of the drainage holes.
The “Secret Sauce” (Pro Tips)
Here are a couple of things I’ve learned over the years that really make a difference:
- Humidity is Key, But Avoid Soggy Leaves: While Canscora alata loves humidity, you don’t want its leaves constantly sitting in water. If you’re using a plastic bag over the pot, make sure the leaves aren’t touching the plastic. A little airflow is good, so maybe prop up the bag slightly. This prevents fungal issues.
- Bottom Heat is Your Best Friend: If you’re struggling with root development or your room tends to be a bit on the chilly side, a gentle bottom heat from a heat mat can really speed things up. It encourages the roots to start forming from the base of the cutting. Think of it as a cozy little incubator for your new plant babies.
Aftercare & Troubleshooting
Once your cuttings are planted, it’s time for some gentle TLC.
- Maintain Humidity: Cover your pots with a clear plastic bag or place them in a mini-greenhouse. This is crucial for keeping the moisture levels high. Keep the soil consistently moist, but never waterlogged.
- Provide Bright, Indirect Light: Place your cuttings in a bright spot where they’ll get plenty of light, but avoid direct, harsh sunlight, which can scorch tender new growth.
- Check for Roots: After 3-6 weeks, you can gently tug on a cutting. If you feel resistance, it means roots have formed! You’ll also start seeing new leaf growth.
- When to Transplant: Once your new plants have a decent root system and are actively growing, you can carefully transplant them into individual pots with fresh potting mix.
Now, what if things don’t go as planned? The most common issue is rot. This usually happens when the soil is too wet and there isn’t enough airflow. If you see your cutting turning mushy or black at the base, sadly, it’s likely beyond saving. The best ways to avoid this are to use well-draining soil, water judiciously, and ensure good air circulation. Don’t be discouraged if a few don’t make it; it’s all part of the learning process!
So there you have it! Propagating Canscora alata is a delightful journey. Be patient, have fun with it, and celebrate every little success. Happy gardening!
Resource:
https://identify.plantnet.org/k-world-flora/species/Canscora%20alata%20(Roth)%20Wall./data