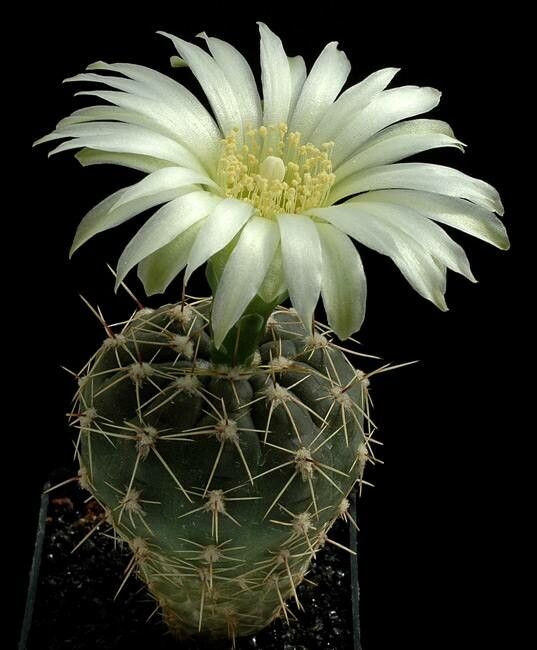
Hello, fellow plant lovers! Today, we’re diving into the fascinating world of propagating Gymnocalycium reductum, also known as thechin cactus. If you’re looking for a quirky, rewarding plant to add to your collection, this is it. Their unique ribbed bodies and delicate flowers are truly a sight to behold.
Why Propagate Gymnocalycium reductum?
There’s something incredibly satisfying about creating new life from an existing plant. With Gymnocalycium reductum, you can expand your collection, share these beauties with friends, or even just enjoy the process of nurturing a tiny sprout into a mature cactus. Happily for us, this particular cactus is quite amenable to propagation, making it a fantastic choice for beginners looking to get their hands dirty (or, well, a little bit gritty!).
The Best Time to Start
The sweetest spot for propagating Gymnocalycium reductum is during its active growing season. Think late spring through summer. This is when the plant has plenty of energy to put into developing new roots and shoots. You can often tell it’s ready to go when you see new growth actively happening.
Supplies You’ll Need
Gathering your tools beforehand makes the whole process smoother. Here’s what I usually have on hand:
- Well-draining cactus/succulent soil mix: You can buy a pre-made one, or mix your own with equal parts potting soil, perlite, and coarse sand.
- Sharp, clean knife or pruning shears: Sterilize them with rubbing alcohol to prevent disease.
- Rooting hormone (optional but helpful): This little powder can give your cuttings a boost.
- A small pot or seed tray: Make sure it has drainage holes!
- Gravel or small stones: For top dressing and to help keep the soil surface dry.
- Gloves: Cacti spines are no joke!
- Watering can with a fine rose or misting bottle.
Propagation Methods
For Gymnocalycium reductum, my go-to methods are through offsets and stem cuttings.
Propagating from Offsets (Pups)
Many Gymnocalycium varieties will produce small offsets, or pups, around their base. This is the absolute easiest way to start a new plant.
- Gently unpot the parent cactus.
- Carefully locate the offsets. You should be able to see where they connect to the main stem.
- Using your clean knife or shears, gently cut the offset away from the parent plant, making sure to get a clean separation. If the offset has any tiny roots already, that’s a bonus!
- Allow the cut surface to callus over. This is crucial. Place the offset in a dry, bright spot for 3-7 days until the cut end looks dry and sealed. This prevents rot.
- Plant the offset. Fill your small pot with your cactus mix. Make a small hole in the center and place the callused end of the offset into the soil. Gently firm the soil around it.
- Don’t water immediately. Wait a week or so before giving it its first light watering.
Propagating from Stem Cuttings
If your cactus has grown a bit leggy or you want to try a more adventurous approach, cuttings work well.
- Select a healthy stem or “arm” from the parent plant that is at least 2-3 inches long.
- Make a clean cut with your sterilized knife or shears, leaving a bit of the base attached to the parent.
- Again, the most important step: let the cut end callus. Place the cutting in a dry, bright location for at least 5-7 days, or until the cut end feels completely dry and hardened.
- Pot the cutting. Fill a small pot with your cactus mix. You can insert the callused end directly into the soil. You might want to use small stones or gravel to help support the cutting so it stands upright.
- Resist the urge to water. Wait about 10-14 days before giving it its first very light watering. Patience here is key!
The “Secret Sauce” (Pro Tips)
Here are a couple of things I’ve learned that make a real difference:
- Don’t rush the callusing. I cannot stress this enough. A wet cut surface meeting damp soil is a recipe for rot, and that’s the death knell for your new cactus. Give it ample time to heal.
- Bottom heat works wonders for root development. If you have a heat mat designed for seedlings, placing your pot on it during the rooting process can significantly speed things up. It mimics the warmth of the earth and encourages those roots to reach out.
- When watering, think “soak and dry.” Once your new cactus is established and has roots, water thoroughly until water drains from the bottom, then let the soil dry out completely before watering again. That dry period is just as important as the watering itself.
Aftercare & Troubleshooting
Once you see signs of new growth or feel a bit of resistance when gently tugging the plant, you know roots have formed!
- Begin watering gradually. Start with light waterings, increasing as the plant matures and you see more robust growth.
- Keep it in bright, indirect light. Avoid intense, direct sun when the plant is young and vulnerable.
- Watch for rot. The biggest enemy of young succulent cuttings is rot. If your cutting turns mushy or black and smelly, it’s likely rotted. In this case, sadly, it’s usually best to discard it and start fresh with a new cutting. Ensure your soil is airy and your watering is infrequent.
- Pest watch. Keep an eye out for mealybugs or spider mites, especially in dry conditions. Treat promptly if you spot any.
A Word of Encouragement
Propagating plants, especially cacti, is a journey. There might be a few bumps along the way, but trust me, the reward of holding a tiny, happy new Gymnocalycium reductum in your hand is absolutely worth it. Be patient, enjoy the process, and don’t be afraid to experiment! Happy gardening!
Resource: