Oh, hello there! Come on in, grab a cup of tea. Today, we’re going to talk about a plant that’s brought me so much joy over the years: Neillia affinis.
The Charm of Neillia Affinis
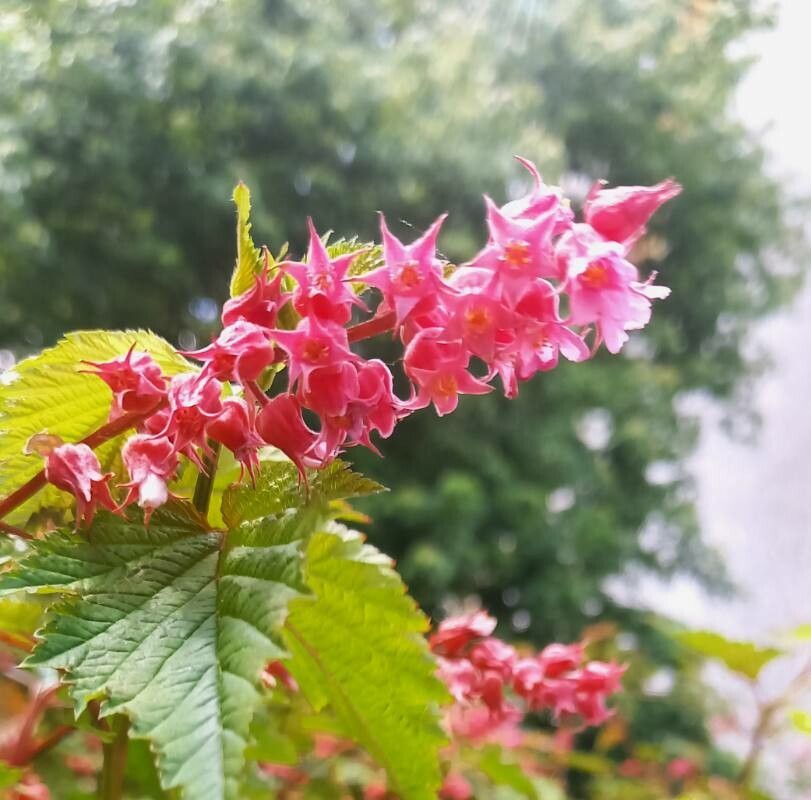
If you’re looking for a shrub that’s got a bit of understated elegance, Neillia affinis is your gal. She’s known for her delicate, arching branches and lovely, soft pink flowers that appear in late spring to early summer. They’re not showy, but their subtle beauty is utterly captivating. And the best part? Propagating her is a genuinely rewarding experience. You get to witness new life emerge from small beginnings, which, in my book, is one of gardening’s greatest magic tricks. For beginners, I’d say Neillia affinis is moderately easy to propagate. With a little attention, you’ll be well on your way to an abundance of these beauties.
The Best Time to Start
When it comes to getting Neillia affinis to root, timing is everything. For the highest success rate, I always reach for my pruners in late spring to early summer. This is when the plant is actively growing, and the stems are what we call “semi-ripe.” They’re not brand new and floppy, but they haven’t hardened off completely, which makes them perfect for taking cuttings.
Supplies You’ll Need
Getting your workspace ready is half the battle! Here’s what I always have on hand:
- Sharp Pruning Shears or a Knife: Cleanliness is key to preventing disease.
- Rooting Hormone: I prefer a powder, but a gel works too. It gives young cuttings a real boost.
- Well-Draining Potting Mix: A good blend of peat moss or coco coir with perlite or coarse sand is ideal. I often use a seedling mix.
- Small Pots or Trays: About 3-4 inches deep are perfect. Make sure they have drainage holes!
- Plastic Bags or a Propagation Dome: To create a humid environment for your cuttings.
- Marker: To label your cuttings with the date.
- Water: For moistening your soil and, well, for drinking!
Propagation Methods
Let’s get our hands dirty! My go-to method for Neillia affinis is stem cuttings.
- Select Your Stems: Gently examine your Neillia affinis plant. Look for healthy, non-flowering stems that are about pencil-thick and bend without snapping.
- Take Your Cuttings: Using your clean, sharp pruners, cut stems into sections about 4 to 6 inches long. Make your cuts just below a leaf node (where a leaf attaches to the stem). This is where the rooting magic often happens!
- Prepare the Cuttings: Carefully remove the lower leaves, leaving just a couple of leaves at the very top. This helps to reduce moisture loss. If the leaves are large, I like to cut them in half horizontally.
- Dip in Rooting Hormone: Moisten the cut end of each stem slightly with water, then dip it into your rooting hormone powder, tapping off any excess.
- Plant Your Cuttings: Fill your pots or trays with your prepared, moist potting mix. Make a small hole with your finger or a pencil, and gently insert the cutting. Firm the soil gently around it.
- Water and Enclose: Water your cuttings gently to settle the soil. Then, cover the pots with a plastic bag, securing it with a rubber band or placing them inside a propagation dome. This creates that essential humid environment.
The “Secret Sauce” (Pro Tips)
Here are a few things I’ve learned over the years that make a real difference:
- Don’t Let the Leaves Touch the Water: If you choose to propagate in water (which works for Neillia, though cuttings are often more successful), make sure the leaves are never submerged. Rot is the enemy! Only the stem should be in the water.
- Bottom Heat is Your Friend: If you have a heated propagator or can place your pots on a gentle heat mat, it can significantly speed up root development. Neillia cuttings love a bit of warmth from below.
- Cleanliness is Crucial: I cannot stress this enough. Sterilize your tools between each plant and even between cuttings if you’re working with multiple different species. It’s the simplest way to avoid introducing diseases.
Aftercare & Troubleshooting
Once your cuttings are planted, find them a spot with bright, indirect light. Avoid direct sun, as it can scorch those tender new leaves. Keep the soil consistently moist but not soggy. A good test is to poke your finger into the soil; if it feels dry an inch down, it’s time to water.
You’ll know your cuttings have taken root when you see new leaf growth appearing. You can also give them a gentle tug; if there’s resistance, you’ve got roots! Once they’re well-rooted and have a few sets of new leaves, you can gradually acclimate them to lower humidity by opening the plastic bag a little each day. Your new Neillia will be ready for their own pots once they’ve grown a bit more.
The most common sign of trouble is rotting. If your cuttings turn black or mushy, it’s usually a sign of too much moisture and not enough air circulation. If you see this, unfortunately, it’s best to discard them and try again, perhaps with drier soil or better ventilation. Yellowing leaves can sometimes indicate too much direct sun or a nutrient deficiency, but typically, with good practices, your cuttings will thrive.
A Encouraging Closing
Be patient with your little green charges! Propagation is an exercise in hope and observation. Not every cutting will make it, and that’s perfectly okay. Celebrate the successes, learn from the ones that don’t, and most importantly, enjoy the wonderful process of growing something new. Happy gardening!
Resource:
https://identify.plantnet.org/k-world-flora/species/Neillia%20affinis%20Hemsl./data