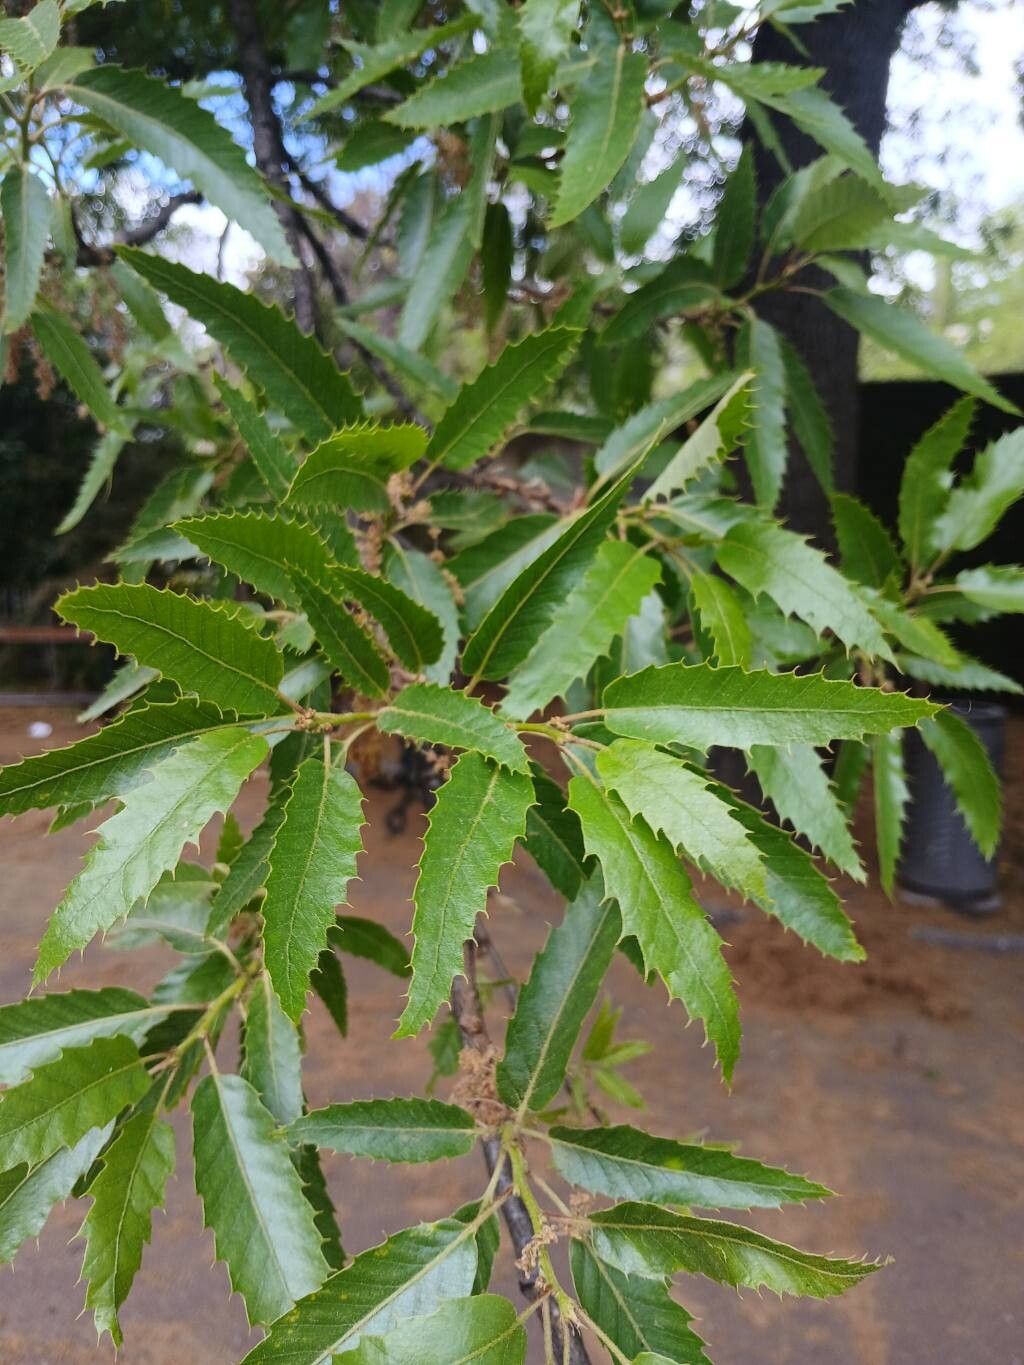
Hello fellow garden enthusiasts! Today, we’re diving into the wonderful world of propagating Quercus castaneifolia, or the Chestnut-leaved Oak. I’ve spent years admiring these magnificent trees, with their beautiful, glossy leaves that truly do resemble those of a chestnut. There’s something incredibly satisfying about nurturing a new life from a small cutting or seed, and this species, while not the absolute easiest for a complete beginner, is definitely achievable with a little patience and care. Trust me, watching your own oak seedling unfurl its first true leaves is a moment of pure joy!
The Best Time to Start
For Quercus castaneifolia, the sweet spot for propagation is definitely mid-summer, usually around July and August. This is when the tree is in full swing, and you can usually find semi-hardwood cuttings. These are the most receptive to rooting. Starting earlier in the season with softer shoots can lead to them rotting before they root, and waiting too late means the wood isn’t mature enough to establish itself before the cooler weather arrives.
Supplies You’ll Need
Here’s what you’ll want to have on hand before you start:
- Sharp pruning shears or a clean, sharp knife (sterilize them first!)
- Rooting hormone (powder or gel works well)
- A good quality seedling potting mix or a blend of peat moss and perlite (about a 1:1 ratio)
- Small pots or propagation trays with drainage holes
- A plastic bag or propagation dome to create a humid environment
- A spray bottle with clean water
- (Optional, but recommended) Bottom heat mat for consistent soil temperature
Propagation Methods
While acorns are the most natural way to grow a Chestnut-leaved Oak, they can be tricky to germinate and require stratification. For a more hands-on approach and a quicker reward, I find stem cuttings to be quite successful.
Stem Cuttings:
- Select your shoots: Look for the current year’s growth that has started to firm up – not too soft and green, and not already woody. You’re aiming for what we call semi-hardwood cuttings.
- Take the cuttings: Using your sterilized pruners or knife, take cuttings about 4-6 inches long. Make the cut just below a leaf node (where a leaf attaches to the stem).
- Prepare the cuttings: Gently remove the lower leaves, leaving only the top 2-3 leaves. If the remaining leaves are very large, you can carefully cut them in half to reduce water loss.
- Apply rooting hormone: Dip the cut end of each cutting into your rooting hormone, ensuring it’s coated. Tap off any excess.
- Plant the cuttings: Fill your pots or trays with your chosen potting mix. Make a small hole with a pencil or skewer and insert the cutting, firming the soil around it gently.
- Create humidity: Water the soil thoroughly until it drains from the bottom. Then, cover the pots with a clear plastic bag or place them under a propagation dome. This is crucial for preventing the cuttings from drying out.
- Provide warmth and light: Place the pots in a bright location but out of direct, scorching sunlight. If you have a bottom heat mat, now’s the time to use it – consistent warmth keeps things happy. Aim for a soil temperature of around 70-75°F (21-24°C).
The “Secret Sauce” (Pro Tips)
Here are a few things I’ve learned over the years that can really make a difference:
- My absolute favorite trick for cuttings is to ensure no leaves touch the water inside the humidity dome. If they start to rot, it can take down the whole cutting. Just a quick check and tuck whenever you water.
- Don’t be too proud to use a bottom heat mat. Oaks, like many woody plants, absolutely love that gentle warmth at their roots. It encourages that initial root development much faster than just ambient room temperature.
- And this one is simple but often overlooked: Sterilize, sterilize, sterilize! Before you even think about cutting, make sure your tools are clean. A quick dip in rubbing alcohol or a rinse with soapy water and a good scrub can prevent a world of fungal infections before they even start.
Aftercare & Troubleshooting
Once your cuttings have been in their humid environment for a few weeks, you can gently tug on them. If you feel a bit of resistance, that’s a good sign roots are forming! At this point, you can gradually acclimate them to normal humidity by opening the bag or dome for increasing periods each day. Continue to keep the soil consistently moist but not waterlogged.
The most common issue you’ll encounter is rot. If you see mushy, blackening stems, or if the leaves yellow and drop off rapidly, it’s a sign of too much moisture or damping off. Make sure your soil drains well, and don’t overwater during this early stage. If a cutting rots, remove it immediately to prevent it from spreading.
A Encouraging Closing
Propagating trees takes a bit of patience, my friends. You might not see roots for several weeks, or even a couple of months. Don’t get discouraged! Keep the conditions consistent, trust the process, and celebrate the small victories. Enjoy nurturing these future giants – it’s a journey well worth taking. Happy gardening!
Resource:
https://identify.plantnet.org/k-world-flora/species/Quercus%20castaneifolia%20C.A.Mey./data