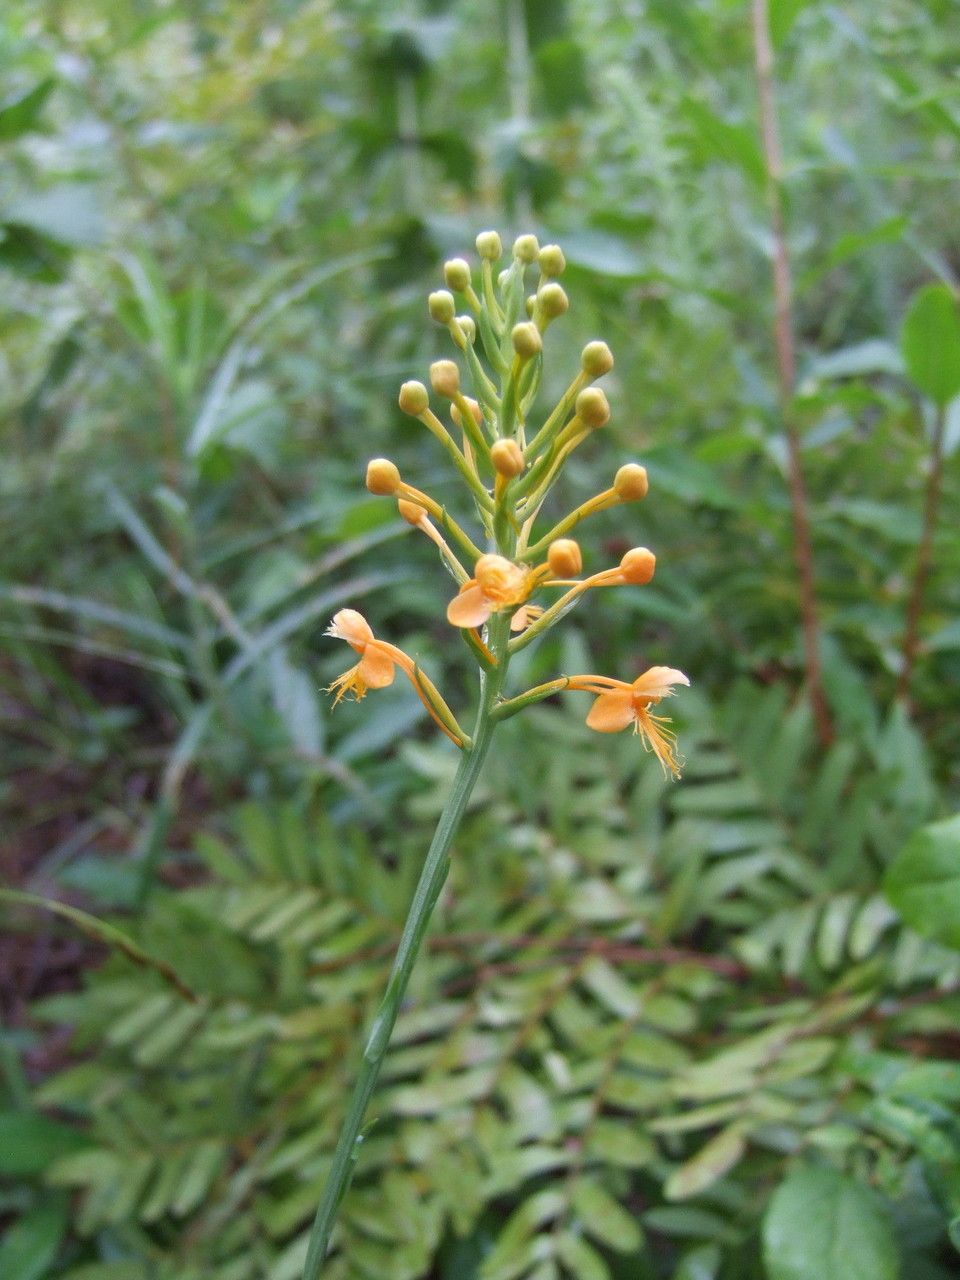
Hey there, fellow plant lovers! Today, we’re diving into the fascinating world of Platanthera chapmanii, also known as Chapman’s rein orchid. If you’re looking for a truly special bloom to grace your garden, this is it. Its delicate, fragrant flowers are a sight to behold, and there’s something incredibly satisfying about coaxing a new plant from an existing one. Now, I won’t sugarcoat it – propagating orchids, especially this particular one, can be a bit of a challenge. It’s not quite the “just stick it in water” kind of plant. But with a little patience and the right approach, it’s absolutely achievable, and the reward is immense.
The Best Time to Start
The sweet spot for propagating Platanthera chapmanii is when the plant is actively growing but not flowering. Think of late spring or early summer, after the previous season’s growth has matured and the plant is brimming with energy. You’ll want to look for healthy, robust specimens. Trying to propagate from a stressed or dormant plant is like asking a sleepy cat to do jumping jacks – it’s just not going to happen.
Supplies You’ll Need
Gathering your supplies beforehand makes the whole process so much smoother. Here’s what I always have on hand:
- Sterilized pruning shears or a sharp knife: Crucial for clean cuts that minimize disease risk.
- Orchid potting mix: A well-draining blend is key. I often use a mix of fine orchid bark, sphagnum moss, and perlite. You want good aeration.
- Small pots or trays: Drainage holes are non-negotiable!
- Clear plastic bags or a propagation dome: To maintain humidity.
- Water: Preferably distilled or rainwater. Tap water can sometimes contain minerals that orchids don’t love.
- (Optional) Rooting hormone: While not strictly necessary for Platanthera chapmanii, a gentle rooting hormone can sometimes give it an extra nudge.
Propagation Methods
For our beautiful Platanthera chapmanii, we’ll primarily focus on division. This is often the most successful and least stressful method for this type of orchid.
Division:
This method is best done when the plant is actively growing, as mentioned earlier. Here’s how I do it:
- Gently remove the orchid from its pot. You want to be as careful as possible not to damage the roots. If it’s stuck, run a knife around the inside of the pot.
- Carefully tease apart the root ball. You’re looking for natural divisions, where individual pseudobulbs (those thickened stem-like structures) have started to grow their own roots. Don’t force it! If you encounter resistance, it means they’re still too intertwined.
- Inspect each division. You want each new piece to have at least two to three healthy pseudobulbs and a good set of roots. If a division is lacking in roots, it’s probably best to leave it attached to the mother plant for now.
- Trim away any dead or mushy roots with your sterilized shears.
- Pot each division individually. Use your well-draining orchid mix. Plant them so the top of the pseudobulb is just at the surface of the mix.
- Water lightly. Don’t drench them, just give them a gentle moistening.
- Place the newly potted divisions in a humid environment. This is where your clear plastic bag or propagation dome comes in. Keep them out of direct sunlight.
The “Secret Sauce” (Pro Tips)
Now for a couple of tricks I’ve picked up over the years that can really help your Platanthera chapmanii cuttings thrive:
- Don’t overwater! This is probably the most common mistake. Orchids hate soggy feet. You want the potting mix to be moist, not wet. I find it’s better to err on the side of slightly too dry than too wet, especially when they’re just starting to form roots.
- Bottom warmth can make a big difference. If you have a seed starting mat or a warm windowsill that doesn’t get too hot, placing your pots on it can encourage root formation. Just a gentle warmth, nothing scorching, is what we’re aiming for.
- Patience is truly a virtue. For orchid propagation, “quickly” is a relative term. Don’t expect to see new leaves or roots overnight. It can take weeks, sometimes even a couple of months, for new growth to appear. Resist the urge to constantly poke and prod!
Aftercare & Troubleshooting
Once your divisions show signs of new growth – a tiny new leaf or a developing root nub – it’s a good sign they’re settling in. Continue to keep them in that high-humidity, indirect light environment. As they grow stronger, you can gradually acclimate them to slightly less humidity and more light, mimicking the conditions of your mature plants.
The biggest issue you’ll likely face is rot. If you see a pseudobulb turning dark and mushy, it’s usually a sign of too much moisture. Sadly, once rot sets in, it’s hard to recover. If you catch it early, you might be able to salvage a healthier part of the division, but prevention is always better. Watch for yellowing leaves that aren’t related to new growth – this can also indicate stress or an issue with watering.
A Encouraging Closing
Propagating Platanthera chapmanii is a journey, for sure. There might be a few bumps along the way, but the thrill of seeing those first tiny, new roots emerge is such a beautiful reward. Be patient with yourself and with your plant. Enjoy the process of learning and observing. Happy growing!
Resource:
https://identify.plantnet.org/k-world-flora/species/Platanthera%20chapmanii%20(Small)%20Luer/data