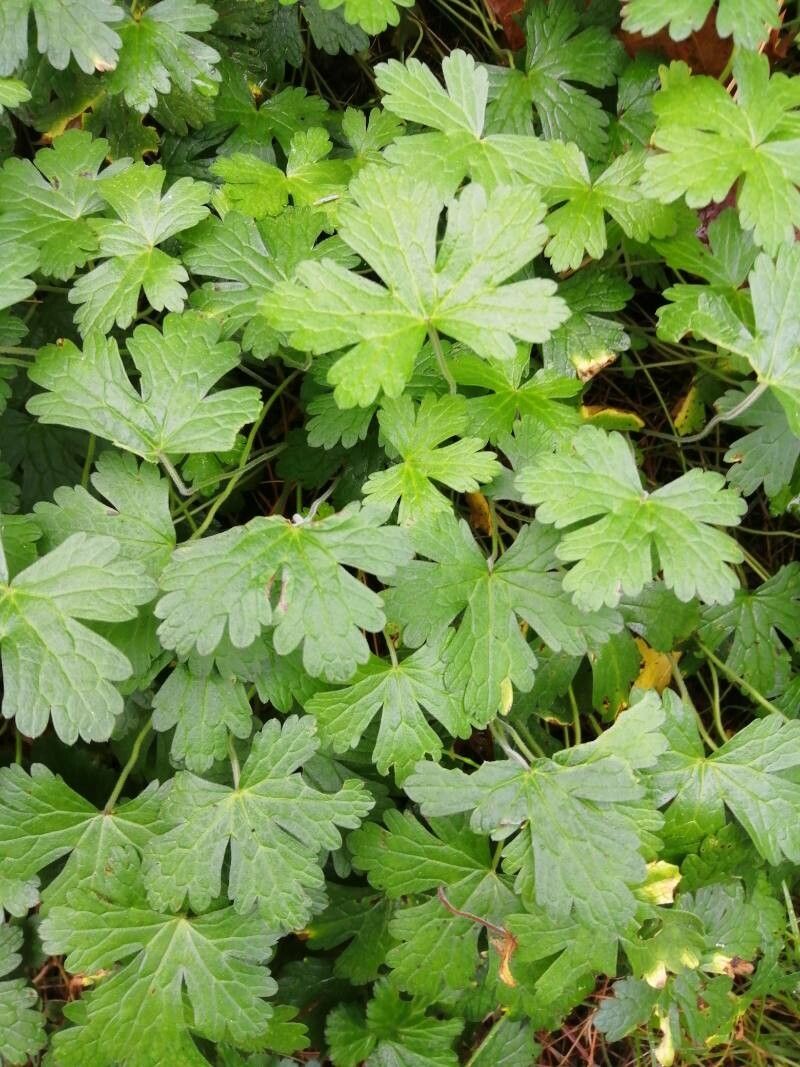
Oh, Geranium aculeolatum! What a treasure to have in the garden. Its delicate, spiky foliage and surprising bursts of color bring such a unique charm, don’t they? And the notion of coaxing new life from an existing plant, creating your own little army of these beauties? It’s just incredibly rewarding.
Now, if you’re new to the gardening game, I’d say Geranium aculeolatum falls into the “moderately easy” category for propagation. It’s not as stubbornly set as some, but it does appreciate a little know-how. But don’t you worry, we’ll get you there!
The Best Time to Start
My absolute favorite time to get busy with Geranium aculeolatum propagation is in the late spring to early summer, right as things are really taking off. The plant is full of vigor, and the warmer temperatures really encourage those cuttings to get their roots going without too much fuss. You can also have some success in early autumn, but spring is usually my go-to for the best results.
Supplies You’ll Need
Gathering your tools before you start will make the whole process so much smoother. Here’s what I usually have on hand:
- A clean, sharp pair of pruning shears or a sharp knife. Hygiene is key, so make sure they’re spotless!
- A well-draining potting mix. I like to use a blend of equal parts perlite and a good quality seed-starting mix. This helps prevent waterlogged soil, which is the enemy of new roots.
- Small pots or trays of some kind. Yogurt cups with drainage holes poked in the bottom work in a pinch!
- Rooting hormone (optional but recommended) for stem cuttings. It’s like a little boost for those budding roots.
- A spray bottle for misting.
- Clear plastic bags or a propagator lid to create a humid environment.
- Labels to keep track of what you’ve potted up!
Propagation Methods
For Geranium aculeolatum, my preferred method is usually stem cuttings. It’s efficient and you can often get several new plants from one healthy parent.
Stem Cuttings:
- Take your cuttings: In late spring or early summer, select a healthy, non-flowering stem from your mature plant. Using your clean shears, make a cut about 4-6 inches long, just below a leaf node (where a leaf attaches to the stem).
- Prepare the cutting: Gently remove the lower leaves from the cutting, leaving only a few at the very top. If the leaves are quite large, you can even trim them in half to reduce water loss.
- Apply rooting hormone (if using): Dip the cut end of the stem into the rooting hormone powder, tapping off any excess.
- Plant the cutting: Fill your small pots with your prepared potting mix. You can use your finger or a pencil to make a hole, then insert the cutting, making sure the lowest leaf node is below the soil surface. Gently firm the soil around the stem.
- Water gently: Give the soil a light watering. You want it moist but not soggy.
- Create a humid environment: Cover the pot with a clear plastic bag, securing it loosely around the rim, or place it in a propagator. This traps moisture and keeps the humidity high, which is crucial for cuttings to root. Place the potted cuttings in a bright spot with indirect light. Avoid direct sun, which can scorch the delicate cuttings.
Water Propagation (for a more visual approach):
If you’re feeling brave and like to watch the magic happen, you can try water propagation.
- Follow steps 1 and 2 above for taking and preparing your cuttings.
- Place the cuttings in a jar or glass of clean water. Make sure to remove any leaves that would be submerged in the water. This is important to prevent rot.
- Place the jar in a bright location with indirect light.
- Change the water every few days to keep it fresh. You’ll start to see tiny white roots forming in a few weeks. Once the roots are about an inch long, you can carefully plant them in your prepared potting mix, just as you would with stem cuttings.
The “Secret Sauce” (Pro Tips)
Alright, let’s get into a couple of things I’ve learned over the years that really make a difference.
- First, don’t let those leaves touch the water if you’re propagating in water. It sounds simple, but it’s a surefire way to invite rot. Even in soil, if you’re misting, try to mist the soil surface more than the leaves themselves. Healthy leaves are good, but soggy leaves? Not so good.
- Secondly, for those stem cuttings, bottom heat makes a huge difference. If you can find an old seedling heat mat or even just place the pots on top of a warm appliance (like a computer monitor, if it’s not too hot!), that gentle warmth from below will encourage root development far more quickly. It’s like giving them a warm hug from the roots up!
Aftercare & Troubleshooting
Once you see those little roots starting to emerge (you might see them peeking out of the drainage holes, or feel a slight resistance when you gently tug the cutting), it’s time to adjust their care.
Keep the humidity high for a little while longer, gradually reducing it over a week or two by opening the bag or propagator lid a bit more each day. Continue to keep them in bright, indirect light. Water them when the top inch of soil feels dry.
Now, about troubleshooting. The most common issue you’ll encounter is rot. If a cutting turns mushy and brown, or the leaves suddenly wilt and go limp, it’s usually a sign of too much moisture and not enough air circulation. Sadly, a rotted cutting is usually a goner, so remove it promptly to prevent it from affecting others. Sometimes, cuttings just don’t take. Don’t get discouraged! It happens to the best of us. It might be the time of year, the temperature, or just one of those things.
A Little Patience, A lot of Joy
Propagating Geranium aculeolatum is a journey, and like any good journey, it requires a bit of patience. Watch for those signs of life, try not to hover over them too much, and celebrate every little root that appears. You’re creating something new, and that, my friend, is truly wonderful. Happy gardening!
Resource:
https://identify.plantnet.org/k-world-flora/species/Geranium%20aculeolatum%20Oliv./data