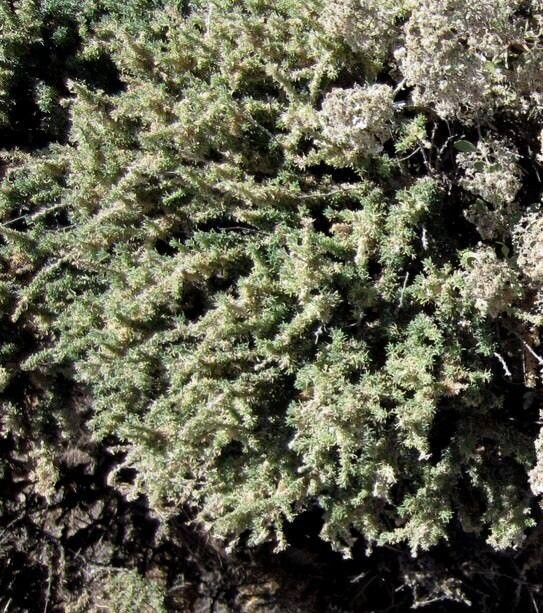
Hello, fellow garden enthusiasts! Today, we’re going to talk about a real gem: Herniaria fruticosa, or Spanish Carpet. If you’ve ever seen this low-growing, evergreen shrub cascading over a rock wall or sprawling across a sunny border, you know its charm. Its tiny, bright green leaves create a delightful textured carpet, and it’s wonderfully tough, handling heat and dry conditions with aplomb.
Why propagate it? Well, for starters, it’s an economical way to fill out your garden or share these beauties with friends. There’s a special kind of joy in nurturing a new plant from a tiny snippet of what you already have. And good news for beginners: Herniaria fruticosa is quite forgiving, making it a fantastic plant to practice your propagation skills on.
The Best Time to Start
My favorite time to get started with propagating Herniaria fruticosa is late spring to early summer. This is when the plant is actively growing, and you’ll find plenty of healthy, semi-hardwood stems to work with. It’s that sweet spot between the new, tender growth and the mature, woody stems.
Supplies You’ll Need
Here’s a little toolkit that will make your propagation journey smoother:
- Sharp pruning shears or a clean knife: For taking clean cuts.
- Rooting hormone (powder or gel): While not strictly necessary for Herniaria, it can give you a little boost.
- A well-draining potting mix: I prefer a 50/50 mix of perlite and peat moss (or coco coir) for cuttings. For division, your regular garden soil or a decent potting mix works well.
- Small pots or trays: With drainage holes, of course!
- A clear plastic bag or propagation dome: To create a humid environment.
- Watering can or spray bottle: For gentle watering.
Propagation Methods
There are a couple of tried-and-true ways to get more Spanish Carpet from your existing plants.
Stem Cuttings
This is my go-to method for Herniaria fruticosa.
- Take your cuttings: Using your sharp shears, select healthy, non-flowering stems. Aim for cuttings about 4-6 inches long. Make a clean cut just below a leaf node (where the leaves grow from the stem).
- Prepare the cuttings: Gently remove the leaves from the bottom half of each cutting. This is important to prevent them from rotting in the soil.
- Apply rooting hormone (optional): Dip the cut end of each stem into your rooting hormone, tapping off any excess.
- Plant the cuttings: Make small holes in your prepared potting mix. Insert the cuttings into the holes, ensuring at least one leaf node is below the soil surface. Gently firm the soil around them.
- Provide humidity: Water the soil lightly. Then, cover the pot or tray with a clear plastic bag or propagation dome. This keeps the humidity high, which is crucial for preventing the cuttings from drying out. Place it in a bright spot, but out of direct sunlight.
Division
If you have a mature, well-established clump of Herniaria fruticosa, division is a quick and effective method.
- Remove the plant from its pot or the ground: Be as gentle as possible with the roots.
- Inspect the root ball: You’ll often see natural divisions where the plant has spread.
- Separate the divisions: Using your hands or a clean trowel, gently pull or cut the plant into smaller sections. Ensure each section has a good amount of roots and some leafy growth.
- Replant immediately: Plant the divisions into their new homes, either back in the garden or in pots, watering them well.
The “Secret Sauce” (Pro Tips)
Here are a couple of tricks I’ve learned over the years that can really improve your success rate.
- Bottom heat is your friend: Especially for stem cuttings, placing your pots on a heated propagator mat can significantly speed up root development. It mimics the warmth of spring soil and encourages the plant to put its energy into root growth.
- Don’t overwater: This is a common mistake. The soil should be consistently moist, but not waterlogged. Soggy conditions are a breeding ground for rot, which is the arch-nemesis of cuttings. If you’re unsure, it’s better to err on the side of slightly too dry than too wet.
- Mist regularly: Even with a plastic dome, misting the cuttings and the inside of the dome a couple of times a day can help maintain that vital high humidity, especially in dry climates.
Aftercare & Troubleshooting
Once your cuttings have rooted – you can usually tell by seeing new leaf growth or giving a very gentle tug and feeling resistance – it’s time for a bit more attention.
- Acclimatize gradually: Slowly introduce your new plants to lower humidity by opening the plastic bag for increasing periods each day over a week. Eventually, remove the covering completely.
- Watering: Continue to water them when the top inch of soil feels dry. As they grow bigger, you can transplant them into slightly larger pots.
- Troubleshooting: The most common problem is rot, which appears as brown, mushy stems. This is usually due to overwatering or poor drainage. If you see this, it’s best to discard the affected cuttings immediately to prevent it from spreading. Another sign of trouble is drooping or yellowing leaves, which can indicate they are too dry or not getting enough light.
A Encouraging Closing
Propagating Herniaria fruticosa is a truly rewarding experience. It’s about patience, observation, and the gentle unfolding of new life. Don’t be discouraged if your first few attempts aren’t perfect; every gardener has had their share of failures! Just keep trying, enjoy the process, and soon you’ll have a garden full of this delightful Spanish Carpet. Happy gardening!
Resource:
https://identify.plantnet.org/k-world-flora/species/Herniaria%20fruticosa%20L./data