Hello there, fellow garden enthusiasts!
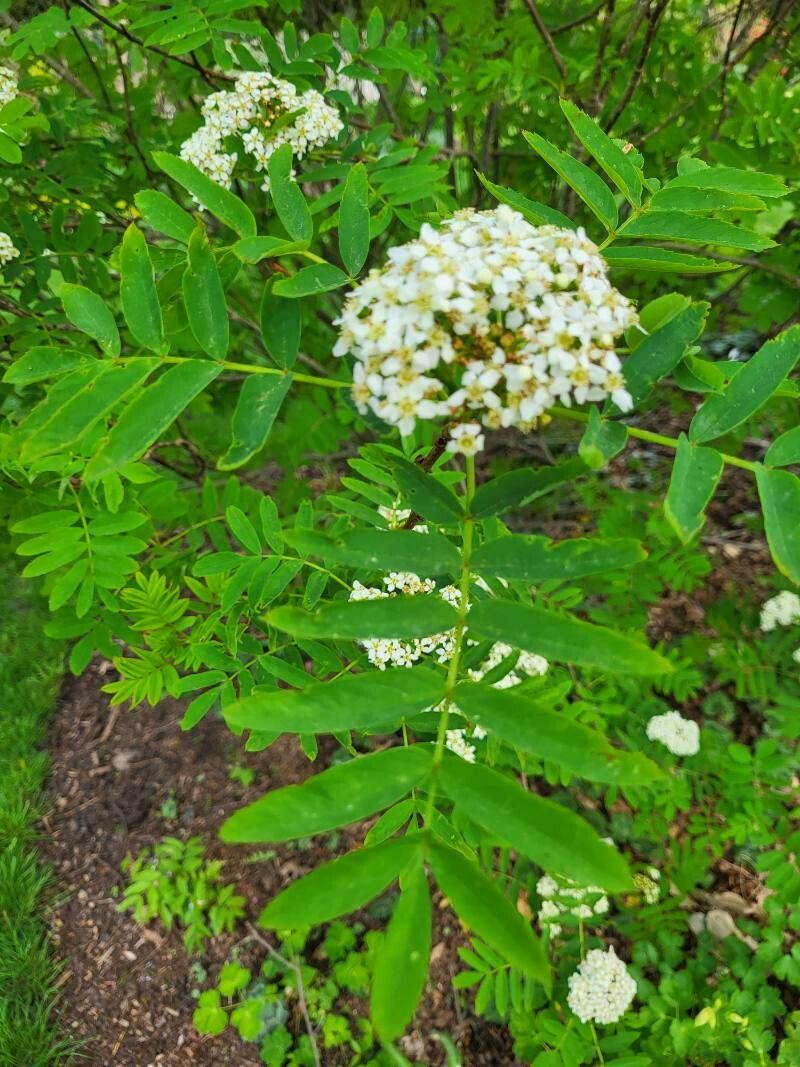
Today, I want to talk about a truly special tree, one that brings a splash of vibrant color and delightful charm to any garden: Sorbus matsumurana, also known as the Japanese Rowan or Matsumura’s Rowan. With its delicate white flowers in spring and stunning crimson berries that persist through winter, it’s a plant that truly puts on a show. Propagating these beauties yourself is incredibly rewarding. Now, I’ll be honest, for absolute beginners, Sorbus matsumurana can be a tiny bit fussier than, say, a geranium. But with a little patience and attention to detail, it’s absolutely achievable, and the joy of nurturing a new plant from a tiny cutting or seed is a feeling like no other.
The Best Time to Start
For the most success, late spring to early summer is generally your golden window for propagating Sorbus matsumurana. This is when the plant is actively growing, and the new shoots have that perfect balance of being pliable yet firm enough to handle. You’re looking for semi-ripe cuttings. Think of them as not too soft and floppy, but not woody and hard either – they snap cleanly when bent.
Supplies You’ll Need
Gathering your supplies before you begin makes the whole process much smoother. Here’s what I usually have on hand:
- Sharp Pruning Shears or a Craft Knife: Clean tools are essential to prevent disease.
- Rooting Hormone: While not strictly mandatory for all species, it significantly boosts success rates with Sorbus. Look for a powder or gel.
- Small Pots or Seed Trays: Clean, with good drainage holes.
- Propagation Mix: A light, airy blend. I like a mix of 50% perlite and 50% peat moss, or a good quality seed-starting mix.
- Watering Can with a Fine Rose: To avoid disturbing your cuttings.
- Plastic Bags or a Propagator: To create a humid environment.
- Labels and a Marker: So you don’t forget what you planted!
- Grit or Small Gravel (optional): For the bottom of pots if you’re concerned about drainage.
Propagation Methods
Let’s get our hands dirty! Here are a couple of reliable ways to grow new Sorbus matsumurana.
1. Stem Cuttings (The Most Common Method)
This is how I usually get my Sorbus started.
- Select Your Cuttings: On a nice, bright day, choose healthy, vigorous young shoots from your parent plant. Look for stems that are about pencil-thick and roughly 6-8 inches long.
- Take Your Cuttings: Using your sharp pruning shears or craft knife, make a clean cut just below a leaf node (where a leaf attaches to the stem). This is where the plant naturally produces rooting hormones.
- Prepare the Cuttings: Gently remove the lower leaves, leaving just two or three at the top. If any of the leaves are very large, I like to snip them in half horizontally to reduce water loss.
- Apply Rooting Hormone: Dip the cut end of the stem into your rooting hormone, tapping off any excess.
- Plant Your Cuttings: Fill your pots or trays with the propagation mix. Make a small hole in the center of the mix with a pencil or your finger. Insert the cutting into the hole, ensuring the hormone-coated end is well within the mix. Gently firm the mix around the stem.
- Water Gently: Water the pots thoroughly but gently. You want the mix to be moist, not waterlogged.
- Create Humidity: Place a clear plastic bag over the pot, securing it with a rubber band so the leaves don’t touch the plastic. Alternatively, if you have a propagator, place them inside. This humidity is crucial for preventing the cuttings from drying out before they can root.
2. Seed (A Longer, More Variable Approach)
While cuttings are quicker, growing from seed is also an option, though it requires a bit more patience and understanding of dormancy.
- Collect Seeds: Harvest berries in the autumn when they are fully ripe.
- Extract and Stratify: Remove the seeds from the fleshy part of the berry. Sorbus seeds require a period of cold, moist stratification to break their dormancy. This means they need to experience winter conditions. I recommend mixing the cleaned seeds with damp peat moss or sand in a plastic bag and storing it in the refrigerator (not freezer!) for about 3-4 months.
- Sow: After stratification, sow the seeds thinly in trays filled with a good quality seed-starting mix. Cover them lightly with about 1/2 inch of soil. Keep the soil consistently moist.
- Germination: Germination can be slow and uneven, often occurring in the spring or even the following year.
The “Secret Sauce” (Pro Tips)
Here are a few tricks I’ve learned over the years that really make a difference:
- Bottom Heat is Your Friend: If you have a heat mat, placing your pots on it can dramatically speed up root development, especially for cuttings. It mimics the warmth of spring soil and encourages those roots to get going.
- Don’t Let Leaves Touch Water (in water propagation): While I primarily recommend soil propagation for Sorbus, if you ever try water propagation with other plants, always ensure that the leaves are well above the water line. Any submerged leaves will rot and can introduce disease to the cutting.
- Observe for Condensation: The condensation on the inside of your plastic bag or propagator is a great sign! It indicates that the environment is humid enough. If there’s too much pooling water, you can wipe it down or briefly open the bag to allow for a little ventilation.
Aftercare & Troubleshooting
Once you see signs of new growth – tiny leaves unfurling or resistance when you gently tug on the cutting – it’s a good indicator that roots have formed!
- Gradual Acclimatization: Slowly harden off your new plants by gradually exposing them to less humid conditions. Open the plastic bag a little more each day over a week or so.
- Potting Up: Once your cuttings have a decent root system (you might see roots peeking out of the drainage holes), it’s time to pot them up into their own small pots using a good potting mix (not too heavy).
- Watering: Keep the soil consistently moist but never waterlogged. Allow the top inch of soil to dry slightly between waterings.
- Troubleshooting: The most common issue you’ll encounter is rot. This is usually caused by overwatering and poor drainage. If a cutting turns black and mushy, unfortunately, it’s likely past saving. Make sure your soil is well-draining and your pots have good drainage holes. Another sign of trouble is when cuttings shrivel and dry out – this usually means they didn’t root and the humidity was insufficient.
A Final Encouraging Word
Propagating plants is a wonderful journey, and Sorbus matsumurana is a worthwhile endeavor. Be patient with the process. Some cuttings take longer than others, and not every attempt will be successful – that’s just part of gardening! Enjoy watching those tiny roots develop and that first, tentative new leaf appear. It’s a little piece of magic you’ve created. Happy propagating!
Resource:
https://identify.plantnet.org/k-world-flora/species/Sorbus%20matsumurana%20(Makino)%20Koehne/data