Oh, hello there, fellow garden enthusiast! Grab a mug, settle in, and let’s chat about one of my absolute favorites: Allium carinatum. That lovely nodding bloom, the delicate fragrance, and the sheer joy of seeing it spread its charm – it’s truly a gem. And the best part? You can easily add more of these beauties to your garden without a second thought.
Why You’ll Love Propagating Allium carinatum
Honestly, I find propagating Allium carinatum incredibly rewarding. It’s like nurturing a little piece of your garden to share with yourself all over again. For beginners, this is a fantastic plant to start with. It’s quite forgiving and often gives you a gentle nudge in the right direction. You don’t need to be a seasoned pro to see success here.
The Best Time to Get Started
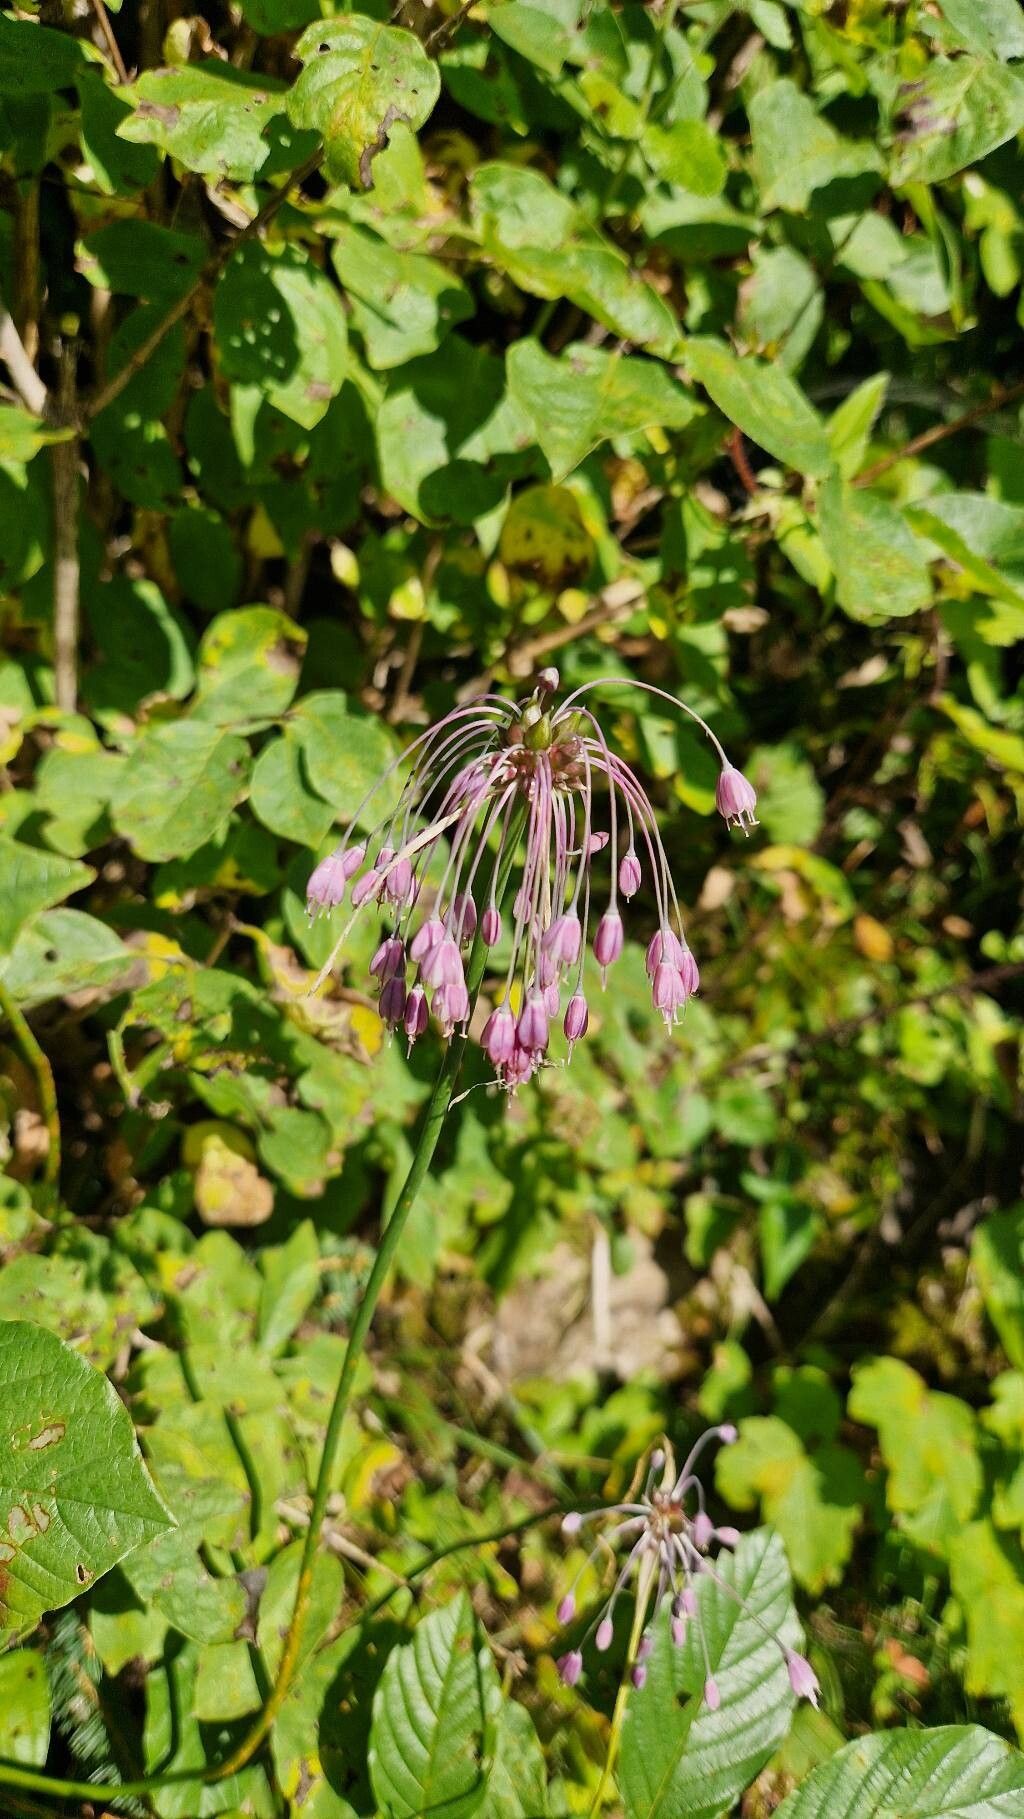
My personal favorite time to get busy with propagation is late spring or early summer, just as the flowering is finishing up, or once the seed pods have started to form. This is when the plant has plenty of energy stored and is ready to reproduce. You’ll often notice small bulbils forming around the base of the maturing flower heads. These are your golden ticket!
Supplies You’ll Need
Here’s what I usually have on hand for propagating these cheerful alliums:
- A sharp, clean trowel or spade: For gentle division.
- Small pots or trays: For starting bulbils or divisions.
- Well-draining potting mix: A special bulb mix or a blend of standard potting soil with plenty of perlite or coarse sand works wonders.
- Watering can with a fine rose: To avoid disturbing delicate seedlings.
- Gardening gloves: Always a good idea!
- (Optional) Rooting hormone powder: While not strictly necessary for allium bulbils, some gardeners like to use it for divisions.
Propagation Methods: Easy as Pie!
For Allium carinatum, we’re mainly looking at two wonderfully straightforward methods:
1. Propagating by Bulbils (The Easiest Way!)
This is hands-down the simplest and most effective method for Allium carinatum.
- Locate the Bulbils: After your allium has flowered, look closely at the spent flower heads. You’ll often see small, papery bulbils, resembling tiny bulbs, nestled amongst the dried flower parts. They can also form at the base of the plant.
- Harvest Gently: Carefully snip off the stem just above where the bulbils are forming, or gently pull the bulbils from their parent bulb. Try to do this before the seed pods completely disintegrate.
- Plant Them Out: You can either sow the bulbils directly into pots filled with your well-draining mix, planting them about 1-2 inches deep. Alternatively, if you’re feeling adventurous, you can plant them directly into a prepared bed in your garden where you want them to grow.
- Water Gently: Give them a good but gentle watering. Keep the soil consistently moist but not waterlogged.
2. Division (For Established Clumps)
If you have an established clump of Allium carinatum that’s gotten a bit crowded, division is a great way to give it new life and more plants.
- Dig Them Up: In late spring or early summer, after flowering, carefully dig around the clump with your trowel or spade. Lift the entire clump out of the ground.
- Separate the Bulbs: Gently shake off excess soil and gently pull or cut the bulbs apart. You’ll often find they separate quite easily into smaller bulbs, sometimes still attached by a bit of root.
- Replant Immediately: Get your divisions replanted as soon as possible. Plant them at the same depth they were growing previously, typically about 2-3 inches deep. Space them according to their mature size.
- Water Well: Water the newly planted divisions thoroughly to help settle the soil and reduce transplant shock.
The “Secret Sauce” (Insider Tips)
Here are a couple of little tricks I’ve picked up over the years that make a difference:
- Don’t Rush to Plant Bulbils: While you can plant them immediately, I often gather bulbils and store them in a cool, dry, airy place (like a paper bag) for a few weeks. This simulates a natural dormancy period and can improve germination rates when you do plant them the following autumn or spring.
- Patience is Key with Bulbils: These tiny bulbils might not flower for a year or two. Don’t get discouraged! They’re busy establishing themselves underground, building up the energy for those beautiful blooms. Think of it as a long-term investment in future beauty.
Aftercare & Troubleshooting
Once your bulbils are planted or your divisions are in the ground, here’s what to do:
- Keep Moist: Regular watering is important, especially for young plants. Avoid letting the soil dry out completely.
- Watch for Sprouts: You’ll see new shoots emerge when they’re ready.
- Common Issues: The biggest challenge to watch out for is rot. This usually happens from overwatering or poor drainage. If you see yellowing leaves that seem mushy, or a generally wilting appearance, it’s often a sign of too much moisture. Ensure your soil drains well, and if you’ve planted in pots, make sure they have drainage holes.
A Little Encouragement
Growing new plants is one of life’s simple pleasures, and propagating Allium carinatum is a fantastic way to experience that joy. Be patient with your new additions, enjoy the process of watching them grow and develop, and soon you’ll have a whole garden full of these enchanting blooms. Happy gardening!
Resource:
https://identify.plantnet.org/k-world-flora/species/Allium%20carinatum%20L./data