Hello fellow garden enthusiasts! It’s wonderful to connect with you today. I want to talk about a truly captivating tree: the Vachellia xanthophloea, or as many fondly call it, the Fever Tree.
The Allure of the Fever Tree
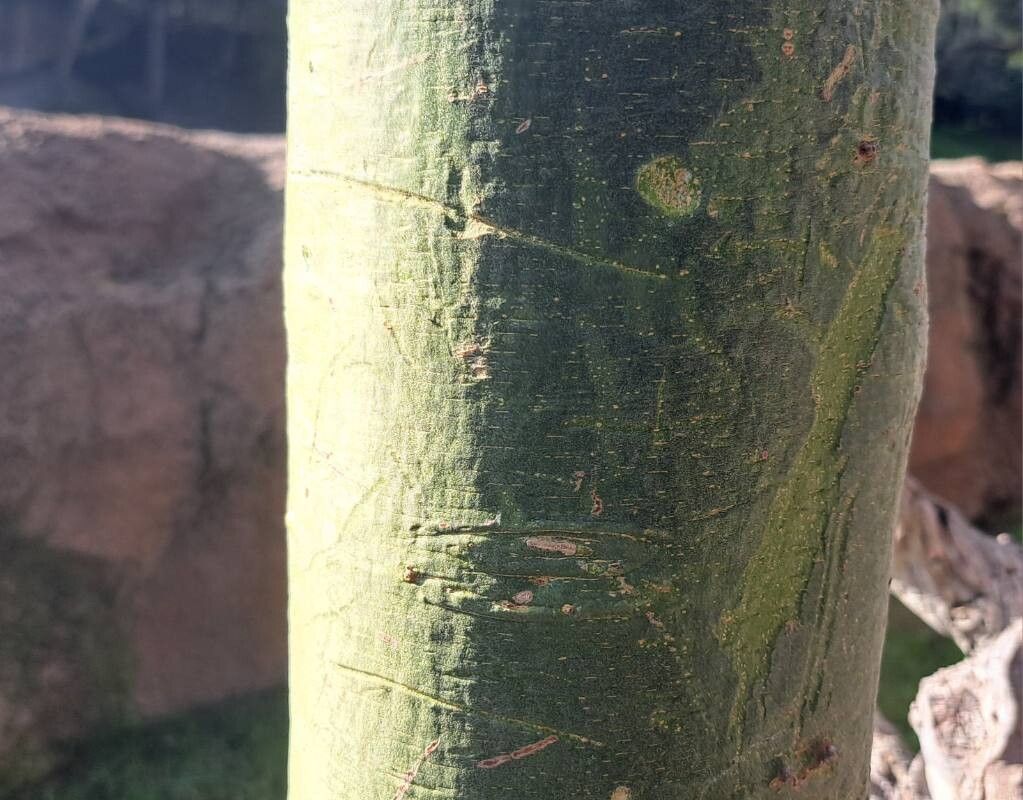
There’s something about the Vachellia xanthophloea that just stops you in your tracks. Its striking lime-green bark, often mottled with reddish-brown patches, is simply stunning, especially against a bright blue sky. And the delicate, feathery foliage? It creates a beautiful dappled shade, perfect for our gardens. Beyond its good looks, it’s a tree with a rich history and an important ecological role in its native African savannas. Propagating your own Fever Tree is an incredibly rewarding endeavor. Now, for the good news: while it might seem a bit exotic, I find Vachellia xanthophloea to be surprisingly forgiving when it comes to propagation, even for those just starting their gardening journey.
When to Get Your Hands Dirty
The absolute best time to begin propagating your Vachellia xanthophloea is during its active growing season. For most of us, this means late spring or early summer. You’re looking for stems that are firm and have that vibrant green growth, not old, woody branches. Think of it as gathering cuttings from a plant that’s bursting with life!
Your Propagation Toolkit
Gathering the right supplies makes all the difference. Here’s what you’ll want to have on hand:
- Sharp, sterile pruning shears or a sharp knife: A clean cut is crucial for healthy healing.
- Rooting hormone (optional, but recommended): This little boost can significantly improve success rates. Look for one suitable for woody cuttings.
- Well-draining potting mix: I like to use a blend of perlite, vermiculite, and a good quality seed-starting mix. You want something that won’t hold too much moisture.
- Small pots or propagation trays with drainage holes.
- A plastic bag or a clear plastic dome: This helps create a humid environment for your cuttings.
- A small trowel or dibber: For making holes and gently firming the soil.
- Watering can with a fine rose or spray bottle.
Bringing New Fever Trees to Life
There are a couple of ways to go about this, but stem cuttings are my go-to method for Vachellia xanthophloea.
Method: Stem Cuttings
- Select your cuttings: Head out to your healthy Vachellia xanthophloea tree. Look for semi-hardwood cuttings – these are stems that are mostly green but have started to get a bit firm. You’re aiming for pieces about 4-6 inches long. Take these cuttings from the current season’s growth.
- Make the cut: Using your sharp, sterile pruning shears, take cuttings. Make a clean cut just below a leaf node (that’s where a leaf attaches to the stem).
- Prepare the cutting: Gently remove the lower leaves. You want to leave just a few sets of leaves at the top. If the leaves are very large, you can even trim them in half to reduce water loss.
- Apply rooting hormone (if using): Dip the cut end of the stem into your rooting hormone. Tap off any excess.
- Planting: Fill your pots with your prepared well-draining potting mix. Use your trowel or dibber to make a small hole in the center of each pot.
- Insert the cutting: Gently place the rooting hormone-coated end of the cutting into the hole. Firm the soil gently around the stem to ensure good contact.
- Water gently: Water the soil thoroughly but avoid waterlogging. You want the soil to be moist, not soggy.
- Create humidity: Place the pot inside a clear plastic bag, making sure the leaves don’t touch the plastic. You can use stakes to prop up the bag if needed. Alternatively, use a clear plastic dome over the tray. This cover will trap moisture and create a humid microclimate, which is essential for successful rooting.
- Placement: Place your pots in a bright location but out of direct, harsh sunlight. A windowsill that gets filtered light is usually perfect.
My “Secret Sauce” for Success
Years of getting my hands dirty have taught me a few little tricks. These aren’t complicated, but they really do make a difference:
- Bottom Heat is Your Best Friend: If you have access to a heated propagator mat or can place your pots on a warm surface (like near a radiator, but not directly on it), do it! Gentle bottom heat encourages root development significantly. It mimics the warmth of spring soil, and your cuttings will absolutely love it.
- Don’t Let Those Leaves Drip Down: This is a big one! Make sure the leaves of your cuttings are not touching the inside of the plastic bag or dome. If they do, they can start to rot very quickly, taking your cutting with them. Sometimes just a slight adjustment of the bag or trimming a leaf is all it takes.
- Patience, Young Grasshopper: I know it’s tempting to peek and prod, but try to resist the urge to pull up your cuttings to check for roots too often. You’ll only disturb the delicate new root structures. Give them at least 4-6 weeks before you attempt to gently tug on them to feel for resistance.
Nurturing Your New Sprouts & What to Watch For
Once you start to see signs of new growth – tiny leaves unfurling or a bit of vigorous habit – it’s a good sign that roots are developing.
- Gradual Acclimation: Once roots have formed and new growth is apparent, you’ll need to gradually acclimate your cuttings to normal humidity. This means slowly opening up the plastic bag or dome over a few days, or removing it for longer periods each day before taking it off completely.
- Continue Watering: Keep the soil consistently moist but not waterlogged. As the root system develops, they will become more forgiving, but it’s still important to monitor.
- Light and Temperature: Continue to keep them in bright, indirect light.
- Troubleshooting Pitfalls: The most common issue you’ll encounter is rot. This usually happens due to overwatering or poor drainage. If you see your cutting turning brown and mushy, or if the leaves start to develop black spots and fall off, it’s likely rot. Unfortunately, at that point, it’s usually too late. Make sure your soil drains like a sieve! Another sign of failure is if the cutting simply wilts and shows no signs of life after many weeks – this can happen if the cutting dries out too much or if it just wasn’t viable to begin with.
The Joy of Growing Your Own
Growing your own Vachellia xanthophloea from cuttings is such a wonderfully fulfilling experience. It connects you more deeply to the plant and allows you to share its beauty with friends and family. Don’t be discouraged if your first few attempts aren’t perfect – gardening is a journey of learning and observation. Be patient, enjoy the process of nurturing these little green hopefuls, and before you know it, you’ll have your very own striking Fever Trees to admire. Happy gardening!
Resource: