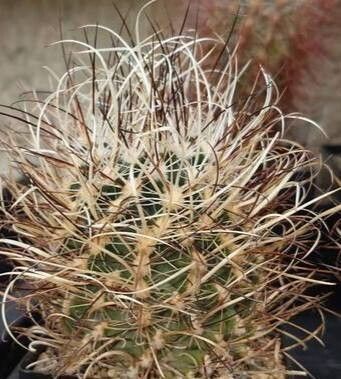
Oh, hello there! Come on in, grab a cuppa. Today, we’re diving into the wonderful world of Sclerocactus blainei. You know, the cactus with those striking hooked spines and that beautiful, often vibrant, bloom? They have a real presence in the garden, don’t they? And the thought of creating more of these beauties from your existing ones? Pure gardening joy! Now, I’ll be honest, I wouldn’t call Sclerocactus blainei a beginner’s absolute first cactus to try propagating. They can be a little particular, but with a bit of care and attention, it’s absolutely achievable, and so rewarding.
The Best Time to Start
When it comes to getting new little Sclerocactus going, spring is your best friend. This is when the plant is really waking up from its winter rest and has all its energy for growth. You’ll want to propagate from a healthy, actively growing plant. You can often see those plump, developing tissues that are just begging to be a new plant!
Supplies You’ll Need
Here’s what you’ll want to have on hand before we get started:
- Well-draining cactus and succulent mix: This is crucial. I like to use a commercial mix and then amend it with extra perlite or pumice – about a 50/50 ratio.
- Sharp, sterilized pruning shears or a clean knife: For making clean cuts. Sterilize with rubbing alcohol.
- Rooting hormone powder: This is optional but can significantly speed things up and improve success rates.
- Small pots or trays: With drainage holes! Absolutely essential.
- Gravel or small stones: For excellent drainage at the bottom of pots.
- Watering can with a fine rose: For gentle watering.
- A bright, but indirect light location: To place your cuttings as they root.
- Optional: A heat mat: For bottom warmth.
Propagation Methods
For Sclerocactus blainei, the most successful method I’ve found is by taking offsets or stem cuttings. Offsets are those little baby plants that sometimes bud off the base of the mother plant. Stem cuttings are pieces you can take from a more mature plant.
1. Taking Offsets:
- Gently remove a small offset from the base of the parent plant. You want to ensure it has some root development if possible, or at least a good solid base where it attached to the mother. If you can’t easily pull it off, use your sterilized knife to carefully slice it away.
- Allow the offset to air dry for a few days to a week in a dry, well-ventilated spot. This is super important for callus formation. You’ll see the cut end start to look dry and a bit leathery.
- Dip the callused end into rooting hormone, tapping off any excess.
- Plant the offset into your prepared, gritty potting mix. You don’t need to bury it too deep, just enough so it stands upright. Add a layer of gravel on top for further drainage.
- Water very sparingly, just enough to moisten the soil.
2. Taking Stem Cuttings:
- Choose a healthy stem or segment from your mature Sclerocactus. Using your sterilized shears or knife, make a clean cut.
- Just like with offsets, you must allow the cut end to callus over completely. This can take anywhere from a week to two weeks. Patience here prevents rot!
- Once callused, dip the cut end in rooting hormone if you’re using it.
- Plant the cutting into your well-draining cactus mix, again, just enough to anchor it. A top layer of gravel helps tremendously.
- Water very, very lightly.
The “Secret Sauce” (Pro Tips)
Here are a few little tricks I’ve picked up over the years:
- Don’t water too much, too soon! This is the biggest killer of cactus cuttings. They are prone to rot, so let the soil dry out significantly between watering. Think “less is more.”
- Bottom heat is your friend. For stem cuttings especially, placing the pot on a seedling heat mat set to a low temperature (around 70-75°F or 21-24°C) encourages root development much faster than ambient room temperature.
- Consider the parent plant’s health. Always take cuttings from a plant that is robust and virus-free. It sounds obvious, but a stressed or unhealthy plant will pass those issues on.
Aftercare & Troubleshooting
Once your offsets or cuttings are planted and you’ve been patient with watering, look for signs of new growth. This might be slow to appear, so don’t despair! You might see the flesh of the cutting plump up slightly, or a tiny new spine bud emerge.
The most common problem you’ll face is rot. If you see the cutting start to turn mushy or translucent, it’s likely rotting. There’s usually no coming back from this, so it’s a sign to check your watering habits. Ensure your soil drains like a sieve! If you catch it very early, you might be able to cut away the rotten part and try to re-callus, but it’s a long shot.
Once your cutting has developed a solid root system (you can gently tug on it, and it will feel anchored), you can begin to water it a bit more regularly, letting the soil dry out thoroughly in between. Treat it like a young, established cactus.
A Warm Farewell
Propagating Sclerocactus blainei is definitely a rewarding endeavor. It takes a little practice, and yes, there might be a few casualties along the way – that’s just part of the learning process for any gardener! But the satisfaction of seeing those tiny new plants take root and thrive is simply unmatched. Be patient with them, be observant, and most importantly, enjoy the journey. Happy propagating!
Resource: