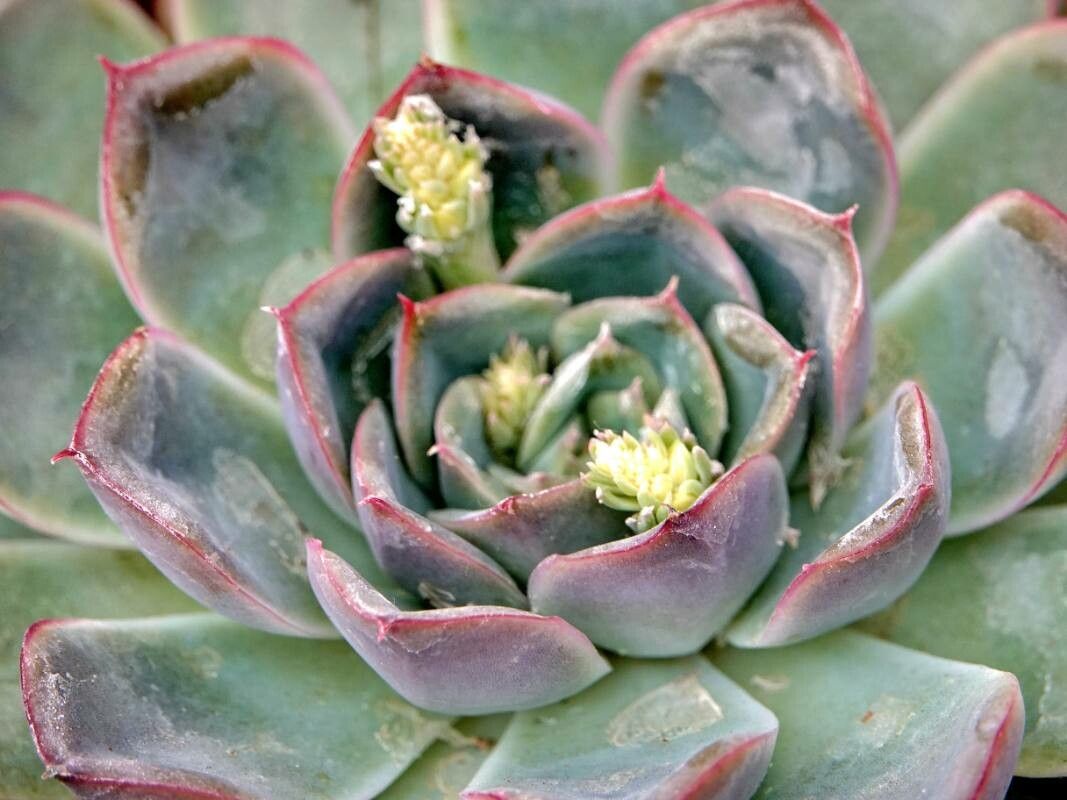
Oh, hello there, fellow plant lover! Grab a mug of your favorite warm drink. Today, we’re diving into the delightful world of propagating Echeveria colorata. If you’ve ever admired those stunning rosettes, with their powdery blue-green leaves and often vibrant pinkish edges, you know how captivating they are. And guess what? You can create more of these little beauties yourself! Don’t worry if you’re just starting out; propagating Echeveria colorata is quite accessible, especially with a few pointers from my two decades in the garden. It’s a truly rewarding experience to watch a tiny leaf unfurl into a brand new plant.
The Best Time to Start
Timing is everything, isn’t it? For Echeveria colorata, the sweet spot is definitely spring or early summer. This is when the plant is actively growing and has the most energy to put into developing new roots. You’ll see lots of new growth on your established plant, which means it’s raring to go. Trying to propagate when it’s dormant in winter or during extreme heat just won’t give you the best results.
Supplies You’ll Need
Here’s what you’ll want to have on hand for a smooth propagation session:
- Well-draining succulent or cactus potting mix: This is non-negotiable! If you don’t have a commercial mix, I find a good ratio is 2 parts potting soil to 1 part perlite or pumice.
- Sharp, clean pruning shears or a sharp knife: For making clean cuts.
- A small trowel or spoon: For nestling cuttings into soil.
- Optional: Rooting hormone powder or liquid: This can give your cuttings a little boost, but it’s not strictly necessary for Echeveria colorata.
- A spray bottle with water: For gently misting.
- Small pots or trays: For your new propagations. Old yogurt cups with drainage holes poked in the bottom work great too!
- Labels: To keep track of what you’ve planted and when.
Propagation Methods
Echeveria colorata is wonderfully versatile. Here are my go-to methods:
1. Leaf Propagation
This is my absolute favorite for Echeveria colorata! It’s so neat to see a whole new plant emerge from just a single leaf.
- Select healthy leaves: Gently twist a healthy leaf from the mother plant. Make sure you get the entire leaf base, including that little bit of stem tissue it connects to. This is crucial! If it tears or doesn’t come off cleanly, try again.
- Let it callus: Lay the leaves on a dry paper towel in a well-lit spot, out of direct sun, for about 2-5 days. You want the cut end to dry and form a callus. This prevents rot.
- Place on soil: Once callused, lay the leaves on top of your prepared, dry succulent mix in a tray or pot. The callused end should be lightly touching the soil. You can also gently press the callused end into the soil.
- Wait and mist: Place the tray in a bright location, but again, avoid direct, hot sun. Wait. Resist the urge to water constantly. You should start to see tiny roots and then a miniature rosette forming from the callused end. Begin misting very lightly once you see those first little roots.
2. Stem Cuttings
This is a faster way to get a larger plant, and it’s perfect if your Echeveria has gotten a bit leggy.
- Make the cut: Using your clean shears or knife, cut a healthy stem section, at least 2-3 inches long, from the mother plant. You can even include a few leaves on the stem.
- Remove lower leaves: Gently strip off the bottom leaves from the cutting, leaving a few at the top. These leaves can be propagated separately (see Leaf Propagation above!).
- Callus time: Just like with leaf cuttings, let the cut end of the stem dry and callus over for about 3-7 days in a bright, indirect light spot.
- Planting: Once callused, insert the callused end of the stem into your well-draining potting mix. You can use a pencil to make a small hole first. Plant it deep enough so it’s stable, usually about an inch or so.
- Water sparingly: After planting, wait a few days before watering. Then, water lightly. You can also put the pot in a tray where the soil can wick up some moisture from the bottom.
The “Secret Sauce” (Pro Tips)
Here are a couple of little tricks from my own garden:
- Don’t let leaves touch the water: If you ever find yourself propagating in water (I don’t recommend it as much for Echeveria unless desperate), make sure absolutely no part of the leaf is submerged in water. Only the very tip where the roots will come from. Waterlogged leaves will just rot.
- Bottom heat is your friend: For stem cuttings, especially if the weather isn’t consistently warm, placing the pot on a seedling heat mat set to a low temperature (around 70-75°F) can significantly speed up root development. It mimics that lovely spring warmth.
- Be patient with the parent plant: After you take cuttings, give the mother plant a little time to recover. She might look a bit bare for a short while, but she’ll bounce back with new growth.
Aftercare & Troubleshooting
Once you see roots emerging and a tiny new rosette forming, you’re on the right track!
- Watering: For leaf propagations, continue to mist very lightly when the soil surface feels dry. For stem cuttings, water when the top inch of soil is dry. As the new plant grows larger, you can transition to your regular Echeveria watering schedule: water thoroughly when the soil is completely dry, and then let it dry out again.
- Light: Keep your new propagations in bright, indirect light. As they establish, you can gradually introduce them to more direct sun, but always watch for signs of scorching during intense heat.
- Troubleshooting: The most common issue is rot. If a leaf or cutting turns mushy, black, or slimy, it’s usually a sign of too much moisture or insufficient drainage. Unfortunately, rotted pieces are usually lost. To prevent this, always use that well-draining soil and be judicious with watering, especially when roots are forming. Another sign of failure is if the leaf or cutting just dries up and shrivels without any root or new growth formation – this might indicate it didn’t have a good callus, or the environment was too dry.
A Bit of Encouragement
Propagating plants is a journey, not a race. Some leaves might surprise you, while others might not make it. Don’t get discouraged! Each attempt is a learning opportunity. Enjoy the quiet satisfaction of coaxing new life from a simple leaf or stem. Happy propagating, and may your new Echeveria colorata rosettes be plentiful!
Resource:
https://identify.plantnet.org/k-world-flora/species/Echeveria%20colorata%20E.Walther/data