Hello, plant lovers! It’s so good to have you here. Today, we’re going to talk about a truly special plant: Fumaria bicolor.
My Two Cents on Fumaria bicolor
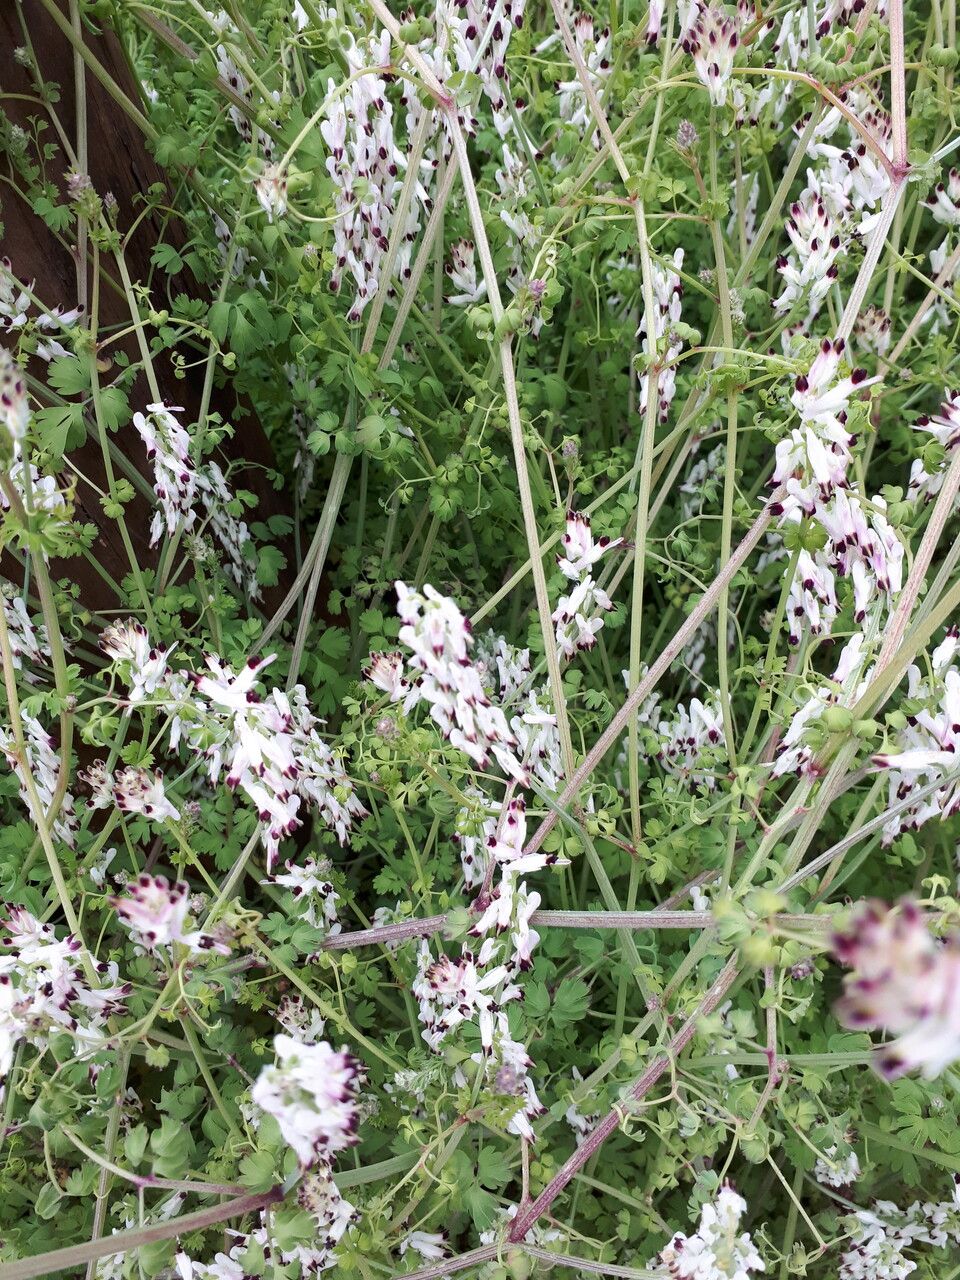
Oh, Fumaria bicolor! This little gem is just delightful. Its delicate, often vibrantly colored flowers and dainty foliage bring such a whimsical charm to any nook of the garden. Growing your own from cuttings or divisions is incredibly satisfying. You get to witness that miracle of life firsthand, multiplying your joy for pennies! For those just starting out, I’d say propagating Fumaria bicolor falls into the moderately easy category. It’s not quite as foolproof as a spider plant, but with a little attention, you’ll be rewarded.
When is the Time Right?
For the best chance of success with Fumaria bicolor, I find that late spring to early summer is your golden window. This is when the plant is actively growing, meaning it has plenty of energy to put into developing new roots. Aim for after the last frost, when things are warming up nicely but before the intense heat of mid-summer sets in.
What You’ll Want in Your Toolkit
To get your propagation station ready, gather these essentials:
- Sharp pruning shears or a clean knife: For making clean cuts.
- Rooting hormone (optional but recommended): Helps give cuttings a helpful boost.
- Well-draining potting mix: A blend of equal parts peat moss, perlite, and compost works beautifully.
- Small pots or trays: Clean containers with drainage holes are a must.
- A misting bottle: For keeping delicate cuttings hydrated.
- Plastic bags or a propagation dome: To create a humid environment.
- Labeling stakes and a pen: To keep track of what you’ve planted!
Getting Your Fumaria bicolor Growing
There are a couple of ways we can coax new life from our existing plants. Let’s explore them!
Method 1: Stem Cuttings – The Speedy Route
This is my go-to for a quick expansion.
- Find a healthy stem. Look for a piece that’s not flowering but has plenty of lush, green growth. About 4-6 inches long is ideal.
- Make a clean cut. Just below a leaf node (where a leaf attaches to the stem) is the best spot.
- Remove lower leaves. Pinch off any leaves from the bottom half of your cutting. This prevents them from rotting in the soil.
- Dip in rooting hormone. If you’re using it, give the cut end a quick dip. Tap off any excess.
- Pop it in soil. Make a small hole in your prepared potting mix and gently insert the cutting. Firm the soil around it.
- Water lightly. Give the soil a gentle watering. You don’t want it soggy, just nicely moist.
- Create humidity. Cover the pot with a plastic bag or propagation dome. Keep it out of direct sun.
Method 2: Division – For the Established Beauty
If your Fumaria bicolor has become a generous clump, it’s probably time to divide it.
- Gently dig up the plant. Carefully excavate the entire root ball from its pot or the ground.
- Inspect the roots. Gently brush away excess soil to see how the root system is structured.
- Divide the clump. You can often tease the roots apart with your fingers. If they’re stubborn, use your clean knife or pruning shears to make a cut, ensuring each section has both roots and some leafy growth.
- Replant immediately. Pot up your divisions into fresh, moist potting mix.
- Water well. Give them a good soak after planting.
The “Secret Sauce” from My Well-Worn Notebook
Here are a few little tricks I’ve picked up over the years:
- The Bottom Heat Trick: For cuttings, placing your pots on a gentle warming mat can make a world of difference. It encourages roots to form faster because the soil temperature is consistently higher. Just make sure it’s not too hot!
- Don’t Let Them Drown! When you’re misting your cuttings, or if you’re doing water propagation (which I find less reliable for Fumaria bicolor), make sure no leaves are touching the water or very damp soil. This is a fast track to rot.
- Cleanliness is King (or Queen!): Always, always use clean tools and pots. This is the single most important step to prevent disease from taking hold when your new plants are most vulnerable.
Nurturing Your New Sprouts and What to Watch For
Once you see those lovely little roots! For cuttings, this usually takes a few weeks to a couple of months. You’ll know they’re ready when you gently tug on them and feel resistance, or when you see new growth at the top. Start by acclimating them slowly to normal humidity by gradually lifting the plastic cover for longer periods. Water when the top inch of soil feels dry.
If things go south, don’t despair. The most common culprit for failure is rot. This usually looks like mushy, black stems or leaves. It’s often a sign of too much moisture and not enough air circulation. If you see it, sadly, it’s best to discard the affected cutting to prevent it from spreading. Sometimes, no roots form at all. This can happen if the cutting wasn’t healthy to begin with, the conditions weren’t quite right, or the rooting hormone didn’t take.
Keep Growing, Keep Enjoying!
Propagating plants a bit like planting a tiny seed of hope. Be patient with your Fumaria bicolor cuttings. Nature has its own timeline, and the joy of nurturing a new plant from something so small is truly profound. Happy propagating!
Resource:
https://identify.plantnet.org/k-world-flora/species/Fumaria%20bicolor%20Sommier%20ex%20Nicotra/data