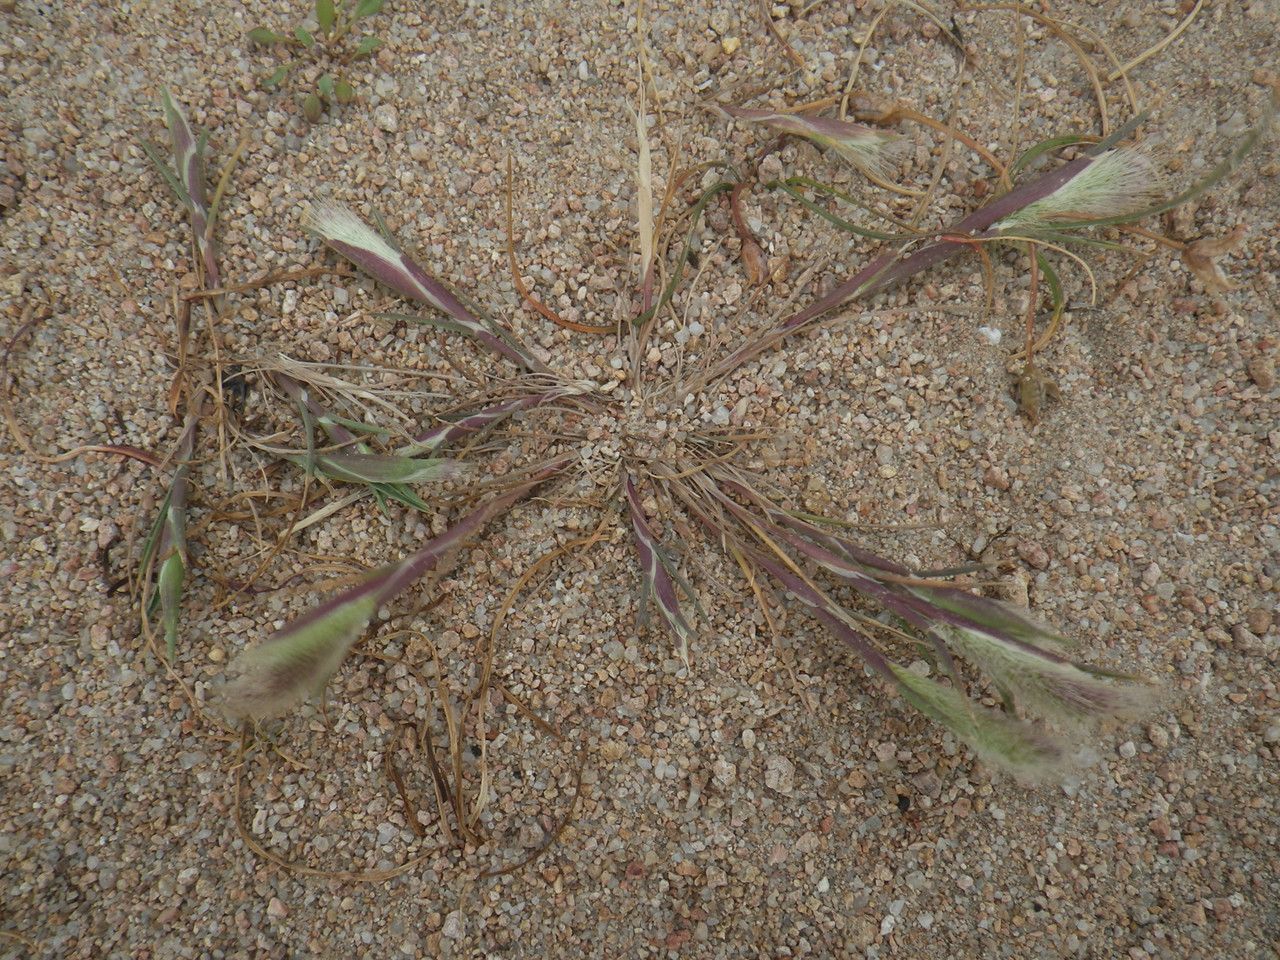
Hello, garden friends! I’m so excited to chat with you today about a grass that truly captures my heart – Polypogon subspathaceus. You might know it better by its common name, perhaps something like “Felted Rabbitsfoot Grass” or similar. Its delicate, fuzzy inflorescences are just darling, like tiny wands of softest wool swaying in the breeze. And the way it catches the light in late afternoon? Pure magic!
If you’re looking to expand your collection of these beauties, or perhaps share them with fellow plant lovers, propagating them is a wonderfully rewarding endeavor. And the good news? For those of you just dipping your toes into the world of plant propagation, Polypogon subspathaceus is generally quite forgiving. You’ll likely find success with these easy-to-follow steps.
The Best Time to Start
For the highest chance of success, I always recommend starting your propagation efforts in late spring or early summer. This is when the plant is actively growing and has plenty of energy to dedicate to developing new roots. You’ll be working with healthy, vigorous material then.
Supplies You’ll Need
To get your Polypogon subspathaceus cuttings off to a great start, gather these essentials:
- Sharp, clean pruning shears or a sharp knife: Essential for making clean cuts and preventing disease.
- A well-draining potting mix: I find a blend of peat moss or coco coir, perlite, and a bit of compost works beautifully.
- Small pots or seed trays: Clean ones, please! Sterilizing them with a dilute bleach solution is a great habit to get into.
- Rooting hormone (optional but recommended): A good quality powder or gel will give your cuttings a significant boost.
- Plastic bags or a propagator: To create a humid environment for your cuttings.
- Watering can or mister: For gentle hydration.
- Labels and a marker: To keep track of your precious new plants!
Propagation Methods
Let’s get our hands dirty! The most reliable way to propagate Polypogon subspathaceus is through stem cuttings.
- Select Your Cuttings: Look for healthy, non-flowering stems on your mature plant. Choose stems that are about 4-6 inches long and have at least a few sets of leaves. It’s best to take these in the morning after the dew has dried, but before the heat of the day.
- Make the Cut: Using your sharp pruning shears or knife, make a clean cut just below a leaf node (that little bump where a leaf emerges from the stem). This is where the plant’s magic happens for rooting.
- Prepare the Cuttings: Gently remove the lower leaves from about an inch or two of the stem. You want to make sure these won’t be submerged in your potting mix or water, as they’ll just rot.
- Apply Rooting Hormone (Optional): If you’re using rooting hormone, dip the cut end of the stem into the powder or gel. Tap off any excess.
- Plant Your Cuttings: Fill your small pots or trays with your prepared potting mix. Make a small hole with your finger or a pencil and gently insert the prepared cutting. Firm the soil gently around the base.
- Water Gently: Water your cuttings thoroughly but gently. You don’t want to blast the soil away! A fine mist from your watering can or a mister works great.
- Create a Humid Environment: This is key! Cover the pots with a plastic bag or place them in a propagator. This traps moisture and creates the humid environment that cuttings crave. Make sure the leaves aren’t touching the plastic if possible. Open the bag or lid for a few minutes each day to allow for air circulation and prevent fungal issues.
The “Secret Sauce” (Pro Tips)
Here are a few little tricks I’ve picked up over the years that can really make a difference:
- Bottom Heat Works Wonders: If you can, place your pots on a gentle heat mat. This little bit of warmth from below encourages root development much faster than ambient room temperature alone. It’s like a warm hug for your cuttings!
- Don’t Overwater Your Cuttings: While humidity is important, soggy soil is the enemy of new cuttings. Allow the top inch of soil to dry out slightly between waterings. You’ll get a feel for it with practice.
- The Perfect Potting Mix Ratio: For grasses like Polypogon, I find a slightly coarser mix than I might use for fleshy succulents. A ratio of 2 parts potting soil, 1 part perlite, and 1 part coco coir provides excellent drainage and aeration, which is crucial for preventing rot.
Aftercare & Troubleshooting
Once you see new leaf growth, that’s a good sign! It means your cuttings are likely developing roots. You can gently tug on a cutting to feel for resistance; that’s your indication of rooting.
- Acclimatizing: When roots are established (usually after several weeks), you can start to gradually acclimate your new plants to drier air. Remove the plastic bag for longer periods each day.
- Repotting: Once they have a good root system, you can carefully transplant them into slightly larger pots with fresh potting mix. Treat them like young, delicate plants at this stage.
Now, sometimes things don’t go as planned. The most common issue you might encounter is rot. If your cuttings turn black and mushy, it’s usually a sign of too much moisture and poor air circulation. Don’t be discouraged! It happens to the best of us. Just discard the rotted cuttings and try again, perhaps adjusting your watering or ensuring better air flow. Yellowing leaves can also indicate too much or too little water, or even a lack of light.
A Encouraging Closing
Growing new plants from cuttings is such a rewarding part of gardening. It’s a chance to connect with nature’s incredible ability to renew and multiply. Be patient with your Polypogon subspathaceus cuttings, trust the process, and enjoy the journey of watching them grow. Happy propagating!
Resource:
https://identify.plantnet.org/k-world-flora/species/Polypogon%20subspathaceus%20Req./data