Alright, my fellow garden enthusiasts! Grab your mug of something warm, pull up a chair, and let’s chat about a truly fascinating plant: Pereskiopsis kellermanii.
Why You’ll Love Propagating Pereskiopsis
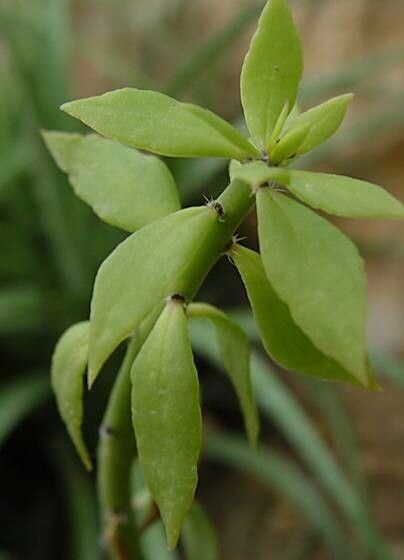
If you’re looking for a plant that’s a bit unusual, a little surprising, and surprisingly rewarding to grow from, then Pereskiopsis kellermanii is for you. It’s one of those fascinating cactuses that actually has true leaves, giving it a lush, almost vine-like appearance. And the best part? Propagating it is a fantastic way to share a piece of your garden or simply grow more of this unique beauty for yourself. For beginners, I’d say it’s a solid intermediate plant. It’s not a guaranteed success on the first try, but with a little attention, you’ll be rewarded with new plants.
The Sweet Spot for Starting
The absolute best time to get your propagation party started is during the active growing season. Think late spring through summer. The plant is full of vigor then, and cuttings will have the best chance of establishing roots quickly. You want to take cuttings from healthy, mature stems that aren’t currently in bloom.
What You’ll Need to Get Going
Here’s a little toolbox of goodies to have on hand:
- Sharp pruning shears or a clean knife: For making clean cuts.
- Perlite and potting soil (or a specialized cactus mix): We want excellent drainage!
- Rooting hormone (optional but recommended): A little boost never hurts.
- Small pots or containers: For your new baby plants.
- Watering can with a fine rose or a spray bottle: Gentle watering is key.
- A warm spot with bright, indirect light: This is crucial for root development.
Let’s Get Our Hands Dirty: Propagation Methods
Pereskiopsis kellermanii is wonderfully versatile, and stem cuttings are the most straightforward and successful method.
Stem Cuttings:
- Choose Your Cuttings: Select a healthy stem, about 4-6 inches long. Look for one that’s not too woody but also not too soft and new.
- Make the Cut: Using your sharp pruning shears or knife, make a clean cut just below a leaf node (where a leaf attaches to the stem). This is where the magic of rooting happens!
- Let It Callus: This is a vital step for cacti! Place your cuttings in a dry, airy spot for a few days to a week. You’ll see the cut end dry out and form a callus. This prevents rot. Don’t skip this!
- Prepare the Soil: Mix your perlite and potting soil thoroughly. You want a very light, fast-draining mix.
- Planting Time: Gently dip the callused end of the cutting into your rooting hormone (if using). Then, insert the cutting about an inch or two into the prepared soil mix. Make sure it’s stable.
- Initial Watering: Water very lightly. The goal is to moisten the soil, not soak it. You can use a spray bottle to mist the surface.
Water Propagation (with a twist!)
While I generally prefer soil for cacti, you can start them in water, but you have to be vigilant.
- Prepare the Cutting: Same as steps 1-3 above – make the cut and let it callus.
- The Water Jar: Fill a clean glass jar with fresh water.
- The Crucial Detail: DO NOT let the cut end of the stem touch the water. You can suspend the cutting so that only the very bottom of the stem (above the healing callus) is just above the water line. The moisture in the air will encourage root growth.
- Placement: Place the jar in bright, indirect light.
- Water Changes: Change the water every few days to keep it fresh and prevent bacterial growth.
The “Secret Sauce” for Stellar Success
Here are a few things I’ve learned over the years that make a real difference:
- Warm Toes are Happy Toes: I always put my planted cuttings on a propagation mat or in a warm location. Bottom heat really encourages roots to form. It’s like a cozy little incubator for your new plants.
- Patience is a Virtue (Especially with Cacti!): Don’t be tempted to yank your cutting out to check for roots every other day. It can disturb delicate new growth. Give it at least 3-4 weeks, and often longer, before you gently tug to feel for resistance.
- Mimic Their Natural Environment: Pereskiopsis comes from areas with distinct wet and dry seasons. So, after the initial light watering, let the soil dry out considerably between waterings. It’s better to err on the side of underwatering than overwatering when roots are forming.
Aftercare and What to Watch For
Once you’ve established that magical moment where your cutting shows signs of rooting (a gentle tug reveals resistance, or you might even see tiny root nubs if you carefully peek), it’s time to treat it a little more like a mature plant.
- Watering: Start watering more regularly, but always let the soil dry out between waterings. You’ll get a feel for it. The leaves will plump up when they’re happy.
- Light: Gradually introduce your new plant to brighter light. Avoid intense, direct sun right away, as it can scorch tender new growth.
- Potting Up: When your plant is visibly growing and the roots have filled its initial pot, you can transplant it into a slightly larger pot with fresh, well-draining soil.
Troubleshooting – Signs of Trouble:
The biggest enemy of cuttings is rot. If you see your stem turning mushy, dark, and smelly, that’s a sure sign of overwatering or failure to callus properly. Unfortunately, if rot sets in, it’s usually beyond saving. The best thing to do is discard the affected cutting to prevent it from spreading and try again with a new one, paying close attention to the callusing step.
Digging In and Enjoying the Journey
Propagating Pereskiopsis kellermanii is a wonderfully satisfying endeavor. It might take a little patience, and you might have a cutting or two that doesn’t make it, but the joy of seeing those first tiny roots emerge and then a new plant unfurl is truly special. So, give it a try! Enjoy the process, and before you know it, you’ll have a whole collection of these leafy cacti to admire. Happy gardening!
Resource:
https://identify.plantnet.org/k-world-flora/species/Pereskiopsis%20kellermanii%20Rose/data