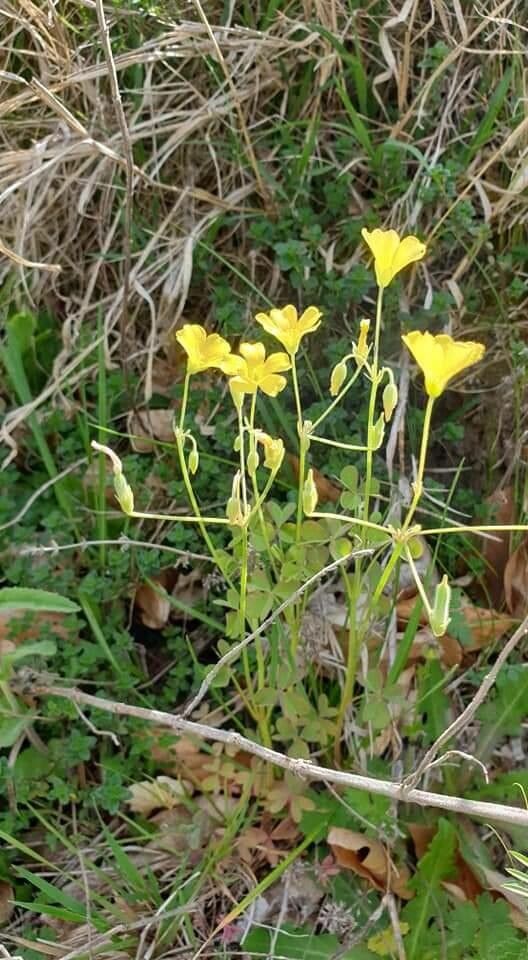
Hello, fellow plant lovers! I’m so excited to chat with you today about a plant that truly brings a smile to my face: Oxalis macrantha. You might know it as the “large-flowered wood sorrel,” and if you don’t yet, you’re in for a treat! Its delicate, clover-like leaves and vibrant, often whimsical flowers are just pure garden joy. And the best part? It’s surprisingly easy to share its beauty! If you’re new to the propagation game, this is a fantastic plant to start with. You’ll be amazed at how rewarding it is to watch a tiny piece of your beloved plant grow into its own thriving individual.
The Best Time to Start
My favorite time to get busy propagating Oxalis macrantha is during its active growth period. For most of us, this means spring and early summer. You’ll see new shoots really taking off, and the plant will have plenty of energy to spare for creating new life. Avoid trying to propagate when the plant is dormant or stressed.
Supplies You’ll Need
Gathering your tools beforehand makes the whole process so much smoother. Here’s what I usually have on hand:
- Small pots or seed trays: Clean ones, to prevent any yucky diseases from hitching a ride.
- Well-draining potting mix: I like a blend of seed-starting mix and a bit of perlite for extra aeration.
- Sharp pruning shears or a clean knife: For making clean cuts.
- Rooting hormone (optional, but helpful): A powdered or gel form can give your cuttings a nice boost.
- Watering can with a fine rose: For gentle watering.
- Plastic bags or a clear propagation dome: To create a humid environment.
- A sunny windowsill or grow light: Indirect bright light is perfect.
- Spray bottle: For misting.
Propagation Methods
Oxalis macrantha is quite forgiving, and I’ve had success with a couple of different methods.
Stem Cuttings
This is my go-to for multiplying my Oxalis collection.
- Select your stems: Look for healthy, non-flowering stems that are at least 4-6 inches long. You want them to be firm, not woody or too soft.
- Make the cut: Using your sharp pruning shears or knife, make a clean cut just below a leaf node (where the leaf attaches to the stem).
- Prepare the cutting: Gently remove the lower leaves, leaving just a couple at the top. This helps prevent them from rotting in the soil.
- Apply rooting hormone (optional): Dip the cut end of the stem into your rooting hormone. Tap off any excess.
- Plant the cuttings: Fill your small pots with the moistened potting mix. Make a small hole with your finger or a pencil and gently insert the cutting.
- Firm the soil: Lightly firm the soil around the base of the cutting to ensure good contact.
- Water gently: Water the pot thoroughly but gently, allowing excess water to drain away.
- Create humidity: Place the pot inside a plastic bag or cover it with a propagation dome. Ensure the leaves don’t touch the plastic if using a bag. You can prop the bag up with a few sticks if needed.
- Provide light: Place the pot in a spot with bright, indirect light. Avoid direct sun, which can scorch the delicate cuttings.
Division
This is a great method if your Oxalis has become a bit crowded in its pot.
- Gently unpot: Carefully remove your Oxalis from its current pot.
- Inspect the root ball: You’ll likely see clumps of roots and possibly small bulbs or rhizomes.
- Separate the clumps: Gently tease apart the root ball with your fingers. You want to separate it into smaller sections, each with enough roots and at least one healthy shoot or bud. Don’t worry if some roots break; they’ll grow back.
- Pot the divisions: Plant each division in its own small pot filled with well-draining potting mix, burying the roots and ensuring the top of the rhizomes or bulbs are just covered.
- Water and place: Water gently and place in bright, indirect light.
The “Secret Sauce”
Now, for a couple of little tricks I’ve learned over the years that can really make a difference:
- Don’t let those lower leaves touch the water (if water propagating): While I’ve opted for soil propagation here, if you ever try water propagation for other plants, remember this golden rule! Any submerged leaves will just rot and can sadly infect the rest of your cutting.
- Bottom heat is a game-changer: If you have a seedling heat mat, using it under your pots of cuttings can significantly speed up root development. It mimics the warmth of spring soil and gives your little ones a real head start. Just make sure the soil isn’t getting too hot – you don’t want to cook them!
Aftercare & Troubleshooting
Once your cuttings have rooted (you can gently tug on them; if there’s resistance, they’ve got roots!), it’s time to give them a little extra love.
- Gradually introduce to normal conditions: If your cuttings were in a humid bag, slowly open it up over a few days to acclimate them.
- Watering: Keep the soil consistently moist, but not waterlogged. Allow the top inch of soil to dry out slightly between waterings.
- Light: Continue to provide bright, indirect light.
- Fertilizing: Once you see new, healthy growth, you can start feeding them with a diluted liquid fertilizer every 4-6 weeks during the growing season.
The most common issue you might encounter is rot. This usually happens from overwatering or poor drainage. If you see a cutting going mushy and black, it’s best to remove it immediately to prevent it from spreading to other cuttings. Sometimes, a cutting just doesn’t take; that’s okay! Don’t get discouraged. Nature sometimes has its own schedule.
A Encouraging Closing
Propagation is a journey, not a race. Be patient with your new Oxalis babies. Celebrate the small victories—a new leaf unfurling, a stronger stem. The process of nurturing new life is one of the most profound joys of gardening. So grab your shears, get your hands in the soil, and enjoy the magic of watching your Oxalis macrantha flourish and multiply! Happy propagating!
Resource:
https://identify.plantnet.org/k-world-flora/species/Oxalis%20macrantha%20(Trel.)%20Small/data