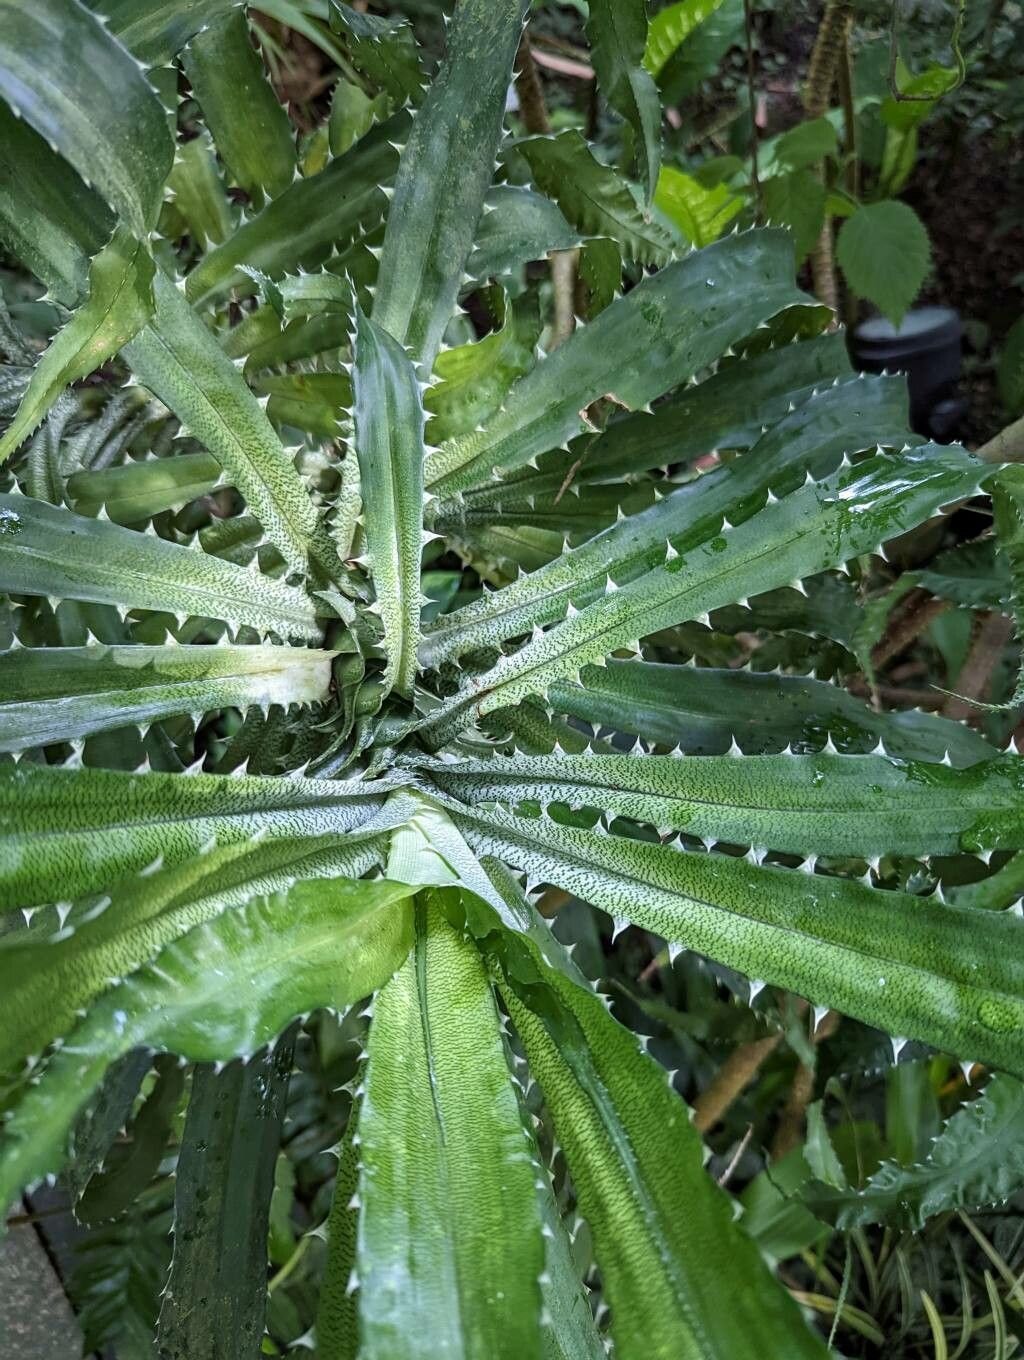
Oh, Pandanus pristis! If you’re anything like me, you’ve been captivated by its spiky, architectural beauty. Those long, strappy leaves, often with those wonderfully jagged edges, bring such a dramatic flair to any space, whether it’s indoors or out in a warm climate. Plus, the satisfaction of watching a new plant sprout from a piece of an old one? Pure gardening joy. Propagating this beauty is definitely a journey worth taking, and I think you’ll find it surprisingly accessible, even if you’re just dipping your toes into plant propagation.
The Best Time to Start
When it comes to Pandanus, think active growth. This usually means spring and summer here in my corner of the world. The plant is buzzing with energy then, making it much more likely to throw out new roots and get settled. Trying to propagate when the plant is a bit sleepy, say in the heart of winter, can make the process feel like pulling teeth. So, let’s aim for when the sun is shining and everything’s waking up!
Supplies You’ll Need
Gathering your tools beforehand makes the whole process smoother. Here’s what I usually have on hand:
- Sharp Pruning Shears or a Knife: Clean cuts are key!
- Well-Draining Potting Mix: I like a mix of regular potting soil with added perlite or coarse sand. A cactus/succulent mix works wonders too.
- Small Pots or Containers: Enough to give your new babies a home. Make sure they have drainage holes!
- Rooting Hormone (Optional but Recommended): This can give your cuttings a real boost.
- Watering Can or Spray Bottle: For gentle watering.
- Plastic Bag or Propagator (Optional): To create a humid environment.
Propagation Methods
Pandanus pristis is a plant that’s quite happy to be divided. It’s usually done by taking off offset pups or making stem cuttings.
Offsets (Pups)
This is often the easiest route. You’ll notice small plantlets, or “pups,” emerging from the base of your main Pandanus.
- Inspect the Mother Plant: Gently clear away some soil from the base of the pup. Look for where it’s attached to the parent plant. You want to see if it has any roots already.
- Make the Cut: Using your clean shears or knife, carefully cut the pup away from the mother plant, trying to get as much of its own root system as possible. If there are no visible roots, don’t fret too much, it’ll grow them!
- Callus Over: Let the cut end air dry for a day or two in a dry spot. This helps to form a callus, preventing rot.
- Potting Up: Fill your small pot with your well-draining mix. Make a small divot in the center and plant the pup, ensuring the cut end is buried. Water gently.
- Placement: Keep it in a warm spot with bright, indirect light.
Stem Cuttings
If your Pandanus is a bit leggy or you want to propagate from higher up the stem, this is the way to go.
- Select a Healthy Stem: Choose a healthy, mature stem that’s at least a few inches long. You’re looking for a piece that has at least a couple of leaf nodes on it.
- Make the Cut: Using your sharp shears, make a clean cut below a leaf node. Remove any lower leaves, leaving just a couple at the top.
- Callus Over: Similar to the pups, let the cut end air dry for a day or two to develop a callus.
- Rooting Hormone (Optional): Dip the callused end into rooting hormone, tapping off any excess.
- Planting: Fill a small pot with your well-draining mix and make a hole for the cutting. Insert the cutting, ensuring the node(s) are buried. Gently firm the soil around it.
- Water: Water the soil lightly.
- Humidity: You can cover the pot loosely with a plastic bag or put it in a propagator to retain humidity. Make sure the leaves don’t touch the inside of the bag.
The “Secret Sauce” (Pro Tips)
Now for a couple of things I’ve learned over the years that make a real difference:
- Bottom Heat is Your Friend: Pandanus, like many tropical plants, absolutely adores warmth from below. If you can, placing your pots on a heating mat designed for seedlings will dramatically speed up root formation. It’s like giving them a warm hug from the soil up!
- Don’t Drown Your Efforts: This is a big one. When propagating, it’s very easy to overwater, which leads to rot before roots even have a chance to form. Water only when the top inch of soil feels dry, and err on the side of slightly too dry rather than too wet. Good drainage is your best defense here.
Aftercare & Troubleshooting
Once you see signs of new growth – a little shoot appearing or the leaves looking perkier – you know roots are forming!
- Gradual Acclimation: If you used a plastic bag for humidity, slowly start to introduce your new plant to the normal air. Open the bag a little more each day for a few days.
- Light: Continue to provide bright, indirect light. Avoid direct, hot sun, as it can scorch those tender new leaves.
- Watering: Water consistently, but let the soil dry out slightly between waterings. You’ll get a feel for this as you get to know your plant.
- Troubleshooting: The most common issue you’ll face is rot. If your cutting or pup starts to look mushy or turns black and soft, it’s likely rot. This is usually a sign of too much moisture and not enough airflow. If you catch it early, you might be able to salvage it by cutting away the rotten parts and letting the remaining healthy bit callus before trying again, but it’s often a sign to start over with fresh material and a drier approach.
A Gentle Nudge Forward
There you have it, a little peek into the world of propagating your own Pandanus pristis. Remember, patience is a gardener’s best virtue. Not every cutting will make it, and that’s perfectly normal! Each attempt is a learning experience. So, get your hands dirty, have some fun, and enjoy the thrill of watching new life emerge. Happy propagating!
Resource:
https://identify.plantnet.org/k-world-flora/species/Pandanus%20pristis%20B.C.Stone/data