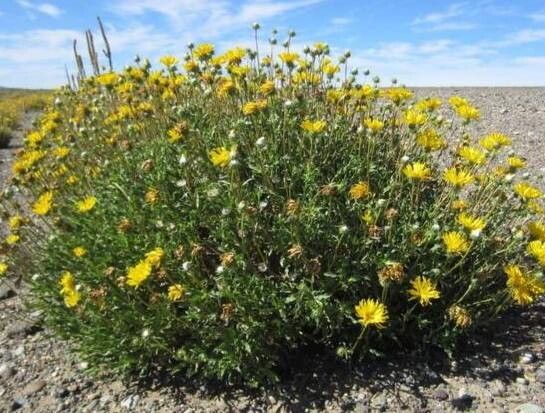
Hello there, fellow garden enthusiasts! Today, we’re going to dive into something truly special: propagating Grindelia chiloensis, also known as Chilean gumweed. I’ve always been drawn to this sturdy, sunny native. It’s a fantastic plant for attracting pollinators with its cheerful yellow blooms, and once you get it established, it’s remarkably low-maintenance. Plus, there’s a unique satisfaction in being able to create more of your favorite plants from just a few parent specimens! For those of you just starting your plant propagation journey, I’d say Grindelia chiloensis is a moderately easy plant to work with. A little bit of attention and a few key steps, and you’ll be well on your way.
The Best Time to Start
My personal sweet spot for propagating Grindelia chiloensis is usually in late spring or early summer, right when the plant is actively growing and shaking off winter’s dormancy. You’re looking for actively growing, non-flowering stems. If your plant is already sporting a lot of blooms, you might want to wait a bit until it finishes flowering or until you can find those promising, fresh shoots.
Supplies You’ll Need
Gathering your supplies beforehand makes the whole process so much smoother. Here’s what I usually have on hand:
- Sharp Pruning Shears or a Craft Knife: Clean cuts are essential for preventing disease.
- Rooting Hormone (Optional, but recommended): A good quality rooting powder or gel can really speed things up.
- Well-Draining Potting Mix: I often use a 50/50 blend of seed-starting mix and perlite or horticultural grit. This ensures good aeration.
- Small Pots or Trays: Clean containers are a must! You can even reuse clean yogurt pots with drainage holes poked in the bottom.
- Watering Can or Spray Bottle: For gentle watering.
- Plastic Bags or a Propagator: To create a humid environment for your cuttings.
- Labels and a Pen: To keep track of what you’ve planted!
Propagation Methods
Grindelia chiloensis is wonderfully amenable to propagation by stem cuttings. It’s my go-to method for this plant.
- Take Your Cuttings: Using your clean shears or knife, take 6-8 inch cuttings from healthy, non-flowering stems. Make your cut just below a leaf node (where a leaf attaches to the stem). Remove the lower leaves, leaving just a few at the top.
- Apply Rooting Hormone (If Using): Dip the cut end of each cutting into your rooting hormone, tapping off any excess. This step isn’t strictly necessary for Grindelia but I find it gives the cuttings a helpful boost.
- Pot Them Up: Fill your small pots or trays with your well-draining potting mix. Make little holes in the soil with your finger or a pencil. Gently insert the base of each cutting into a hole, making sure the leaf nodes that were buried are actually making contact with the soil.
- Water Gently: Water the soil thoroughly but gently. You don’t want to dislodge the cuttings.
- Create Humidity: This is key! Cover the pots with a clear plastic bag, making sure the leaves don’t touch the plastic if possible. You can use stakes to prop it up. Alternatively, place the pots inside a propagator. This creates a humid mini-greenhouse effect, which helps the cuttings retain moisture and encourages root development.
- Provide Light: Place your pots in a bright location, but out of direct, intense sunlight. A bright windowsill or a spot in a greenhouse or polytunnel is ideal.
The “Secret Sauce” (Pro Tips)
Here are a couple of things I’ve learned over the years that make a big difference:
- Don’t Let the Leaves Touch the Water (If Water Propagating): While I prefer soil propagation for Grindelia, if you dabble in water propagation (though I don’t recommend it for this particular plant as it can lead to rot), make sure no leaves are submerged. Only the stem should be in the water. Rotting leaves will quickly foul the water and kill your cutting.
- Bottom Heat is Your Friend: If you have a heat mat or can place your propagator on a warm, sunny spot (but not baking hot!), you’ll find that providing gentle bottom heat significantly speeds up root formation. It mimics spring soil temperatures and really encourages those roots to get going.
- Patience with the Parent Plant: Before you even take cuttings, make sure your parent plant is healthy and well-established. A stressed or weak plant will produce weaker cuttings. Give your established plants consistent watering and good light before you start harvesting.
Aftercare & Troubleshooting
Once your cuttings have rooted – you’ll know this when you see new growth or gently tug on a cutting and feel resistance – it’s time for a little more attention.
- Acclimatization: Gradually remove the plastic bag or open the propagator for increasing periods over a week or so. You’re essentially weaning them off the high humidity.
- Transplanting: Once they have a small but sturdy root system, you can carefully transplant them into slightly larger pots with a good quality potting mix.
- Watering: Water them regularly but allow the soil to dry out slightly between waterings. They don’t like to sit in soggy soil.
- Signs of Distress: The most common issue you’ll encounter is rot. If a cutting turns mushy and black, it’s a sign of too much moisture and not enough air circulation. If your cuttings wilt and never show signs of rooting after a few weeks, it could be that they were taken too late in the season, were too woody, or didn’t get enough humidity. Don’t be discouraged if a few don’t make it; that’s part of the gardening dance!
So there you have it! With a little bit of care and attention, you can successfully propagate your own Grindelia chiloensis. Remember to be patient with the process. Nature has its own pace, and the reward of watching those tiny cuttings grow into beautiful, flowering plants is absolutely worth it. Happy propagating, and enjoy those sunny blooms!
Resource: