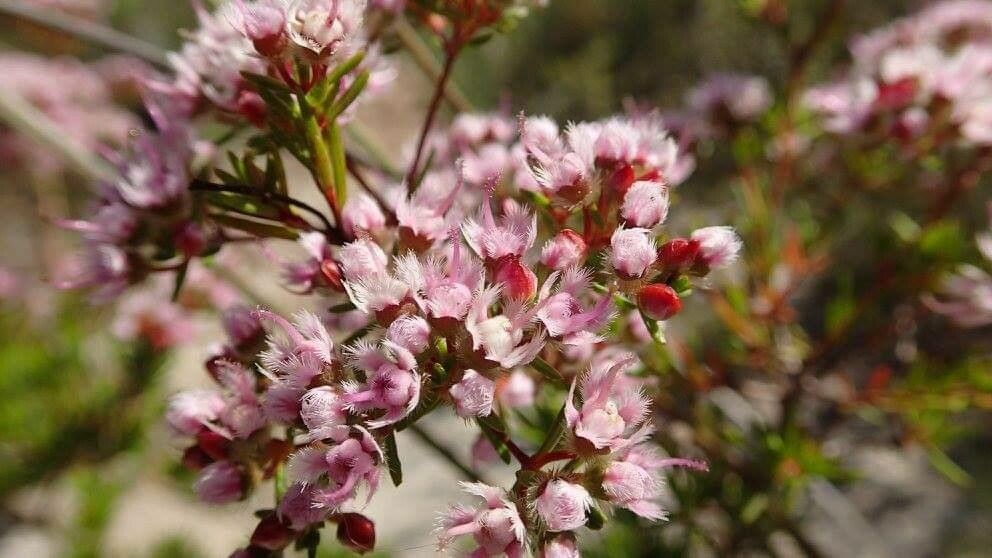
Hey there, plant lovers! Today, we’re diving into the delightful world of propagating Verticordia densiflora, also known as Feather Flowers. If you’ve ever seen these delicate beauties gracing a garden, you know their charm. Their wispy, often vibrant blooms look like miniature fireworks, and I can tell you, nurturing one from a tiny cutting or seed is incredibly satisfying. Now, I won’t sugarcoat it – Verticordia can be a bit of a diva, and propagating them isn’t always a walk in the park. Beginners might find it a tad challenging, but with a little know-how and patience, you can absolutely succeed!
The Best Time to Start
For the highest chance of success with Verticordia, I find that late spring to early summer is your golden window. This is when the plant is actively growing, and cuttings taken during this time tend to root more readily. You want to select stems that are well-established but not woody. Think of them as just past their prime flowering, but still supple and full of life.
Supplies You’ll Need
Gathering your tools beforehand makes the whole process so much smoother. Here’s what you’ll want to have on hand:
- Sharp pruning shears or a clean knife: For taking clean cuts, which is crucial for preventing disease.
- A well-draining potting mix: I usually blend about 50% perlite with 50% peat moss or coco coir. This ensures plenty of aeration for those sensitive roots.
- Rooting hormone: This is a lifesaver for Verticordia. A powder or gel form will work.
- Small pots or seed trays: Clean ones are a must!
- Plastic bags or a propagation dome: To create a humid environment.
- Clean water: For misting.
- Optional: Bottom heat mat: This can really speed up root development.
Propagation Methods
While Verticordia can be grown from seed, stem cuttings are generally my preferred and most reliable method for home gardeners.
Stem Cuttings
This is where the magic happens!
- Select your cutting: With your clean shears, take a tip cutting that is about 4-6 inches long. Look for stems that have started to firm up slightly, but aren’t hard and woody. Remove any flowers or flower buds – they just drain energy from the plant.
- Prepare the cutting: Gently strip off the lower leaves from about half of the cutting. This exposes the nodes where roots will form and prevents leaves from rotting in the potting medium.
- Apply rooting hormone: Dip the cut end of the stem into your rooting hormone, tapping off any excess. This step is really important for encouraging root development.
- Plant the cutting: Fill your small pots with the well-draining mix. Make a small hole with your finger or a pencil and insert the cutting. Gently firm the soil around it.
- Create humidity: Water the pot gently. Then, cover the pot with a clear plastic bag or place it under a propagation dome. This traps moisture and creates that humid microclimate that cuttings adore. Make sure the leaves aren’t touching the sides of the bag if possible.
- Place in bright, indirect light: Find a warm spot that receives plenty of bright, filtered sunlight. Avoid direct sun, as it can scorch the delicate cuttings.
The “Secret Sauce” (Pro Tips)
Here are a few things I’ve learned over the years that can really boost your success with these particular beauties:
- Air circulation is key: Even though we’re creating humidity, too much stagnant air can encourage fungal diseases. Once a day, lift the plastic bag or open the dome for a few minutes to let fresh air in. This is crucial for preventing rot.
- Bottom heat makes a big difference: If you can, pop your pots onto a bottom heat mat set to around 70-75°F (21-24°C). This gentle warmth from below encourages root growth much faster than relying on ambient room temperature alone.
- Don’t disturb them too soon! Resist the urge to pull on your cuttings to check for roots. It can take weeks, sometimes even a couple of months, for Verticordia to establish a strong root system. You’ll know they’re ready when you see new growth appearing.
Aftercare & Troubleshooting
Once you see signs of new growth, that’s your cue! It means roots are forming.
- Gradually acclimate: Once roots are well-established (you can gently tug and feel resistance), slowly begin to harden off your new plants. This means gradually increasing their exposure to open air by opening the bag or dome for longer periods over a week or two.
- Watering: Continue to water gently. The soil should be kept consistently moist but not waterlogged. Overwatering is the fastest way to lose your precious new plants.
- Troubleshooting: The biggest culprit for failure with Verticordia cuttings is rot. If your cuttings turn black and mushy, it’s usually due to too much moisture and not enough air circulation, or the soil is too heavy. If you see signs of rot, unfortunately, it’s best to discard the affected material to prevent it from spreading.
A Little Encouragement
Propagating plants, especially those with a reputation for being a bit fussy, is a journey of learning. Don’t be discouraged if your first few attempts aren’t perfect. Each time you try, you’ll gain valuable experience. Take joy in the process, celebrate every little bit of new growth, and soon you’ll have your own beautiful Verticordia to admire! Happy gardening!
Resource:
https://identify.plantnet.org/k-world-flora/species/Verticordia%20densiflora%20Lindl./data