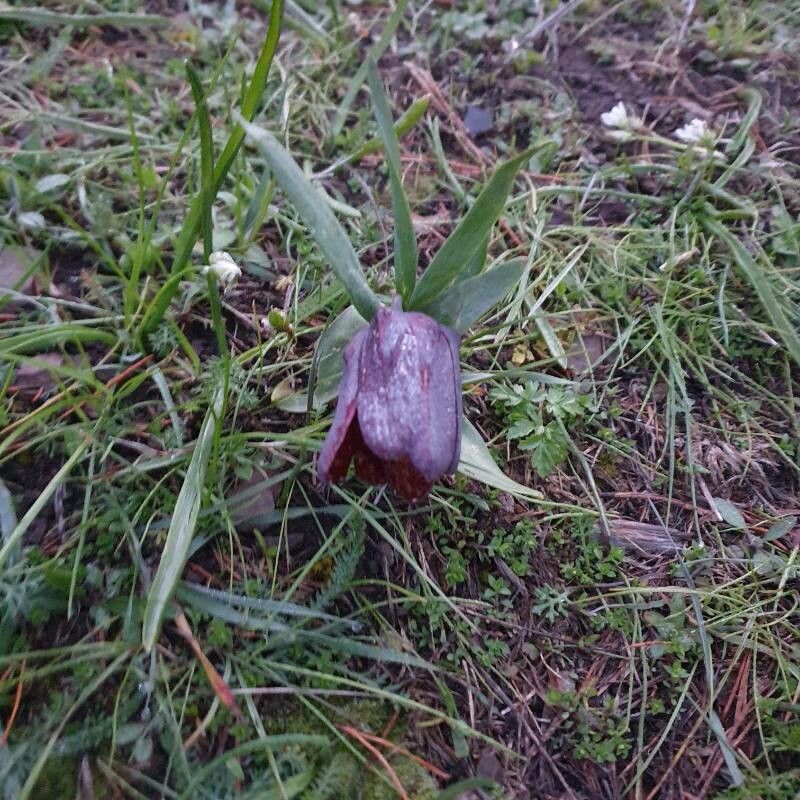
Oh, Fritillaria grandiflora! Those nodding, bell-shaped flowers, often with such lovely intricate markings – they truly are a special sight in the garden. For me, seeing them peek through the spring soil is always a moment of quiet joy. Propagating these beauties can feel a little like unlocking a special secret, and the reward of watching your own little Fritillaria grow from scratch is just wonderful. Now, I won’t sugarcoat it entirely: Fritillaria can be a bit of a discerning lady, and propagating them from seed can be a patient endeavor. However, there are other, more straightforward methods that are quite achievable with a little know-how.
The Best Time to Start
The absolute best time to really get stuck into propagating Fritillaria, especially if you’re looking at dividing bulbs, is just as the plant starts to go dormant in late spring or early summer. You’ll notice the foliage yellowing and dying back. This is your cue! The bulb has finished pouring its energy into flowering and is now consolidating its resources, making it a good time to gently wake it up and see what treasures it might have produced.
Supplies You’ll Need
Gathering your supplies beforehand makes the whole process so much smoother. Think of it like preparing your ingredients before baking a cake! Here’s what I usually have on hand:
- Sharp Pruning Shears or a Clean Knife: For making clean cuts.
- Well-Draining Potting Mix: A mix formulated for bulbs or a blend of equal parts potting soil, perlite, and coarse sand works wonders. You want good airflow around those roots.
- Small Pots or Trays: Clean, with drainage holes, of course!
- Labels: To remind yourself what you’ve planted where.
- Watering Can or Misting Bottle: Gentle watering is key.
- Optional: Rooting Hormone: While not strictly necessary for bulb division, it can sometimes give a little boost, especially if taking offsets.
Propagation Methods
Let’s dive into how we can coax new life from your Fritillaria.
Division (My Favorite for Fritillaria grandiflora)
This is by far the most successful and reliable method for Fritillaria grandiflora. Think of it as giving the plant room to breathe and thrive.
- Wait for Dormancy: As I mentioned, wait until the foliage has completely yellowed and died back. Gently dig around the parent plant with your trowel.
- Gently Unearth the Bulb: Carefully lift the entire bulb clump from the soil. You’ll likely see the main bulb and potentially some smaller bulbs (called offsets or bulblets) attached at the base.
- Separate the Offsets: This is where your clean knife or shears come in. Gently twist or carefully cut away any smaller offsets that have formed. If an offset is quite small, it might not have enough stored energy to grow into a flowering-sized bulb immediately, but it’s still worth a try. Ensure each offset has at least a small piece of the basal plate (where the roots grow from) attached.
- Plant Them Up: Fill your small pots with your prepared well-draining mix. Plant each offset (or if you’ve separated larger bulbs, plant them individually) at a depth roughly twice their height. Make sure the pointed end is facing upwards.
- Water Lightly: Give them a gentle watering to settle the soil.
Seed Propagation (For the Truly Patient Gardener)
This method is less common for Fritillaria grandiflora but is possible. However, it can take years for a seedling to mature into a flowering bulb, and cold stratification is usually required. You’ll want to sow seeds in the fall, exposed to winter conditions, and then provide consistent moisture and shade. It’s a journey, not a quick win!
The “Secret Sauce” (Pro Tips)
Here are a few little tricks I’ve learned over the years that can make a difference:
- Embrace the Dry Dormancy: Once you’ve divided and potted up your Fritillaria, resist the urge to overwater during their dormant period. They prefer to be kept on the drier side. I usually store them in a cool, dry place over summer, checking infrequently.
- Bottom Heat for Offsets: If you’re trying to root very small offsets or cuttings (less common for this species but worth noting for others), a gentle boost of bottom heat can really encourage root development. A heat mat set on low can do wonders.
- Label Everything: Seriously, I can’t stress this enough. You’ll be surprised how quickly you forget which pot holds which treasure, especially when dealing with different species or propagation timelines.
Aftercare & Troubleshooting
Once your new Fritillaria starts to show signs of life – a little green shoot pushing through the soil – it’s time for dedicated care.
- Watering: Keep the soil consistently moist, but not waterlogged, as new growth emerges. Water when the top inch of soil feels dry.
- Light: Place them in a bright spot, but avoid direct, scorching sun when they are very young and tender. A spot with morning sun and afternoon shade is usually ideal.
- Feeding: You probably won’t need to feed them in their first year. Once they are established, a diluted liquid feed in spring when growth starts can be beneficial.
The most common issue you’ll encounter is rot, often due to overwatering or poor drainage. If you see the bulb turning mushy or smelling off, it’s likely gone before you can save it. Sometimes, young bulbs just don’t have enough energy to establish and might wither away. Don’t be discouraged if not every attempt is successful!
A Little Encouragement
Gardening is a practice in patience and observation, and propagating Fritillaria grandiflora is no different. Enjoy the quiet satisfaction of nurturing these unique plants. Even if it takes a little time, the process itself is deeply rewarding. Happy gardening, my friends!
Resource:
https://identify.plantnet.org/k-world-flora/species/Fritillaria%20grandiflora%20Grossh./data