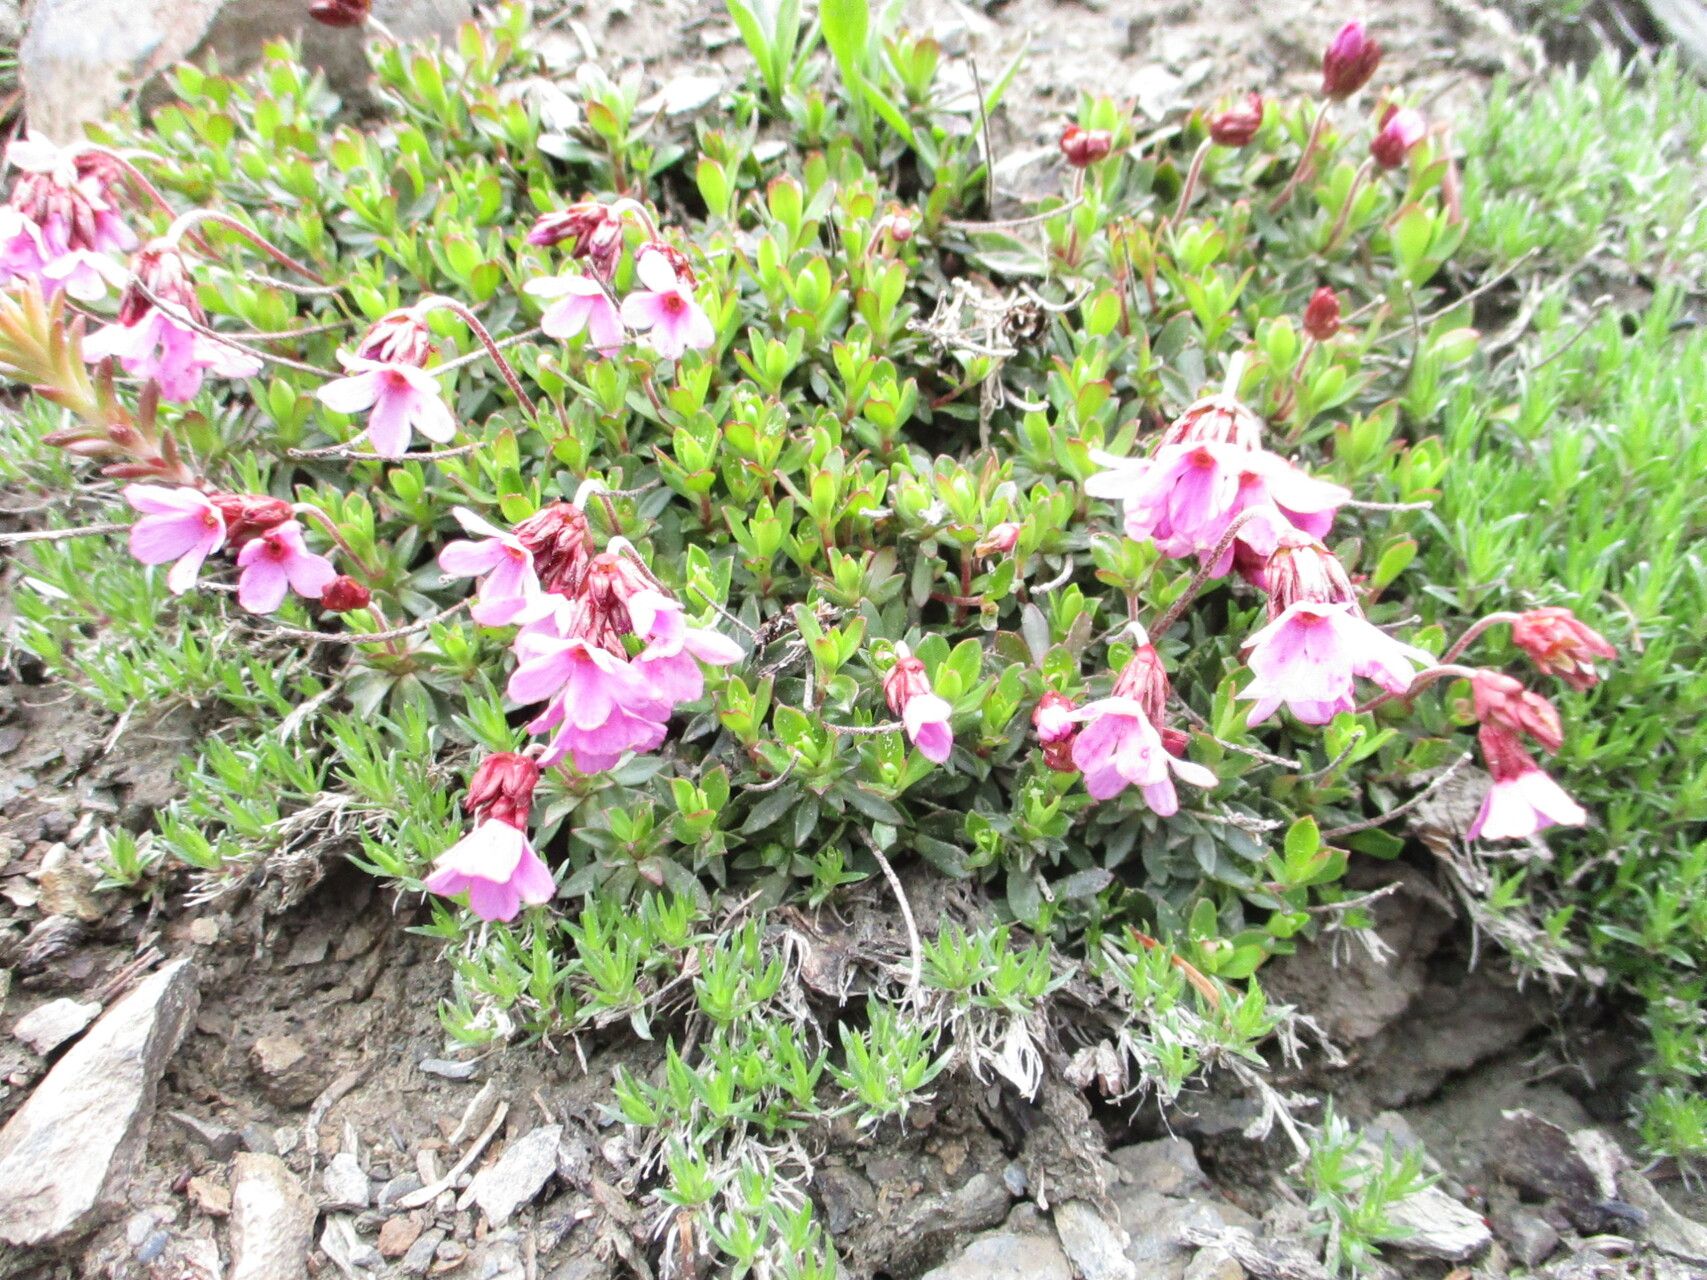
Oh, hello there! Pull up a chair and let’s talk about one of my absolute favorite rock garden treasures: Androsace laevigata. If you’ve ever spotted this lovely little alpine peeking out from a pile of stones, you’ve likely fallen for its charm. It forms those delightful, tidy mounds of fuzzy leaves, often topped with a flurry of delicate, star-shaped flowers in shades of pink and white. Propagating it is a wonderful way to fill your own garden with these beauties, or even share them with fellow plant lovers. Now, full disclosure: I wouldn’t necessarily call Androsace laevigata a “beginner’s plant” for propagation, but with a little patience and the right approach, it’s definitely achievable for most keen gardeners.
The Best Time to Start
Timing is everything, isn’t it? For Androsace laevigata, the sweet spot for propagation is generally late spring to early summer. This is when the plant is actively growing and has ample energy to put into developing new roots. You’re looking for those slightly woody, yet still pliable, new stems to work with. Starting too early in the spring, before the plant has really woken up, or too late in the fall, when it’s winding down, will likely give you less success.
Supplies You’ll Need
Before we dive in, let’s gather our tools. Having everything ready makes the process so much smoother, believe me.
- Sharp pruning shears or a clean, sharp knife: For making clean cuts is crucial.
- Rooting hormone (optional but recommended): A light dusting can give your cuttings a helpful boost.
- A gritty, well-draining potting mix: I like to use a mix of equal parts perlite, horticultural grit, and a good quality seed-starting or potting compost. Good drainage is non-negotiable for androsace!
- Small pots or a propagator tray: Clean, small containers are perfect for individual cuttings.
- A spray bottle: For misting the cuttings to keep them humid.
- Labels and a marker: To keep track of what you’ve planted and when.
Propagation Methods
Androsace laevigata is best propagated through stem cuttings. It’s the most reliable way I’ve found to get new plants.
-
Taking the Cuttings: On a bright, but not scorching, day in late spring or early summer, select healthy, vigorous stems. Look for growths that are about 2-4 inches long and have a bit of flexibility. Using your clean shears or knife, make a clean cut just below a leaf node. A leaf node is that little bump where a leaf attaches to the stem; it’s where roots love to emerge from. Remove the lower leaves from the cutting, leaving just a few set at the top. This prevents them from rotting in the soil and reduces moisture loss.
-
Preparing for Rooting: If you’re using rooting hormone, dip the cut end of the stem into the powder, tapping off any excess. Don’t be tempted to use too much; a light coating is all that’s needed.
-
Planting the Cuttings: Fill your small pots or propagator tray with your prepared gritty mix. Make a small hole in the mix with a pencil or your finger – deep enough to accommodate the cut end of your cutting. Gently insert the cutting into the hole and firm the soil around it so it stands upright.
-
Watering and Placement: Water the cuttings gently but thoroughly, making sure the soil is evenly moist. You want it damp, not waterlogged. Place the pots in a bright location, but out of direct, harsh sunlight. A greenhouse or a windowsill that gets morning sun is ideal.
The “Secret Sauce” (Pro Tips)
Here are a few things I’ve learned over the years that can really make a difference:
- Humidity is Key, But Not Swampy: Androsace cuttings need a humid environment to encourage rooting, but they absolutely hate sitting in soggy conditions. I often cover my pots with a clear plastic bag or lid to create a mini-greenhouse. Just make sure there’s a little bit of airflow, or open the cover for a few minutes each day to prevent fungal issues.
- Give Them a Warm Hug: While not strictly essential for Androsace laevigata, a little bit of bottom heat can significantly speed up rooting. This means placing your pots on a propagator mat or a warm windowsill. It mimics the warmth of spring soil and encourages root development from below.
- Don’t Be Impatient with the Leaves: If you see tiny leaves starting to emerge higher up on the stem, celebrate! However, if you notice existing leaves at the base of the cutting starting to look sad or papery, it’s often a sign they’re pulling energy from the stem to try and root. Don’t remove them unless they’re clearly rotting, as they still help with photosynthesis.
Aftercare & Troubleshooting
Once your cuttings have started to show signs of rooting – usually after 4-8 weeks, you might feel a gentle tug when you lightly pull on a stem, or you may even see tiny new leaf buds forming – they’re ready for a bit more attention.
Continue to keep the soil consistently moist but not wet. As they grow stronger, you can gradually introduce them to slightly brighter light, but always avoid direct midday sun for the first few months. Once they’ve developed a good root system and are showing healthy new growth, you can pot them up into slightly larger containers with their gritty mix, or plant them out in their permanent rock garden location.
The most common issue you’ll encounter is rot. If you see stems turning black and mushy, it’s a definite sign of too much moisture and not enough air circulation. Unfortunately, rotted cuttings are usually lost. That’s why good drainage and a light touch with watering are so important. If a cutting fails to root, don’t despair; it happens! Just clean up the pot and try again.
A Encouraging Closing
Propagating plants is a journey, and it’s so rewarding. It teaches us patience and observation. So, don’t be discouraged if your first attempt isn’t picture-perfect. Enjoy the process of nurturing these little bits of greenery, and celebrate every tiny new leaf or root that appears. Happy propagating!
Resource:
https://identify.plantnet.org/k-world-flora/species/Androsace%20laevigata%20(A.Gray)%20Wendelbo/data