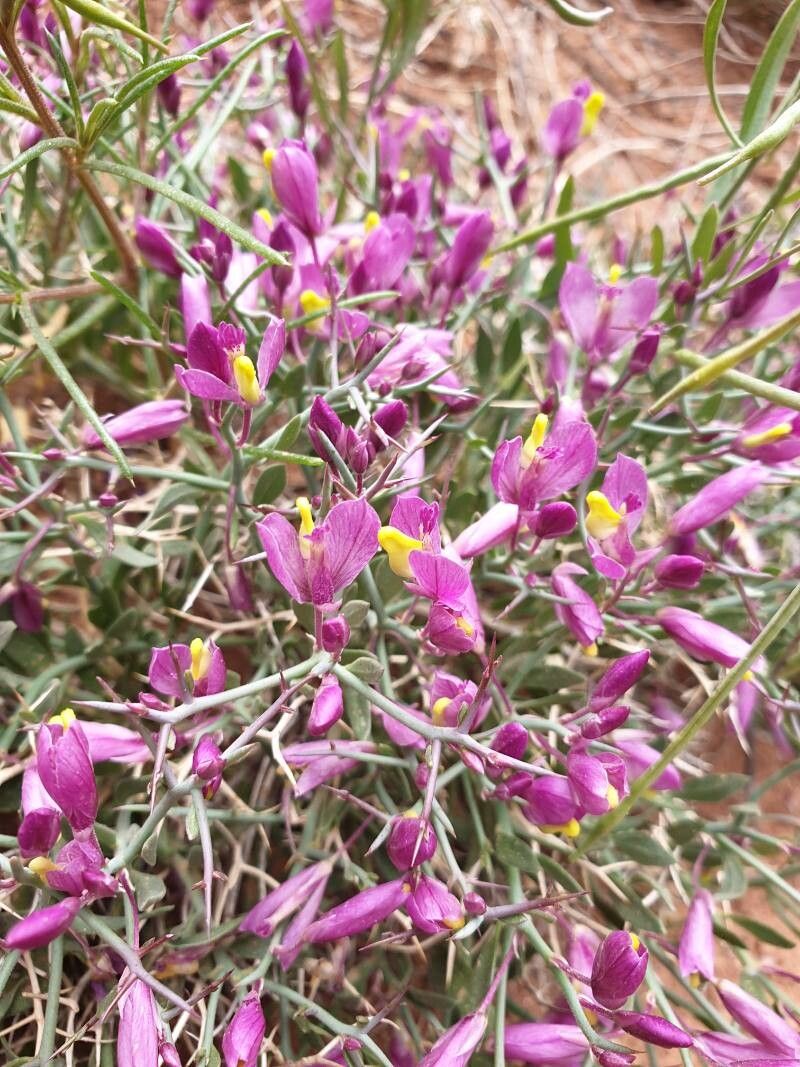
Oh, hello there! Grab a cuppa, let’s chat about a real gem: Rhinotropis heterorhyncha. If you’ve ever fallen for its elegant form and unique blooms, you’re not alone. This plant has a way of captivating our hearts, and bringing more of its beauty into our gardens or homes is just so satisfying. It’s a lovely endeavor, and I’m here to walk you through it.
For those just dipping their toes into plant propagation, Rhinotropis heterorhyncha can be a moderately rewarding challenge. It’s not a beginner’s free-for-all, but with a little patience and the right steps, you’ll be surprised at what you can achieve!
The Best Time to Start
When it comes to getting the best results, timing is everything. For Rhinotropis heterorhyncha, I find that late spring to early summer is truly your golden window. This is when the plant is in a vigorous growth phase, meaning it has plenty of energy to put towards developing new roots. Starting now gives your cuttings the longest possible growing season to establish themselves before cooler weather arrives. Avoid propagating during the plant’s dormancy or when it’s stressed from extreme heat.
Supplies You’ll Need
Gathering your tools beforehand makes the whole process much smoother. Here’s what you’ll want to have on hand:
- Sharp, clean pruning shears or a razor blade: Sterilize them with rubbing alcohol before you begin to prevent disease transmission.
- Rooting hormone (optional but recommended): A good quality rooting hormone powder or gel will significantly boost your success rate.
- A well-draining potting mix: I like a blend of peat moss, perlite, and a little bit of coarse sand. You can also use a commercial potting mix formulated for cuttings or succulents.
- Small pots or seedling trays: Choose pots with drainage holes – this is non-negotiable!
- A spray bottle: For misting your cuttings.
- Plastic bags or a clear plastic dome: To create a humid environment.
- Perlite or gravel (for water propagation): If you choose that method.
Propagation Methods
Let’s get our hands dirty! For Rhinotropis heterorhyncha, stem cuttings are my go-to method.
Stem Cuttings
- Select your parent plant: Choose a healthy, vigorous specimen. Look for stems that are growing actively but aren’t too woody.
- Take your cuttings: Using your sterilized pruning shears or razor blade, take cuttings that are about 4-6 inches long. Make your cut just below a leaf node – that’s the point where a leaf attaches to the stem. These nodes are where roots will likely emerge. Remove any lower leaves from the cutting, leaving just the top few.
- Apply rooting hormone (if using): Dip the cut end of the stem into your rooting hormone powder or gel. Tap off any excess.
- Plant your cuttings: Fill your small pots or seedling trays with your well-draining potting mix. Make a small hole in the center of the mix with your finger or a pencil. Gently insert the cut end of the stem, ensuring the leaf nodes are buried. Firm the soil around the stem.
- Water lightly: Water the soil until it’s evenly moist but not waterlogged. You don’t want the cuttings sitting in soggy soil.
- Create humidity: This is crucial! Mist the cuttings lightly with your spray bottle. Then, cover the pots with a clear plastic bag or a clear dome. Make sure the leaves aren’t touching the plastic if possible. This creates a mini-greenhouse, keeping the humidity high, which helps prevent the cuttings from drying out before they develop roots.
Water Propagation (An Alternative)
If you’re feeling adventurous or just want to watch the rooting process, water propagation is an option.
- Prepare your cuttings: Follow steps 1 and 2 from the stem cutting method.
- Place in water: Put the cuttings in a clean jar or glass filled with clean, room-temperature water.
- Ensure nodes are submerged: Make sure at least one leaf node is below the water line. Remove any leaves that would be submerged to prevent rot.
- Change water regularly: Change the water every 2-3 days to keep it fresh and prevent bacterial growth.
- Wait for roots: You should start to see tiny roots emerging from the nodes within a few weeks. Once the roots are about an inch long, you can transplant them into pots with soil.
The “Secret Sauce” (Pro Tips)
Here are a few things I’ve learned over the years that can make a real difference:
- Bottom Heat is Your Friend: If you have a seedling heat mat, placing your potted cuttings on it can really speed up root development. The warmth encourages root growth from below.
- Don’t Over-Water: It’s so tempting to keep things perpetually moist, but over-watering is the fastest way to doom your cuttings. Let the top inch of soil dry out slightly between waterings. A light finger test is your best guide.
- A Gentle Breeze Works Wonders: While you want humidity, too much stagnant air can encourage fungal issues. Once your cuttings develop roots and start to show new growth, you can gradually introduce more airflow by opening the plastic bag for a few hours each day, or by removing the dome for longer periods. It helps them acclimate to drier conditions.
Aftercare & Troubleshooting
Once your cuttings have developed a good root system (you’ll see new growth appearing, and they’ll feel a bit more secure when tugged gently), it’s time for a bit more regular care.
- Gradually Acclimate: If they’ve been under plastic, slowly remove the cover over a few days to avoid shocking them.
- Watering: Continue to water when the top inch of soil feels dry. They’ll need more water now as they develop their root systems.
- Light: Place them in a bright spot with indirect light. Avoid direct, harsh sun, which can scorch delicate new growth.
Now, what if things go wrong? The most common culprits are rot and drying out.
- Rot: If your cuttings turn mushy, brown, or develop black spots, it’s likely rot. This is usually caused by too much moisture and not enough air circulation. Unfortunately, rotten cuttings are usually lost. Start fresh and be mindful of that watering!
- Drying Out: If your cuttings shrivel up and leaves turn brown and crispy, they’re drying out too quickly. Ensure your humidity dome is secure and mist more frequently if needed.
Happy Rooting!
Remember, propagation is a journey, not a race. Be patient with your little Rhinotropis heterorhyncha cuttings. Some might take off right away, while others might need a bit more coaxing. Embrace the process, learn from each attempt, and most importantly, enjoy the magic of creating new life from a single stem. Happy gardening!
Resource: