Oh, hello there! Come on in, pull up a chair. I’ve got my gardening apron on and a fresh pot of coffee brewing, just for us. Today, we’re going to dive into the wonderful world of propagating Aralia nudicaulis, or Wild Sarsaparilla, as it’s often called.
Why Grow and Propagate Wild Sarsaparilla?
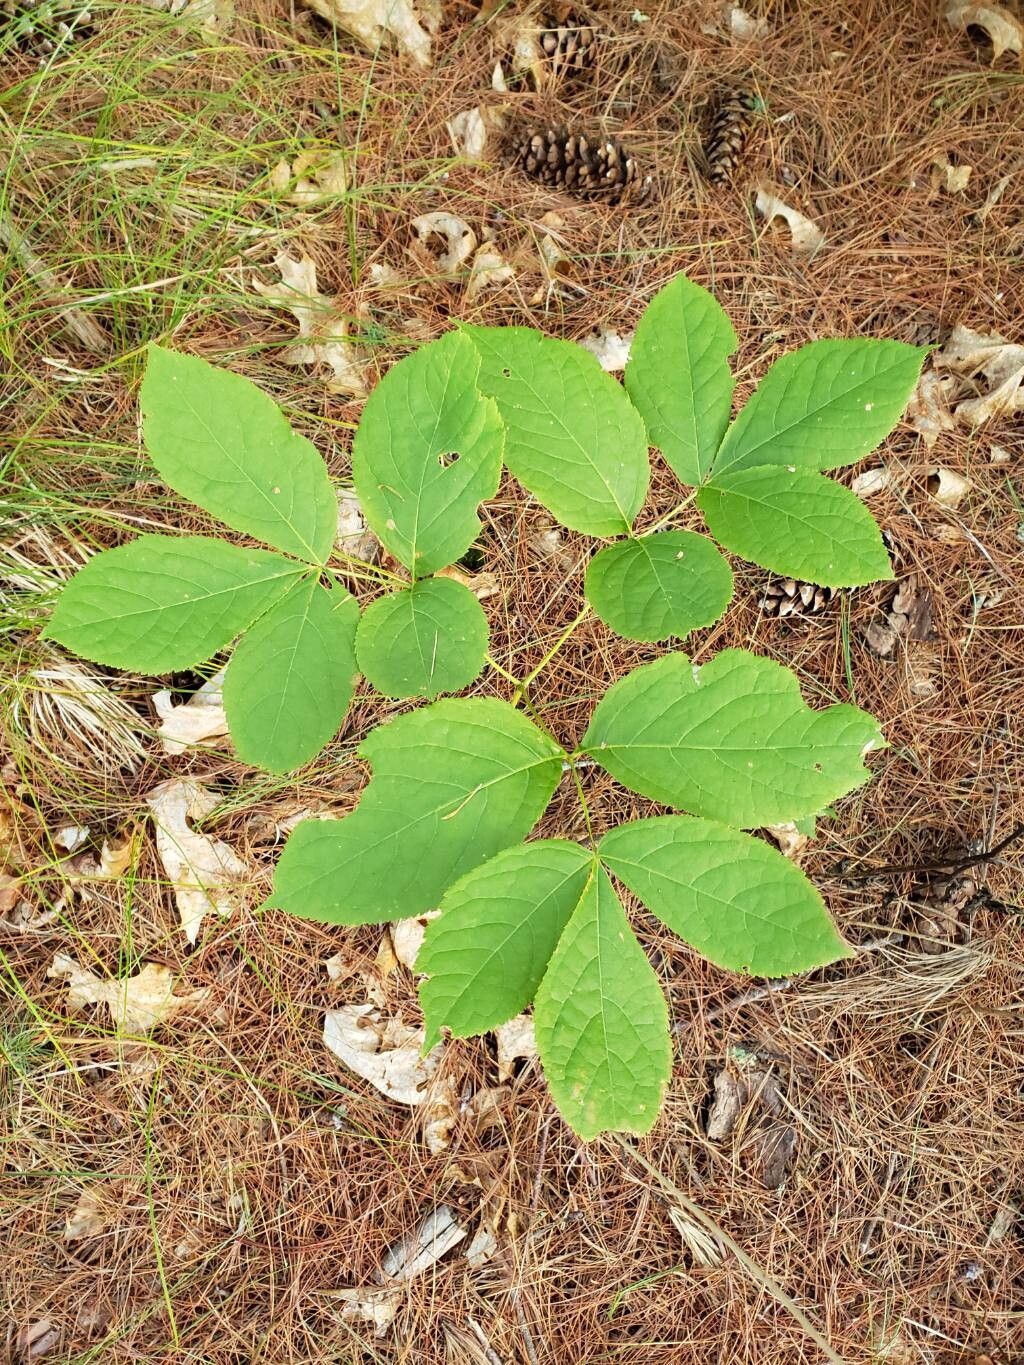
I just love Wild Sarsaparilla. It’s such an understated beauty for shady spots, with its delicate, compound leaves that unfurl so gracefully. And those cute little berries it produces? Pure charm! The real joy, though, is in creating more of these lovely plants from just one. It’s incredibly satisfying, and honestly, I find it a refreshingly straightforward plant to work with. Even if you’re just dipping your toes into propagation waters, this one is a good friend to start with.
When is the Best Time?
For Wild Sarsaparilla, the absolute sweet spot for propagating is late spring to early summer. This is when the plant is actively growing, pushing out new shoots, and has plenty of energy to spare. You’re looking for those soft, new stems that are flexible enough to bend without snapping. Older, woody stems just don’t have the same enthusiasm for rooting.
What You’ll Need
Gathering your supplies before you begin makes all the difference. Here’s what I usually have on hand:
- Sharp Pruning Shears or a Clean Knife: For making nice, clean cuts.
- Rooting Hormone (Optional, but recommended): A good quality powder or gel really gives cuttings a boost.
- Pots or Trays: Small pots or seedling trays with drainage holes are perfect.
- Well-Draining Potting Mix: I usually use a mix of equal parts peat moss (or coir), perlite, and compost. This ensures good aeration and prevents waterlogging.
- Watering Can or Mister: For gentle watering.
- Plastic Bags or Domes: To create a humid environment for your cuttings.
- Marker and Labels: So you don’t forget what you planted where!
Let’s Get Propagating!
Wild Sarsaparilla is quite amenable to propagation, and my go-to method is by stem cuttings. It’s reliable and satisfying.
Stem Cuttings – My Favorite Method:
- Take Your Cuttings: On a bright, mild morning, select healthy, non-flowering stems. Using your sharp pruners or knife, cut a piece of stem that’s about 4-6 inches long. Make sure each cutting has at least two or three nodes (where the leaves attach to the stem). Take a few more than you think you’ll need – not all of them will take.
- Prepare the Cuttings: Gently remove the lower leaves from the cutting, leaving just a couple of leaves at the top. This reduces moisture loss and directs the plant’s energy towards rooting. If the remaining leaves are very large, I’ll sometimes snip them in half horizontally.
- Dip in Rooting Hormone (If Using): Slightly dampen the cut end of the stem and dip it into your rooting hormone powder or gel. Tap off any excess.
- Plant Your Cuttings: Fill your pots or trays with the well-draining potting mix. Make a small hole with your finger or a pencil. Carefully insert the cut end of the stem into the hole, ensuring at least one node is buried beneath the soil surface. Gently firm the soil around the base of the cutting.
- Water Gently: Water the soil thoroughly but delicately. You want it moist, not soggy.
The “Secret Sauce” – My Insider Tips
Now, here are a few little tricks I’ve learned over the years that really help things along:
- Mimic the Understory: Wild Sarsaparilla thrives in a humid, shaded environment. After planting your cuttings, cover the pots with a clear plastic bag or a plant dome. This is crucial for maintaining high humidity, which prevents the cuttings from drying out before they can develop roots. Just make sure the leaves aren’t directly touching the plastic!
- Bottom Heat is Your Friend: If you have a propagation mat or can place your pots on top of a gently warm appliance (like a router or old computer), this can significantly speed up root formation. Warm soil encourages the plant to put its energy into root development.
- Don’t Peek Too Soon! I know it’s tempting, but resist the urge to tug on your cuttings to “check for roots” in the first few weeks. Wait at least 3-4 weeks before giving them a very gentle tug. If you feel resistance, you’ve got roots!
Aftercare and What Ifs
Once you see signs of new leaf growth, that’s a great indicator that your cuttings have rooted.
- Acclimatize Gradually: Once roots have formed and you’ve seen growth, begin by slowly introducing your new plants to less humid conditions. This means opening the plastic bag a little each day or lifting the dome for increasing lengths of time.
- Continue Watering: Keep the soil consistently moist but not waterlogged.
- Transplant When Ready: When your new plants are sturdy and have a good root system, you can transplant them into slightly larger pots.
Now, rot is the main culprit when cuttings fail. If you see stems turning mushy and black, or if there’s a foul smell, that’s usually a sign of overwatering and poor drainage. In this case, it’s often best to discard the affected cuttings to prevent it from spreading.
Happy Growing!
Propagating Aralia nudicaulis is a wonderfully rewarding endeavor. It takes a little patience, a touch of care, and a willingness to experiment. Don’t be discouraged if not every cutting makes it; it’s all part of the learning process. Just enjoy the journey, and soon you’ll have a lovely collection of these woodland charmers. Happy gardening, my friend!
Resource:
https://identify.plantnet.org/k-world-flora/species/Aralia%20nudicaulis%20L./data