Blooming Wonders: Bringing More Tylecodon schaeferianus into Your Life!
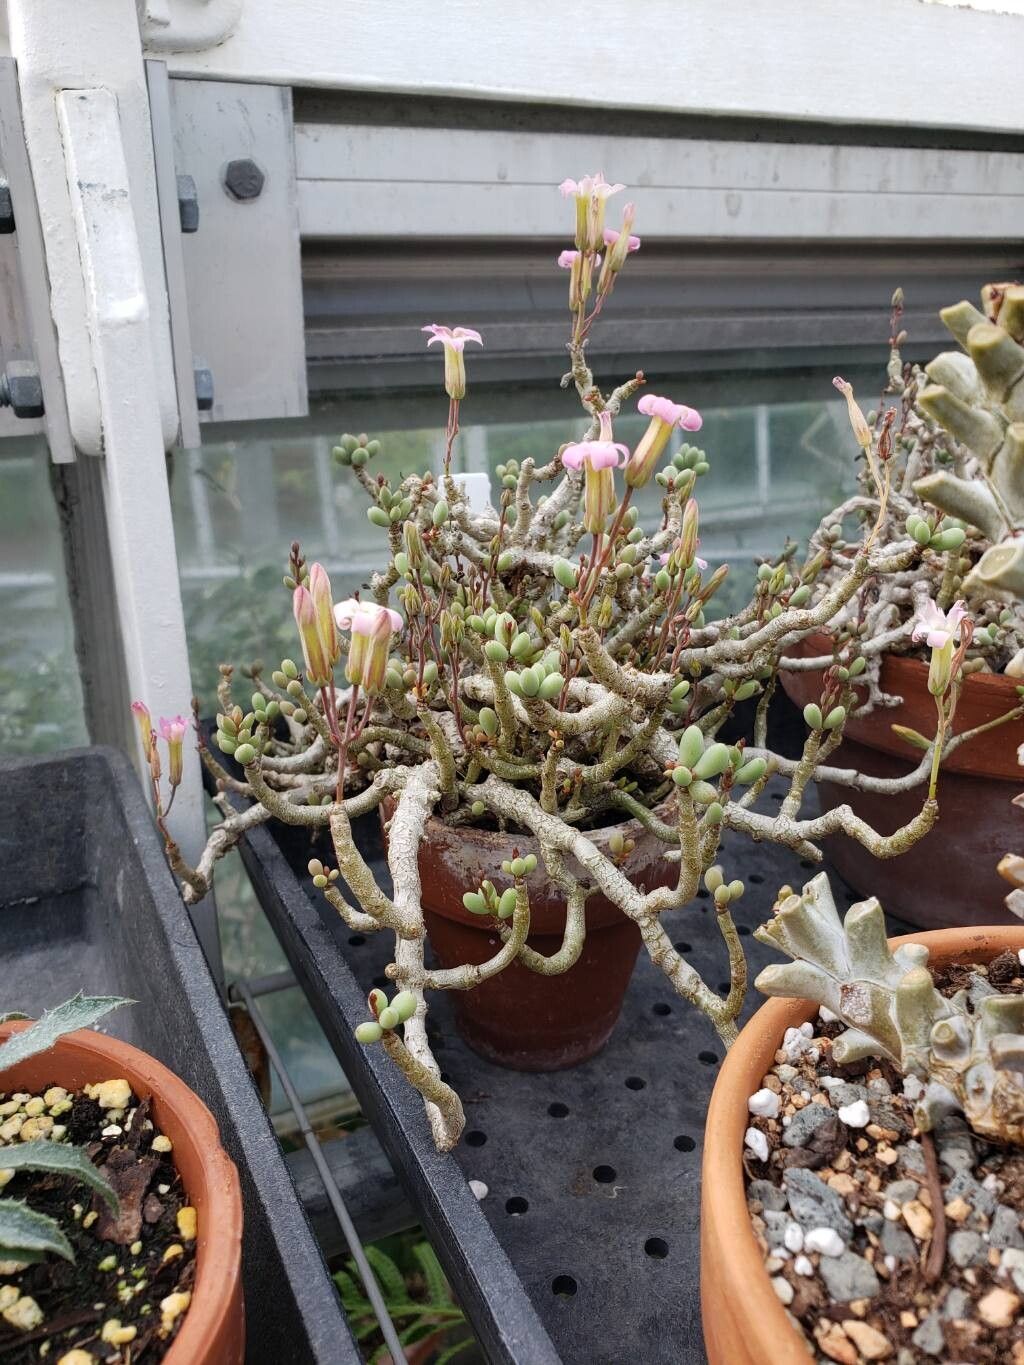
Oh, how I adore Tylecodon schaeferianus! Those swollen, beautiful caudexes and the cascades of delicate green leaves that emerge like tiny chandeliers are simply captivating. They bring such a unique, sculptural element to any succulent collection. If you’ve ever admired one of these beauties and wished you had more, you’re in for a treat. Propagating them is incredibly rewarding, and while they might seem a bit fussy, with a little know-how, I find them to be quite manageable, even for those newer to the succulent scene!
When is the Magic Hour for Propagating?
For Tylecodon schaeferianus, the sweet spot for propagation is really during their active growing season. This usually means late spring through summer. You’ll see them putting on new growth, and this energy is exactly what we need for successful rooting. Trying to propagate them when they’re dormant in winter or during extreme heat can be a recipe for disappointment.
Gearing Up: Your Propagation Toolkit
Before we dive in, let’s make sure you have everything you need. Think of it as gathering your ingredients for a special recipe:
- Well-draining Potting Mix: Crucial! I like a mix of succulent soil with added perlite or pumice. Aim for about a 50/50 blend.
- Sharp Pruning Shears or a Clean Knife: For making clean cuts.
- Rooting Hormone (Optional, but Recommended): A little boost can encourage faster root development.
- Clean Pots or Trays: Small nursery pots or even repurposed containers work great. Make sure they have drainage holes!
- Perlite or Sand: For top dressing.
- Watering Can with a Fine Rose: For gentle watering.
Bringing New Babies to Life: My Go-To Methods
There are a couple of ways you can successfully propagate your Tylecodon schaeferianus, and I find these to be the most reliable:
Stem Cuttings: The Classic Approach
This is my personal favorite and usually yields the best results.
- Choose a Healthy Stem: Look for a stem that’s firm and has a good amount of leaves.
- Make the Cut: Using your sharp shears or knife, take a cutting that’s about 3-5 inches long. Make a clean, angled cut right at the base of the stem.
- Let it Dry (Callous Over): This is super important! Place the cutting in a dry, shady spot for 2-7 days, or until the cut end has dried and formed a callus. This prevents rot when you plant it.
- Apply Rooting Hormone (Optional): Dip the calloused end of the cutting into your rooting hormone powder.
- Plant Your Cutting: Stick the calloused end into your prepared, dry potting mix. Don’t bury it too deep; just enough to hold it upright.
- Be Patient: Water very sparingly at first. I like to wait a week or so after planting to give it a light watering.
Leaf Cuttings: A Delicate Dance
This method is a bit more hit-or-miss for Tylecodon compared to some other succulents, but it’s worth a try if you have plenty of healthy leaves!
- Gently Remove a Leaf: Twist or carefully cut a healthy leaf from the stem. Crucially, make sure you get a small piece of the stem attached to the leaf base – this is where the magic happens.
- Let it Callous: Just like with stem cuttings, let the cut end dry and form a callus for a few days.
- Planting: Lay the calloused end of the leaf on top of your dry potting mix. You can gently press it in so it makes contact.
- Gentle Misting: Mist the soil lightly every few days.
The “Secret Sauce”: My Insider Secrets
After years of trial and error, I’ve picked up a few tricks that make a difference.
- Avoid Leaf-to-Water Contact (For Leaf Cuttings): If you’re trying leaf cuttings, make sure the leaves themselves aren’t sitting in standing water. They’ll rot in a heartbeat. Keep them just above the soil surface.
- Bottom Heat is Your Friend: If you have a seedling heat mat, using it for your cuttings can significantly speed up root development. It mimics the warmth of summer, which these plants love. Just make sure the mat isn’t too hot – warm to the touch is perfect.
Tending to Your New Sprouts: Care and When Things Go Wrong
Once you see signs of growth – perhaps tiny new leaves or the beginnings of roots – your cuttings are officially on their way!
- Light Watering: Continue to water very sparingly. The goal is for the soil to be barely moist, never soggy. Allow the soil to dry out almost completely between waterings.
- Gradual Acclimation: Once roots have established (you might see slight resistance if you gently tug), you can start to gradually introduce them to more light. Move them from indirect bright light to something a little more direct, but always watch for signs of scorching.
- Watch for Rot: The biggest enemy is overwatering. If you see stems turning mushy or black, it’s a sign of rot. Sadly, if rot sets in, it’s very difficult to save the cutting. You might need to try again with a fresh one. Yellowing leaves can also indicate too much (or too little) water or insufficient light.
Go Forth and Grow!
Propagating Tylecodon schaeferianus is a journey, and like any good garden project, it requires a bit of patience. But oh, the joy when you see that first tiny root emerge, or a new cluster of leaves unfurls! Don’t be discouraged if your first few attempts aren’t perfect. Each new plant you nurture into existence is a little miracle, and you’ll be so proud of yourself for bringing more of these sculptural wonders into your home. Happy propagating!
Resource: