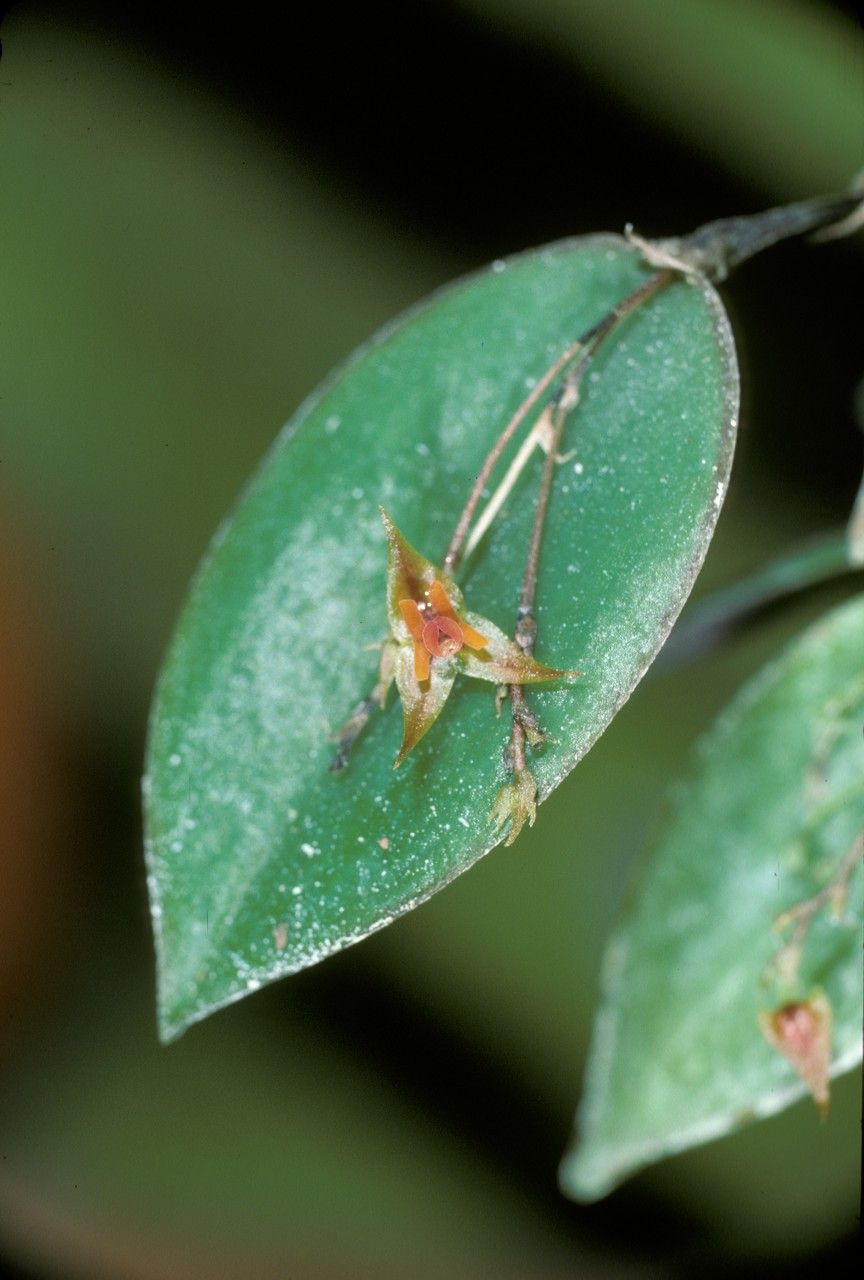
Oh, hello there! It’s so wonderful to chat with you about the enchanting world of plants. Today, we’re diving into the delicate dance of propagating Lepanthes divaricata. If you’ve ever marveled at its miniature, intricate beauty – those tiny, jewel-like flowers that seem to appear out of nowhere – you know why it’s a treasure. Propagating these little wonders is a deeply rewarding experience, a chance to nurture new life and multiply that joy. Now, I’ll be honest, Lepanthes divaricata isn’t the most straightforward plant for an absolute beginner. It can be a bit finicky, but with a little attention and patience, you’ll be rewarded. Think of it as a special craft, not a mass production.
The Best Time to Start
When it comes to encouraging new growth, the sweet spot is usually when your orchid is actively growing. For most Lepanthes, this means after a flowering period, often in the spring or early summer. The plant has more energy reserves to dedicate to producing new roots and shoots. Avoid trying to propagate when the plant is stressed, like during extreme heat or cold, or when it’s just finishing up a bloom cycle and needs to rest.
Supplies You’ll Need
Gathering your tools beforehand makes everything go so much smoother. Here’s what I always have on hand:
- Sharp, sterile pruning shears or a razor blade: Cleanliness is paramount to prevent disease.
- Sphagnum moss: High-quality, long-fibered sphagnum moss is my go-to for its excellent water retention and aeration.
- Small pots or terrariums: Think tiny! Orchid pots with good drainage or even small clear containers work well.
- Distilled or rain water: Tap water can have too many minerals that our delicate Lepanthes dislike.
- Rooting hormone (optional but helpful): A gentle rooting hormone can give your new propagations a nice boost.
- A spray bottle: For maintaining humidity.
- Enclosed environment: A clear plastic bag, a mini greenhouse, or a covered container to create a humid microclimate.
Propagation Methods
While Lepanthes divaricata can be a bit shy about setting seed, propagation from cuttings is generally your best bet. Here’s how I approach it.
Stem Cuttings
This is often the most successful method for me.
- Find a healthy stem: Look for a mature stem that has at least two or three small pseudobulbs or growth points. It should look robust and green.
- Make a clean cut: Using your sterilized shears, carefully slice the stem, making sure to get at least one healthy pseudobulb and a leaf with that cutting. If the stem is long, you can make multiple cuttings, ensuring each has a node from which roots can emerge.
- Prepare the cutting: Gently remove any lower leaves that might rot when in contact with the growing medium. If you’re using a rooting hormone, dip the cut end into it now.
- Plant it up: Moisten your sphagnum moss until it’s damp but not dripping wet – think a wrung-out sponge. Gently press the base of your cutting into the moss, ensuring the pseudobulb is nestled comfortably. You want the node (where the new growth emerges) to be just at the surface or slightly below.
- Create a humid haven: Place the pot into your enclosed environment. A clear plastic bag covering the pot, sealed loosely or with a few air holes, works wonders. This traps humidity, which is crucial for Lepanthes to root.
The “Secret Sauce” (Pro Tips)
Now for a couple of tricks I’ve learned over the years that really make a difference.
- Don’t let leaves touch the water: This is especially true if you decide to try rooting in water (though I find sphagnum more reliable for Lepanthes). If any part of the leaf sits submerged, it’s a fast track to rot. Always keep the leaves elevated.
- Bottom heat can be magic: A gentle warming mat placed beneath your propagation setup can significantly speed up root development. Think of it as a cozy incubator for your tiny cuttings. The warmth encourages cell activity without drying out the delicate new roots. Just make sure it’s not overly hot – you don’t want to cook them!
Aftercare & Troubleshooting
Once your cutting is nestled in its humid home, the real waiting game begins.
- Maintain consistent humidity: Check the sphagnum moss every few days and mist gently with distilled water if it feels dry. The goal is high humidity, but not waterlogged conditions.
- Provide bright, indirect light: A bright windowsill that doesn’t get direct sun is ideal. Too much sun will scorch the delicate leaves.
- Be patient! It can take several weeks, sometimes even a couple of months, for you to see signs of new roots or a new shoot emerging. Don’t get discouraged if you don’t see immediate progress.
- Watch out for rot: The most common problem is rot, indicated by mushy, blackening stems or leaves. If you see this, remove the affected part immediately. You might need to adjust your watering or ventilation to ensure things are airy enough. Ensure your sphagnum is never soggy.
A Encouraging Closing
Propagating Lepanthes divaricata is a journey of sorts. It requires a gentle hand and a watchful eye, but the reward of seeing that first tiny new leaf unfurl or a root emerge from the moss is absolutely worth it. Trust your instincts, learn from each attempt, and most importantly, enjoy the quiet satisfaction of nurturing these miniature botanical gems. Happy growing!
Resource:
https://identify.plantnet.org/k-world-flora/species/Lepanthes%20divaricata%20Fawc.%20&%20Rendle/data