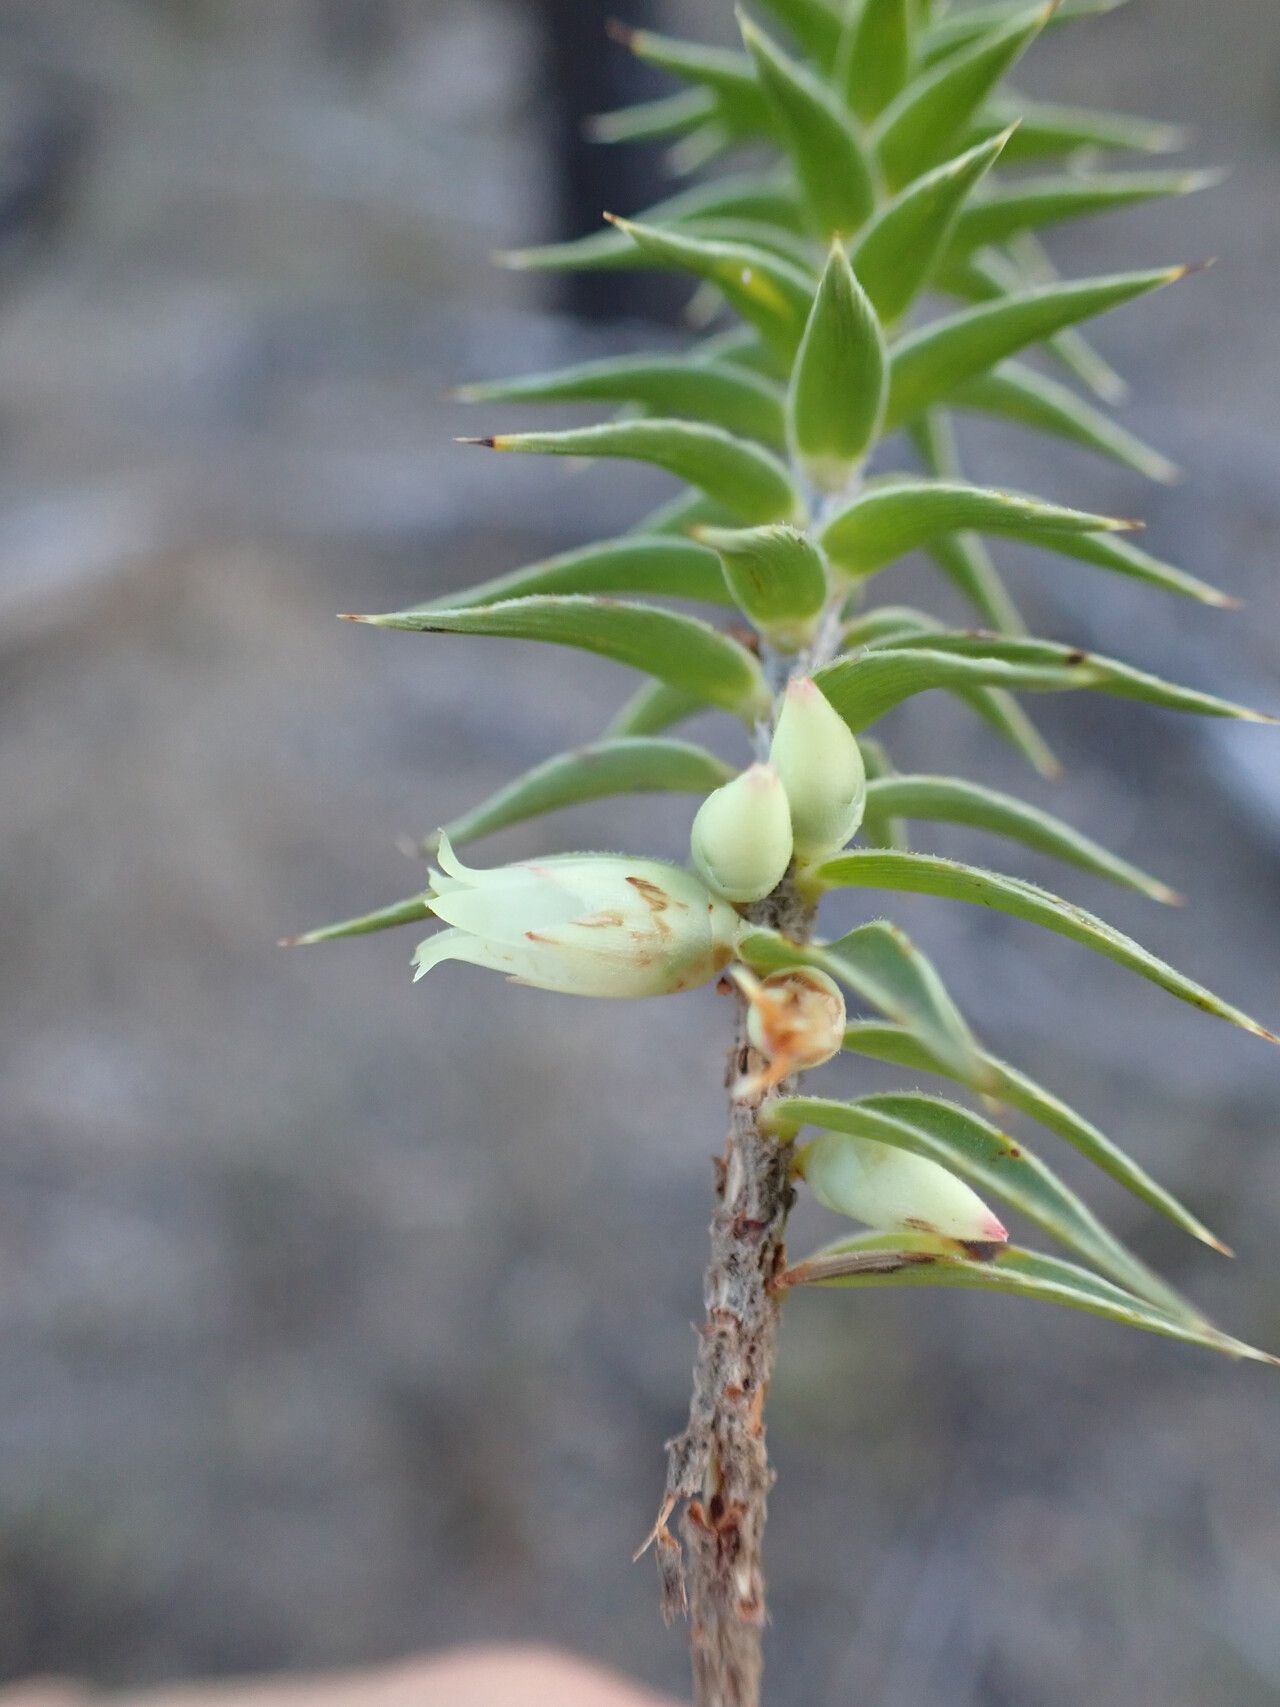
Hey everyone, and welcome back to the blog! Today, we’re diving into the wonderful world of Melichrus urceolatus, also known as the Urn Heath. If you’ve ever admired its delicate, bell-shaped flowers that seem to defy the chill of late winter and early spring, you’re not alone. This tough little heath is a real gem for adding structure and early color to your garden or containers. And the best part? Sharing this beauty by propagating your own plants is incredibly rewarding. Now, while Melichrus urceolatus isn’t perhaps the absolute easiest plant for a complete beginner, with a little patience and the right approach, you can absolutely succeed.
The Best Time to Start
For the most success with propagating Melichrus urceolatus, I’ve found that late spring to early summer is your golden window. This is when the plant is actively growing, and the new shoots are more pliable and ready to take root. You’re looking for stems that have started to mature a bit – not the very soft, bright green tips, but the slightly woodier growth just below them.
Supplies You’ll Need
Before we get our hands dirty, let’s gather our essentials:
- Sterile pruning shears or a sharp knife: Cleanliness is key to prevent disease.
- Rooting hormone (powder or gel): This gives your cuttings a helpful boost. I find the powder to be a bit easier to work with.
- Well-draining potting mix: A mix designed for succulents or cacti is often a great starting point, or you can create your own with equal parts peat moss, perlite, and coarse sand.
- Small pots or seed trays: Make sure they have drainage holes!
- Plastic bags or a propagator lid: To create a humid environment.
- Watering can with a fine rose: For gentle watering.
- Labels and a permanent marker: To keep track of your cuttings.
Propagation Methods: Taking Cuttings
The most reliable way to propagate Melichrus urceolatus is by stem cuttings. It’s straightforward and yields great results.
- Make the cut: Using your sterilized pruning shears, take cuttings that are 4-6 inches long. Make your cut just below a leaf node (where the leaves attach to the stem).
- Prepare the cuttings: Gently strip off the lower leaves from the bottom 2-3 inches of each cutting. This exposes the nodes where roots will emerge. If your cuttings are particularly leafy, you can pinch off about half of the remaining leaves to reduce water loss.
- Apply rooting hormone: Dip the cut end of each prepared cutting into your rooting hormone, tapping off any excess.
- Planting time: Fill your small pots or trays with your well-draining potting mix. Moisten the mix slightly.
- Insert the cuttings: Use a pencil or your finger to make a small hole in the soil, then carefully insert the cut end of each cutting. Gently firm the soil around the base of the cuttings.
- Create humidity: Water gently. Then, cover the pots with a plastic bag, propping it up with stakes so it doesn’t touch the leaves, or place them in a propagator. This creates a mini-greenhouse effect.
- Find a bright spot: Place your cuttings in a bright location with indirect sunlight. Avoid direct sun, which can scorch them.
The “Secret Sauce” (Pro Tips)
Here are a couple of things I’ve learned over the years that really make a difference:
- Don’t rush the roots: Be patient! It can take anywhere from 4 to 8 weeks, sometimes even longer, for Melichrus urceolatus cuttings to root. You’ll know they’re ready when you give them a gentle tug and feel some resistance, or when you see new leaf growth.
- Bottom heat is your friend: If you have a heat mat, placing your propagator on it can significantly speed up the rooting process. It encourages warmth at the base, signaling the plant to send out roots.
Aftercare & Troubleshooting
Once you see signs of new growth, it’s time to start acclimatizing your new plants.
- Gradually increase ventilation: Over a week or two, start opening the plastic bag or propagator lid for longer periods each day. This helps the young plants adjust to normal humidity levels and prevents shocking them.
- Watering: Water only when the top inch of soil feels dry. Avoid overwatering, as this is a surefire way to invite rot.
- Repotting: Once your cuttings have a decent root system, you can carefully pot them into individual, slightly larger pots with your well-draining mix.
Now, what if things go wrong? The most common issue is rot. If your cuttings turn mushy, black, or smelly, they’ve likely succumbed to rot, usually due to too much moisture and not enough airflow. If you see this, sadly, it’s best to discard them and start fresh. It happens to all of us!
A Word of Encouragement
Propagating Melichrus urceolatus is a lovely way to expand your collection and share this wonderful plant. Don’t be discouraged if your first attempt isn’t perfect. Gardening is a journey, and every cutting you take teaches you something new. Be patient, enjoy the process, and soon you’ll have a whole little army of Urn Heaths to admire! Happy growing!
Resource:
https://identify.plantnet.org/k-world-flora/species/Melichrus%20urceolatus%20R.Br./data