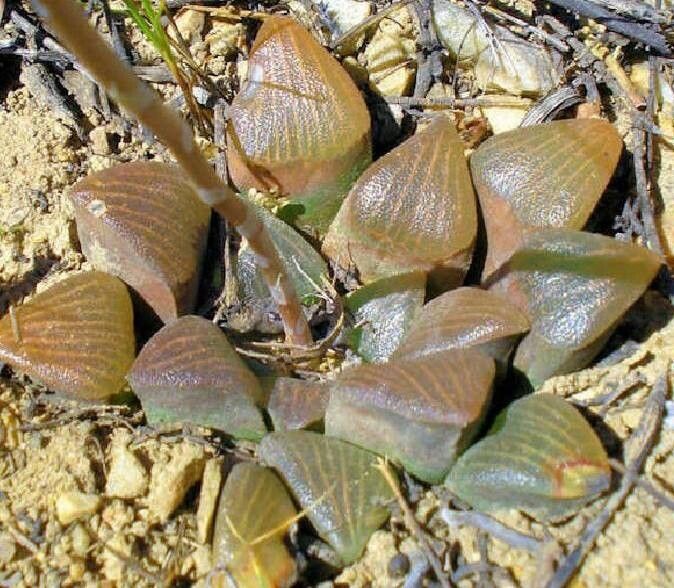
Hello, fellow plant lovers! Today, we’re diving into something truly special: propagating Haworthia bayeri. If you’re drawn to those mesmerizing patterns and plump, segmented leaves, you’re in for a treat. Getting more of these beauties from a single plant is incredibly satisfying, like watching your garden grow and your love for succulents spread. While Haworthia bayeri isn’t rocket science to propagate, it requires a bit of patience and the right touch. It’s a fantastic project for anyone looking to expand their succulent collection, and it’s definitely achievable even if you’re relatively new to the green-thumb world.
The Best Time to Start
When it comes to giving your Haworthia bayeri the best shot at creating new life, think spring and early summer. This is when these desert dwellers are in their active growing season. They’re full of energy, making them more receptive to the propagation process. Trying to do this in the dead of winter, when they’re mostly dormant, will likely lead to less success and more frustration. So, mark your calendars for when the days start to lengthen and the temperatures begin to warm.
Supplies You’ll Need
Gathering your tools beforehand makes the whole process smoother. Here’s what I usually have on hand:
- Sharp, sterile pruning shears or a sharp knife: Essential for clean cuts. Make sure they’re clean to prevent the spread of any diseases.
- Well-draining potting mix: A cactus and succulent mix is perfect. I often add a little extra perlite or pumice for even better drainage.
- Small pots or propagation trays: Ceramic or terracotta pots breathe well, but plastic is fine too.
- Rooting hormone (optional): While not strictly necessary for all succulents, it can give cuttings a helpful boost.
- Spray bottle filled with water: For light misting.
- A small trowel or spoon: For scooping soil.
- Labels and a pen: To keep track of what you’ve propagated and when.
Propagation Methods
For Haworthia bayeri, we’ll focus on the most straightforward and effective methods:
1. Offsets (Pups): The Easiest Route
This is hands-down the simplest way to go. Mature Haworthia bayeri plants often produce little baby plants, called offsets or pups, around their base.
- Step 1: Gently remove the soil. Carefully brush away the soil from around the base of the mother plant to expose the pups and where they are attached.
- Step 2: Separate the pup. Using your clean shears or knife, make a clean cut where the pup connects to the parent plant. Try to get a little bit of the pup’s roots if possible, but don’t worry if you can’t.
- Step 3: Let it callous. Place the separated pup in a dry, bright spot out of direct sun for 2-3 days. This allows the cut end to dry out and form a protective callus, which helps prevent rot.
- Step 4: Plant it up. Once calloused, plant the offset in a small pot filled with your well-draining succulent mix. The pup should sit just above the soil line, and you can gently support it with pebbles if needed.
- Step 5: Water sparingly. Wait a week after planting before giving it its first drink. After that, water only when the soil is completely dry.
2. Leaf Cuttings: A Bit More Patience Required
This method is less common for Haworthia compared to some other succulents, but it can work! You’re generally looking for more established leaves.
- Step 1: Select a healthy leaf. Choose a plump, healthy leaf from the mother plant.
- Step 2: Make a clean cut. Using your sterile shears, cut the leaf as close to the stem as possible. You want to get a clean break.
- Step 3: Allow to callous. Just like with offsets, let the cut leaf sit in a dry, bright location for 3-5 days to form a callus. This is crucial!
- Step 4: Place on soil. Lay the calloused leaf on top of your well-draining succulent mix. Don’t bury it.
- Step 5: Mist lightly. You can lightly mist the surface of the soil every few days, but avoid getting the leaf itself too wet.
- Step 6: Wait and watch. Roots and eventually a tiny new plantlet should begin to emerge from the calloused end. This can take weeks or even months. Be patient!
The “Secret Sauce” (Pro Tips)
Here are a couple of tricks I’ve learned over the years that can really make a difference:
- Don’t let leaves touch standing water. If you’re using water propagation for leaf cuttings (though I generally advise against it for Haworthia bayeri as it’s prone to rot), ensure only the very bottom tip of the leaf is submerged, and it doesn’t touch the surface of the water. Better yet, let them callous and go straight to soil.
- Bottom heat can be your friend. If your propagation area is a bit cooler than ideal, using a seedling heat mat can encourage faster root development, especially for offsets. Just place your pots on top of it, and it provides gentle warmth from below.
Aftercare & Troubleshooting
Once your new little Haworthia bayeri has started to show signs of life – roots appearing or a tiny plantlet forming – it’s time for continued gentle care.
- Watering: Err on the side of underwatering, especially in the beginning. Wait until the soil is completely dry before watering again. Use bottom watering if possible, where you let the pot sit in a saucer of water for a short while, allowing the soil to soak up what it needs. This prevents excess moisture on the leaves.
- Light: Provide bright, indirect light. Direct sun can scorch delicate new growth.
- Troubleshooting: The most common issue you’ll encounter is rot. This usually happens if the plant is too wet, has poor drainage, or wasn’t allowed to callous properly. If a leaf cutting turns mushy and black, it’s best to discard it and try again. If an offset rots, try to salvage any healthy parts and re-initiate propagation. Another sign of trouble is if cuttings shrivel up without any root or leaf development – this could mean they were too dry or the conditions just weren’t right.
A Little Patience Goes a Long Way
Propagating Haworthia bayeri is a journey, not a race. Each successful new plant is a little victory, a testament to your growing skills and the plant’s resilience. Don’t get discouraged if your first few attempts don’t pan out perfectly. Keep learning, keep observing your plants, and most importantly, enjoy the process of nurturing new life. Happy propagating!
Resource: