Hello there, fellow plant enthusiast! I’m so glad you’re here. Today, we’re going to dive into the wonderful world of propagating Bletia warnockii. You know, that stunning orchid with its vibrant blooms and somewhat mysterious allure. I’ve spent years with these beauties, and let me tell you, coaxing a new one to life from an existing plant is one of the most satisfying experiences a gardener can have. It’s a little bit of magic happening right in your hands!
The Joy of a New Bloom: Why Propagate Bletia warnockii?
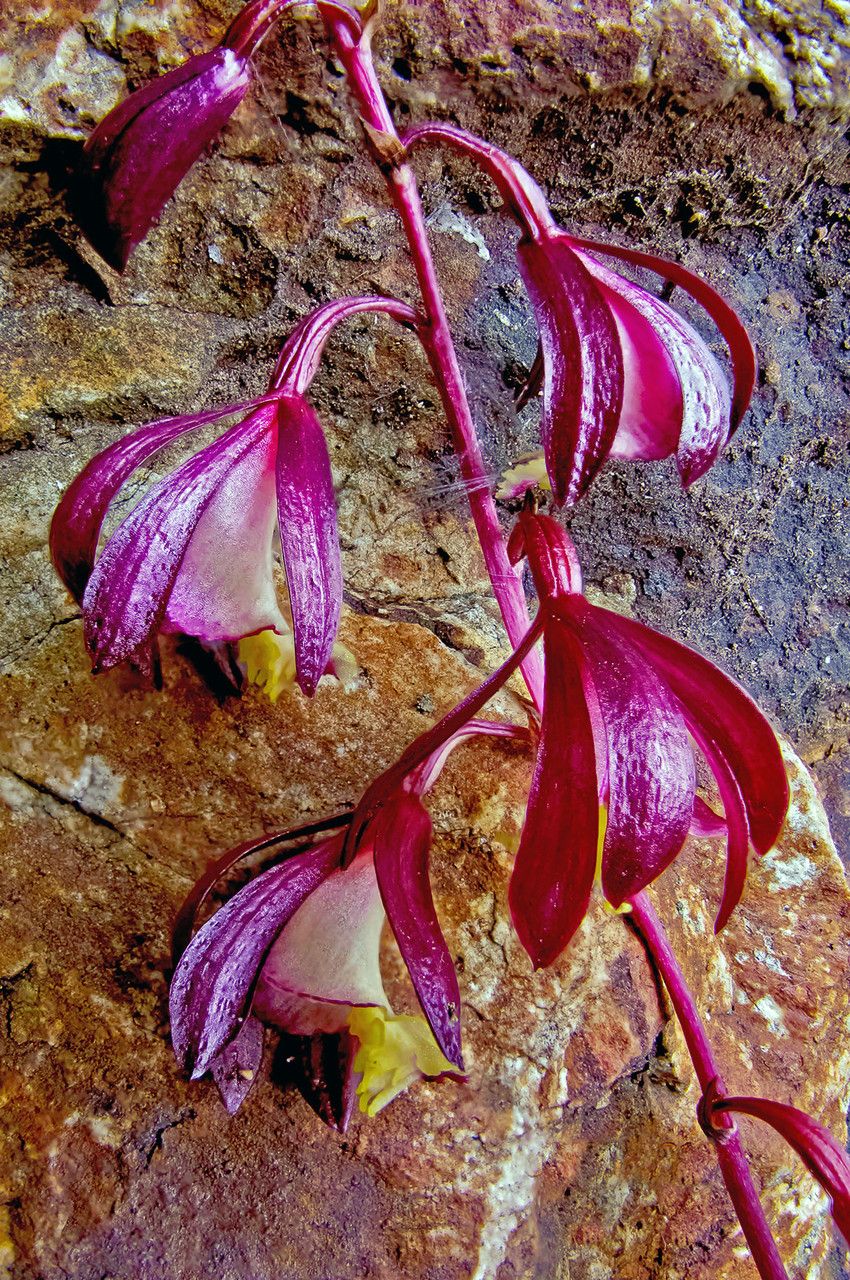
Bletia warnockii, often called the Texas rein orchid, has this incredible ability to bring a splash of color and elegance to even the most unassuming corner. Its delicate, yet resilient, flowers are a true delight. And the best part? Once you have one, you can share that joy! Propagating this orchid isn’t necessarily a “beginner’s” task in the same way a simple pothos cutting might be. It requires a bit of patience and understanding of its needs, but I promise, with these steps, it’s absolutely achievable and incredibly rewarding.
The Best Time to Start: Timing is Everything!
For Bletia warnockii, the absolute sweet spot for propagation is in early spring, just as the plant is emerging from its dormancy and beginning its active growth phase. You’ll see those little pseudobulbs starting to plump up, and new shoots will be pushing their way out of the soil. This is when the plant has the most energy to dedicate to creating new life. Waiting until after the plant has finished flowering is also a good option, but spring’s awakening energy is hard to beat for success.
Supplies You’ll Need: Your Propagation Toolkit
Gathering your supplies beforehand makes the whole process much smoother. Think of it like preparing your ingredients before a delicious meal!
- Sharp Pruning Shears or a Clean Knife: For making clean cuts, which are crucial for preventing disease. Make sure they are sterilized.
- Orchid Potting Mix: A well-draining mix is non-negotiable. Look for something chunky with bark, perlite, and perhaps some charcoal. It should feel airy.
- Small Pots or Containers: Whatever you choose, ensure they have drainage holes. Small nursery pots or even repurposed yogurt cups (with holes poked in the bottom!) work well.
- Rooting Hormone (Optional but Recommended): While not strictly essential for division, it can give cuttings a nice boost.
- Water (Filtered or Distilled Preferred): Tap water can sometimes have minerals that aren’t ideal for orchids.
- A Small Trowel or Dibber: For gently nestling your new divisions or cuttings into their new home.
- Labels: Because trust me, you’ll forget what’s what!
Propagation Methods: Bringing New Life Forth
Bletia warnockii is most commonly and successfully propagated through division. This is essentially splitting up a mature plant into smaller sections, with each section having its own roots and at least one healthy pseudobulb. While stem cuttings can work, division is far more reliable and straightforward for this particular orchid.
Propagation by Division:
- Gently Remove the Plant: Carefully take your Bletia warnockii out of its current pot. Try not to disturb the root ball too much if you can help it.
- Clean Off Excess Soil: Gently brush or rinse away some of the old potting mix. You want to be able to clearly see the pseudobulbs and where they are connected.
- Identify Division Points: Look for natural breaks where a pseudobulb has initiated its own root system or is clearly attached to the main plant. You’re looking for sections that are reasonably sized and appear healthy.
- Make the Cut: Using your sterilized shears or knife, carefully slice between the pseudobulbs. Aim for a clean cut. If you’re struggling, it’s okay to gently pull and tease the roots apart to help them separate. The goal is to have each division with at least one, preferably two, healthy pseudobulbs and a decent root system.
- Prepare the Divisions: Inspect the cut surfaces. If you’ve had to do a bit of rougher work, you can dust cut surfaces with a fungicide to prevent rot. Let the cut surface air dry for a few hours to a day if possible; this helps form a protective callus.
- Pot Them Up: Fill your new pots with your well-draining orchid mix. Create a small well in the center for the roots. Place your division so the pseudobulbs are just at or slightly above the surface of the mix. Gently firm the mix around the roots. Make sure the pseudobulbs aren’t buried too deeply.
The “Secret Sauce”: My Insider Tips
Over the years, I’ve picked up a few tricks that I find make a real difference with orchids.
- Don’t Overwater New Divisions: This is critical! New divisions don’t have established root systems to take up much water. Water them sparingly at first, allowing the potting mix to dry out between waterings. The pseudobulbs store water, so they can handle a bit of dryness initially.
- Bottom Heat is Your Friend: If you can provide a bit of gentle warmth from below, like placing your pots on a seedling heat mat (set to a low temperature, around 70-75°F or 21-24°C), it significantly encourages root development. It mimics the conditions of spring soil warming up.
- A Little Humidity Boost: New divisions appreciate a bit of humidity without being soggy. You can place the pots in a plastic bag with a few air holes, or mist the surrounding air (not directly on the pseudobulbs if you can avoid it) for a week or two. It creates a microclimate that helps them settle in.
Aftercare & Troubleshooting: Nurturing Your New Arrivals
Once your divisions are potted up, patience is key.
- Watering: Water when the potting mix is nearly dry. You’ll learn to gauge this by the weight of the pot or by feeling the mix with your finger. It might be once a week, or even less often, depending on your conditions.
- Light: Place your new Bletia warnockii divisions in bright, indirect light. Avoid harsh, direct sun, which can scorch young leaves.
- Fertilizing: Hold off on fertilizing for at least a month or two after potting. Let them establish their roots first. Then, you can start with a very diluted orchid fertilizer at half or quarter strength, only when the plant is actively growing.
Signs of Trouble:
- Rotting Pseudobulbs: This is the most common issue and usually signals overwatering or poor drainage. If a pseudobulb becomes mushy and black, sadly, it’s likely lost. Remove it to prevent it from spreading.
- Shriveled Pseudobulbs: This can mean underwatering, or sometimes, it’s a sign the plant is focusing all its energy on the (very small) new growth. Ensure the mix is drying out between waterings but not becoming bone dry for prolonged periods.
- No New Growth: This is usually just a matter of patience, especially with orchids. Give them time! Sometimes they need a season to adjust.
A Journey of Growth
So there you have it! Propagating Bletia warnockii is a journey of observation, a little bit of guesswork, and a whole lot of reward. Don’t be discouraged if your first attempt isn’t perfect. Each time you work with these plants, you learn a little more. Enjoy the process of nurturing these new lives, and soon you’ll be marveling at your very own handmade orchestra of blooms. Happy growing!
Resource: