Oh, hello there! Pull up a chair and let’s chat about one of my absolute favorite garden gems: Trachymene coerulea, or as many of us affectionately call it, Geraldton Waxflower.
Why You’ll Fall in Love with Geraldton Waxflower
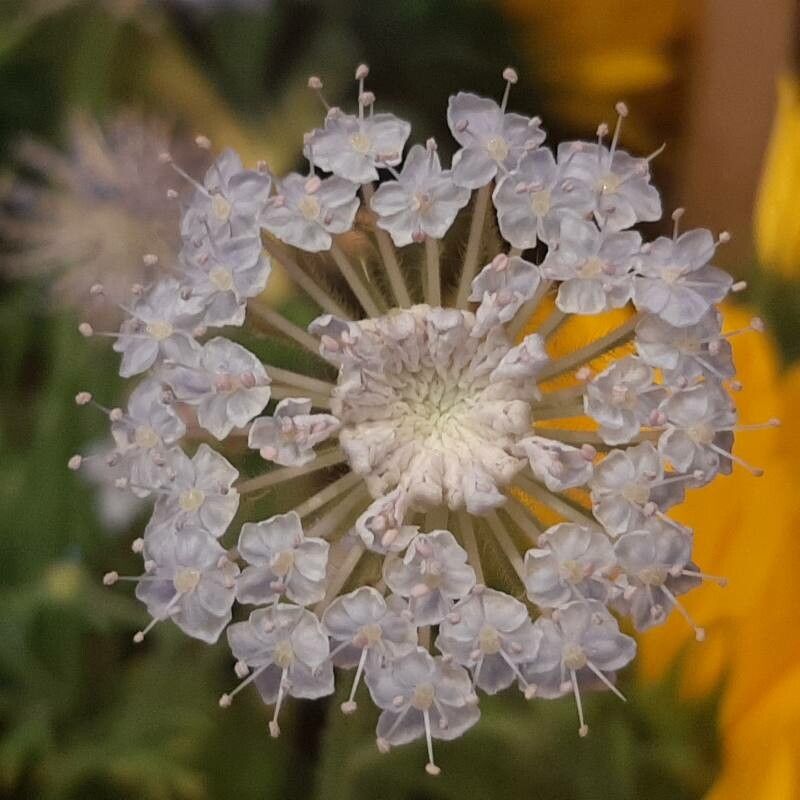
There’s something truly magical about these delicate, star-shaped blooms. They burst forth in a delightful display of blues and pinks, often speckled with darker centers that just make them pop. They’re not only stunning in the garden, attracting a host of pollinators, but they also make for incredibly long-lasting cut flowers. Trust me, a vase of Geraldton Waxflower is pure joy. And the best part? Propagating them is a wonderfully rewarding experience, giving you more of this beauty to share or spread around your own space. Now, I won’t lie, it’s not the absolute easiest plant for a complete beginner, but with a little patience and these tips, you’ll be a pro in no time.
The Best Time to Start
My golden rule for propagating Trachymene coerulea? Spring, when new growth is actively pushing out. Look for those tender, young shoots that aren’t woody yet. This is the prime time because the plant has plenty of energy to dedicate to forming new roots. Trying to propagate from old, tough stems will likely lead to disappointment.
Supplies You’ll Need
Gathering your tools beforehand makes the whole process smoother. Here’s what I always have on hand:
- Sharp, clean pruning shears or a sharp knife: Essential for making clean cuts.
- Potting mix: A well-draining mix is crucial. I like to use a blend of perlite and peat moss, or a special succulent/cacti mix works wonders.
- Small pots or trays: Clean, with drainage holes, of course!
- Rooting hormone (optional but recommended): This can really give your cuttings a boost.
- Plastic bags or a propagation dome: To create a humid environment.
- Watering can with a fine rose or misting bottle: For gentle watering.
Propagation Methods: Let’s Get Rooting!
The most reliable way I’ve found to propagate Geraldton Waxflower is through stem cuttings. It’s straightforward and usually yields great results.
Stem Cuttings:
- Take Your Cuttings: On a bright, mild day in spring, select healthy, non-flowering stems. Gently pinch or snip off a piece about 4-6 inches long. Make sure to cut just below a leaf node (where a leaf attaches to the stem).
- Prepare the Cuttings: Remove the lower leaves from your cuttings, leaving just a few at the top. This prevents those leaves from rotting in the soil or water.
- Dip in Rooting Hormone (Optional): If you’re using rooting hormone, dip the cut end of each stem into the powder or gel. Tap off any excess.
- Plant Them Up: Gently insert the prepared cuttings into your well-draining potting mix. Make a small hole with a pencil or skewer first to avoid rubbing off the rooting hormone. Firm the soil around the base of the cutting.
- Create Humidity: Water the soil lightly until it’s moist but not waterlogged. Then, cover the pot with a plastic bag or a propagation dome to trap moisture. Secure the bag around the pot with a rubber band.
- Find a Bright Spot: Place your pot in a bright location, but out of direct, harsh sunlight. A windowsill that gets good indirect light is perfect.
The “Secret Sauce” (Pro Tips)
Here are a few little tricks I’ve learned over the years that make a difference:
- Don’t Let the Leaves Touch the Water (If Water Propagating): While I prefer soil propagation for Geraldton Wax, if you do try water propagation, never let the leaves sit in the water. They’ll rot quickly. Make sure only the stem is submerged. For soil cuttings, this means removing lower leaves.
- Bottom Heat is Your Friend: If you have a heated propagator or can place your pots on a gentle heat mat, it can really speed up root development. The warmth encourages the plant to send out those little root hairs.
- Be Patient with Ventilation: While humidity is key, remember to “air out” your cuttings daily. Lift the plastic bag or dome for a few minutes each day to allow for some air circulation. This helps prevent fungal issues, a common culprit in propagation failure.
Aftercare & Troubleshooting
Once your cuttings have developed roots (you’ll know when you see new growth or gently tug and feel resistance), it’s time for a little extra care.
- Gradual Acclimatization: Slowly start removing the plastic bag or dome over a few days to get your new plants used to normal humidity levels.
- Gentle Watering: Continue to keep the soil consistently moist but not soggy. Overwatering is the quickest way to kill a brand-new rooting.
- Watch for Rot: The biggest sign of trouble is mushy, black stems or leaves that are yellowing and wilting rapidly. This usually points to overwatering and poor drainage. If you see this, remove the affected cutting immediately and check your soil mix. It’s often too wet or not draining well enough. Another sign of issues can be grey mold, which air circulation – mentioned in my pro tips – helps prevent.
Keep Growing!
Propagating any plant is an act of faith and a wonderful way to connect with nature. Be patient with your Geraldton Waxflower cuttings. Not every single one will make it, and that’s perfectly okay! Celebrate the successes, learn from any mishaps, and most importantly, enjoy the journey of nurturing new life. Happy gardening!
Resource:
https://identify.plantnet.org/k-world-flora/species/Trachymene%20coerulea%20Graham/data