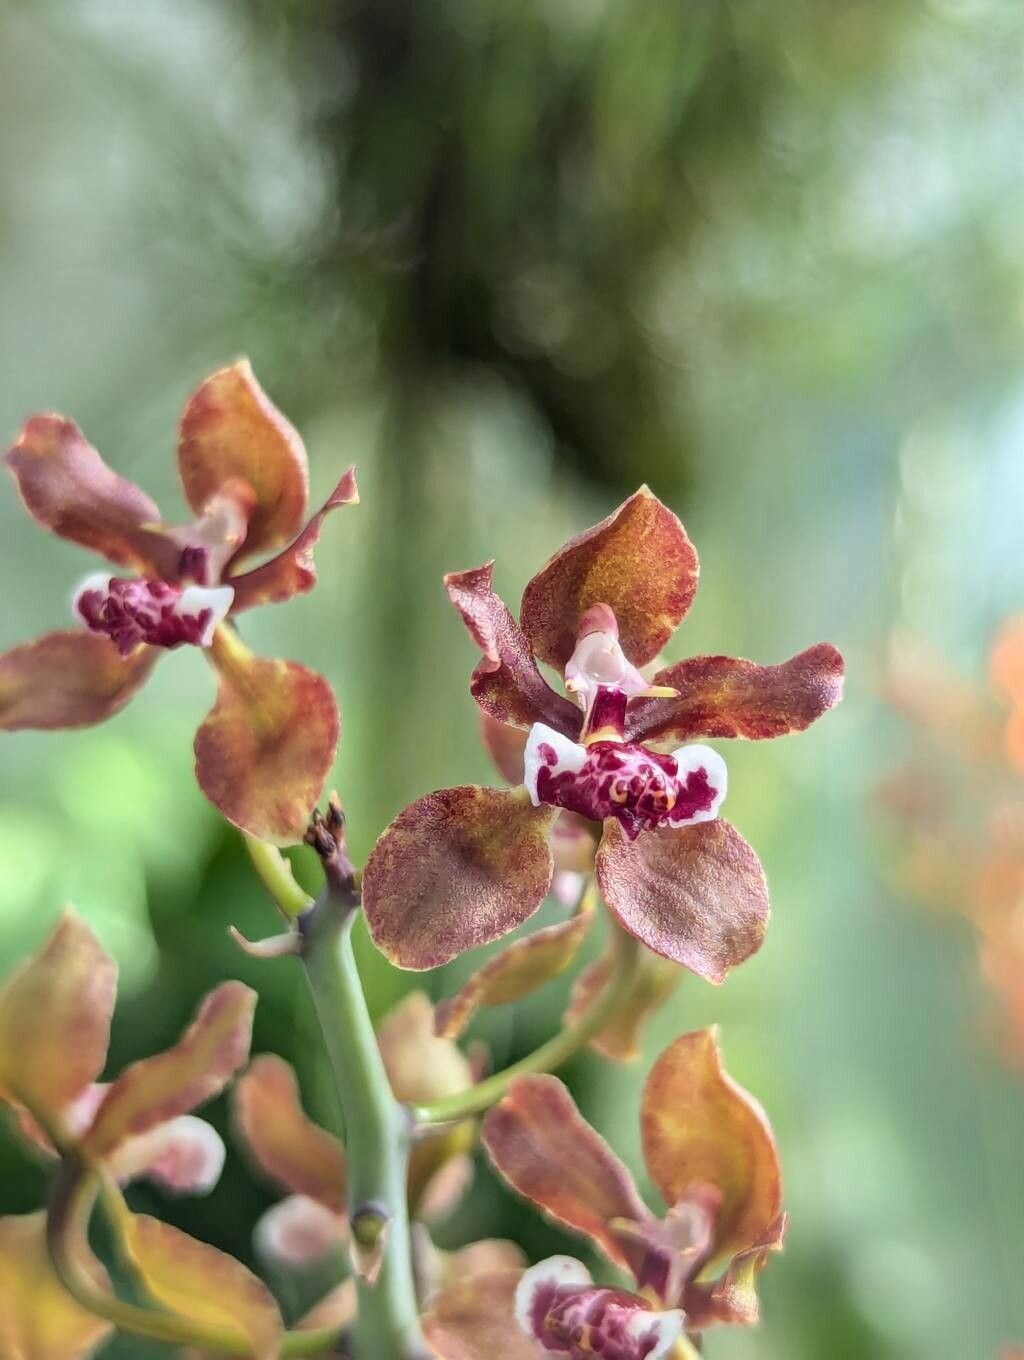
Hey there, fellow plant lovers! I’m so excited to chat with you today about a real gem in the orchid world: Trichocentrum microchilum. If you’re looking for a small orchid with a charming, almost whimsical flower, then this one is for you. Its delicate beauty and often delightful fragrance make it a joy to have around. And the best part? You can multiply that joy by propagating your own! Now, while orchids can sometimes feel a bit intimidating, I find Trichocentrum microchilum to be a pretty good sport for propagation. It’s not the absolute easiest, but with a little patience and the right approach, you’ll be adding new babies to your collection in no time.
The Sweet Spot for Starting
For most orchids, including our little Trichocentrum microchilum, the absolute best time to think about propagation is when the plant is actively growing. This usually means spring or early summer, after it has finished blooming and is putting out new roots or leaves. You’ll be able to see where new growth is happening, and the plant will have the energy reserves it needs to recover from the process and establish itself. Trying to propagate when the plant is dormant, or stressed, is just setting yourself up for disappointment.
Your Propagation Toolkit
Gathering the right supplies beforehand makes all the difference. Here’s what I always have on hand:
- Sharp, sterile pruning shears or a sharp knife: For clean cuts. Sterilize with rubbing alcohol or by passing through a flame.
- Orchid Potting Mix: A fine to medium grade mix is usually best. You can go with a bark-based mix, but I often find a good quality sphagnum moss blend works wonders for Trichocentrum babies.
- Small pots or trays: Clean, small pots or propagation trays with drainage holes are perfect. You can even use small plastic clamshell containers for humidity.
- Rooting Hormone (optional but recommended): A good quality rooting powder or gel can give your cuttings a helpful boost.
- Labels and a waterproof marker: Trust me, you will forget what you propagated and when!
- Spray bottle: For misting.
- Clear plastic bag or mini greenhouse: To maintain high humidity around your cuttings.
- Bottom heat source (optional but excellent): A seedling heat mat can significantly speed up root development.
Nurturing New Life: Propagation Methods
For Trichocentrum microchilum, the most successful and forgiving method is division. This orchid often grows in a clump, and when it gets big enough, you can carefully separate it.
Division – Step-by-Step:
- Gently remove the orchid from its pot. If it’s been in the same pot for a while, you might need to coax it out.
- Inspect the root ball. Look for natural divisions where a new growth point (a pseudobulb with leaves) is clearly separated from the main plant by healthy roots.
- Using your sterile shears or knife, carefully cut through the rhizome (the creeping stem that connects the growths) to separate the divisions. Aim for each division to have at least 2-3 healthy pseudobulbs and some good roots.
- Trim away any dead or mushy roots.
- If any of the cuts are large, you can dust them with cinnamon (a natural fungicide) or apply a rooting hormone paste. I often skip the rooting hormone for divisions, as the existing root system is usually sufficient.
- Repot each division into its own small pot with fresh orchid mix. Make sure the base of the pseudobulbs is at the surface of the mix, not buried.
- Water gently. You want the mix to be moist but not soggy.
The “Secret Sauce”: My Insider Tips
After years of trial and error, I’ve learned a few tricks that really make a difference:
- Don’t be afraid of a little “mess.” Sometimes, when repotting, I’ll slightly tease apart some of the older roots on a division to encourage new root growth. A gentle comb of your fingers can do wonders.
- Humidity is King (and Queen!). Once you’ve potted your divisions, pop them into a clear plastic bag or a mini greenhouse. This creates a humid microclimate that helps them recover and start new root growth much faster. Just be sure to open the bag for a few hours each day to allow for air circulation and prevent fungal issues.
- Bottom heat is a game-changer. If you have a heat mat, place your newly potted divisions on it. This gentle warmth mimics the conditions at the base of a plant and truly encourages those roots to get a move on.
Looking After Your New Treasures & When Things Go Wrong
Once your divisions are potted, keep them in indirect light and do not let them dry out completely. Mist them regularly, especially if they are in the humidity tent. You’ll start to see new roots emerging from the base of the pseudobulbs within a few weeks to a couple of months. This is your cue that they’re happy and settling in!
The most common sign of trouble is rot. If you see leaves turning yellow and mushy, or the pseudobulbs themselves feel soft and squishy, it’s usually a sign of overwatering or poor air circulation. If this happens, remove the affected plant immediately, trim away any rotted tissue with sterile tools, and repot in fresh, drier orchid mix. You might even need to let it air dry for a day or two before potting.
Go Forth and Multiply!
Propagating Trichocentrum microchilum is a wonderfully rewarding way to expand your orchid collection and share the love. Be patient; sometimes these little ones take their time. But with the right care and a sprinkle of these insider tips, you’ll be celebrating successful new additions before you know it. Happy growing!
Resource: