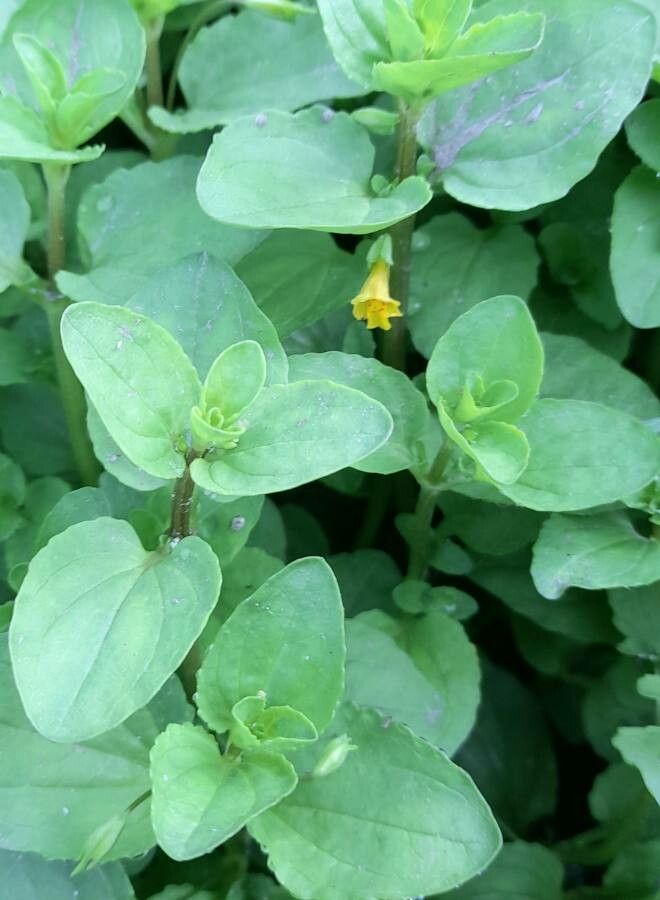
Oh, Erythranthe glabrata! What a charmer. If you’re looking for a plant that brings a delicate flutter of beauty to shady corners, then this is definitely one to consider. Its cheerful blooms, often in shades of lavender or white, just seem to make you smile. And the best part? You can easily fill your garden or pots with more of these delightful little plants. Propagating them is really quite satisfying, a true testament to nature’s magic. For most gardeners, I’d say glabrata is pretty darn beginner-friendly when it comes to making more of them.
The Best Time to Start
When it comes to getting your glabrata propagation off to a flying start, I always lean towards late spring or early summer. This is when the plant is in its most vigorous growth phase. We’re talking new shoots, fresh energy – perfect for taking cuttings. You want to work with healthy, actively growing stems, not those that are old and woody.
Supplies You’ll Need
Before you dive in, having these on hand will make the whole process smoother:
- A clean, sharp pruning shear or scissors. Trust me, a clean cut is a happy cut.
- A good quality potting mix. I like a blend that’s well-draining. A mix for seedlings or cuttings with added perlite or vermiculite is excellent.
- Small pots or seed trays with drainage holes.
- Watering can with a fine rose or a spray bottle. Gentle watering is key!
- Optional: Rooting hormone (powder or gel). It can give cuttings a little boost.
- Optional: A plastic bag or clear dome for creating a humid environment.
Propagation Methods
Let’s get our hands dirty! Here are my go-to ways to multiply your Erythranthe glabrata.
1. Stem Cuttings (My Favorite!)
This is my absolute favorite method for glabrata. It’s reliable and you can get quite a few new plants from just one parent.
- Step 1: Take Cuttings. Look for healthy stems that are about 3-4 inches long. You want to select a stem that has at least two sets of leaves. Make a clean cut just below a leaf node (where a leaf attaches to the stem). This is where the magic happens.
- Step 2: Prepare the Cuttings. Gently remove the bottom leaves from your cutting. You want to expose the leaf nodes that will go into the soil. If your cutting has a lot of leaves, you can pinch off the top few to reduce water loss.
- Step 3: Apply Rooting Hormone (Optional). If you’re using rooting hormone, dip the cut end of the stem into the powder or gel. Tap off any excess.
- Step 4: Plant Your Cuttings. Fill your small pots with your well-draining potting mix. Make a small hole with your finger or a pencil. Insert the prepared cutting, ensuring the leaf nodes are buried in the soil. Gently firm the soil around the base.
- Step 5: Water and Cover. Water the pots gently until the soil is moist but not waterlogged. To create a mini-greenhouse, you can cover the pots with a clear plastic bag (supported by stakes so it doesn’t touch the leaves) or place them under a clear dome. This helps maintain humidity, which is crucial for cuttings to root.
2. Division (For Established Plants)
If you have a mature, well-established clump of Erythranthe glabrata, division is a fantastic way to get more plants and also to invigorate the parent plant.
- Step 1: Gently Excavate. Carefully dig up the entire plant from its pot or garden bed. Try to keep as much of the root ball intact as possible.
- Step 2: Loosen the Roots. Gently shake off some of the excess soil. You want to be able to see the root structure.
- Step 3: Separate the Divisions. Using your hands or (if necessary) a clean, sharp knife, carefully pull or cut the clump apart. Each division should have its own healthy roots and at least a few shoots. Don’t be afraid to be firm but also gentle.
- Step 4: Replant. Pot up each division into its own pot filled with fresh potting mix, or replant them in their desired garden location. Water them in well.
The “Secret Sauce” (Pro Tips)
Here are a couple of little tricks that have served me well over the years:
- Don’t let the leaves touch the water. If you’re doing water propagation (which is also an option for glabrata), make sure only the stem is submerged. Any leaves in the water will likely rot and can take your cutting down with them.
- Bottom heat is your friend! If you have the option, placing your cuttings on a propagation mat can significantly speed up root development. It mimics the warmth of spring soil and really encourages those roots to form.
Aftercare & Troubleshooting
Once your cuttings have been planted, keep them in a bright spot but out of direct, harsh sunlight. The soil should remain consistently moist – imagine a wrung-out sponge. Not dripping wet, but not bone dry either.
You’ll know your cutting has rooted when you see new growth emerging from the top. You can also give it a very gentle tug; if there’s resistance, that means roots are forming! Once roots are well-established (you might see them peeking out the drainage holes), you can gradually introduce them to more light and standard watering practices.
Now, what if things go wrong? The most common issue is rot, characterized by stems turning mushy and black. This is usually a sign of too much moisture and not enough air circulation. If you see this, discard the affected cutting. It’s a learning curve, and sometimes a cutting just doesn’t make it, and that’s okay! It doesn’t mean you’ve failed, just that this particular piece wasn’t ready.
A Encouraging Closing
Making more Erythranthe glabrata is a wonderfully rewarding process. Be patient with your little cuttings; they have their own timeline. Don’t be discouraged if not every single one takes. Each attempt is a chance to learn and grow alongside your plants. So, get out there, get your hands a little dirty, and enjoy the delightful journey of creating new life in your garden!
Resource: