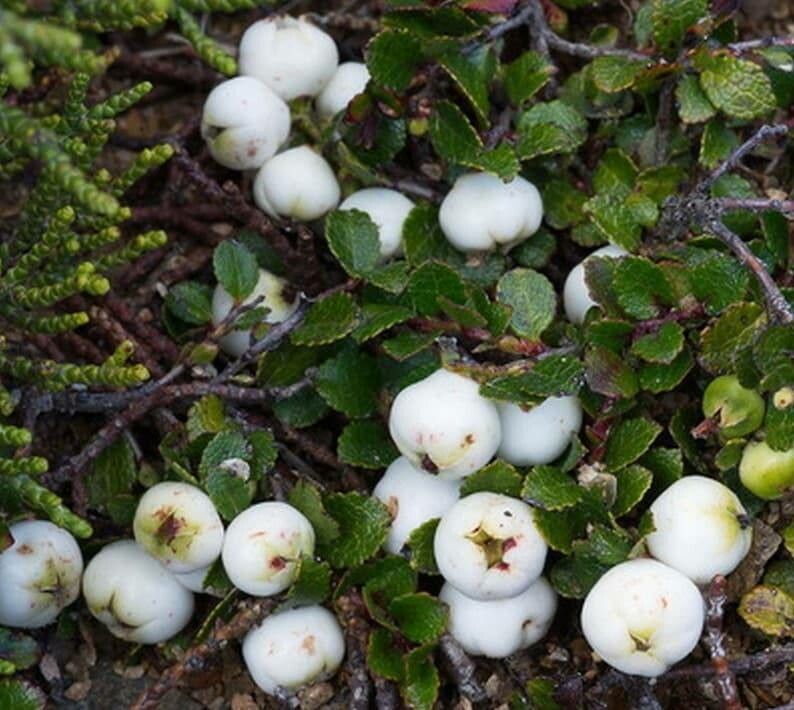
Hey there, fellow plant lovers! I’m so excited to chat with you today about one of my absolute favorite woodland gems: Gaultheria depressa, also known as the creeping wintergreen or New Zealand snowberry. If you’re captivated by its glossy, evergreen leaves, its delicate white flowers, and the promise of those lovely crimson berries, then you’re in for a treat. Propagating this beauty is a really satisfying way to fill your garden with more of its charm, or even to share a piece of living greenery with friends. Now, is it a walk in the park for a complete novice? I’d say it leans a little towards needing a bit of patience, but with these tips, you’ll be well on your way.
The Best Time to Start
My go-to time for propagating Gaultheria depressa is late spring to early summer. This is when the plant is in its active growth phase. You’re looking for semi-hardwood cuttings. What does that mean? Think of a stem that was new growth this spring and is starting to firm up, but it’s not yet woody and brittle. It should snap cleanly when you try to bend it. This stage offers the perfect balance of flexibility and the ability to root.
Supplies You’ll Need
To give your little cuttings the best start, gather these essentials:
- Sharp, clean pruning shears or a sharp knife: Crucial for making clean cuts.
- Rooting hormone (optional but recommended): A powder or gel to encourage root development.
- A coarse, well-draining potting mix: I like a blend of peat moss (or coir), perlite, and a bit of coarse sand.irmed for good aeration.
- Small pots or trays: Clean containers with drainage holes are a must.
- Plastic bags or a propagator: To create a humid environment.
- Labels and a marker: So you remember what you planted where!
- Watering can or spray bottle: For gentle watering.
Propagation Methods: Stem Cuttings
This is my preferred method for Gaultheria depressa. It yields fantastic results when done right.
- Take Your Cuttings: Using your clean shears, select healthy stems from your mature plant. You want cuttings about 3-4 inches long. Make the cut just below a leaf node (where a leaf attaches to the stem).
- Prepare the Cuttings: Gently remove the lower leaves, leaving just a few at the top. This prevents rotting in the soil and directs the plant’s energy towards root formation. If the leaves are large, you can even cut them in half.
- Apply Rooting Hormone (If Using): Dip the cut end of each stem into your rooting hormone, shaking off any excess. This step isn’t strictly necessary for Gaultheria in my experience, but it can give you a speed boost, especially if you’re a beginner.
- Pot Up: Fill your small pots or trays with your prepared potting mix. Make a small hole with your finger or a pencil in the center of the soil.
- Insert the Cuttings: Carefully place the prepared cutting into the hole, ensuring the leaf nodes where you removed leaves are below the soil line. Gently firm the soil around the base of the cutting to ensure good contact.
- Water Gently: Water the soil thoroughly but gently, making sure not to dislodge the cuttings. You want the soil to be moist but not waterlogged.
- Create Humidity: Cover the pots or trays with a plastic bag or place them in a propagator. This traps moisture and creates the humid microclimate that cuttings love. Ensure the leaves don’t touch the sides of the bag if possible to prevent rot.
The “Secret Sauce” (Pro Tips)
Now, for a couple of little tricks I’ve picked up over the years that really make a difference!
- Bottom Heat is Your Friend: Gaultheria roots appreciate a little warmth from below. If you have a heated propagator or even a heat mat designed for seedlings, place your pots on it. This gentle warmth stimulates root development much faster than just room temperature.
- Don’t Overwater, but Don’t Let Them Dry Out: This is a delicate balance. Check the soil moisture regularly by gently touching the surface. If it feels dry, give it a light watering. If it’s still moist, leave it be. Overwatering is one of the quickest ways to lose your precious cuttings to rot.
Aftercare & Troubleshooting
Once you see new growth emerging or feel a gentle tug when you lightly pull on a cutting (a sign of roots!), it’s time for a little adjustment.
- Gradual Acclimation: Slowly remove the plastic cover over a week or two. Start by taking it off for a few hours each day, then gradually increase the time until the plants are fully exposed. This helps them adapt to normal humidity levels.
- Gentle Feeding: Once the cuttings are established and showing consistent growth, you can start feeding them with a weak, diluted liquid fertilizer every few weeks.
- Watch for Rot: The most common sign of failure is wilting and eventual rot, often appearing as black, mushy stems at the soil line. This is usually a sign of overwatering or poor drainage. If you see this, unfortunately, that cutting is likely lost.
- Fungus Gnats: Sometimes, especially with damp soil, you might see tiny flying gnats. These are generally harmless to the plants but can be annoying. Allowing the top layer of soil to dry out slightly between waterings usually discourages them.
A Little Patience Goes a Long Way
Propagating Gaultheria depressa is a journey, and like all good things in the garden, it requires a bit of patience. Don’t be discouraged if not every cutting takes. Learn from each batch, adjust your approach, and celebrate the successes! The reward of nurturing a new plant from a tiny cutting is truly special. Happy propagating, and enjoy the green goodness!
Resource:
https://identify.plantnet.org/k-world-flora/species/Gaultheria%20depressa%20Hook.f./data