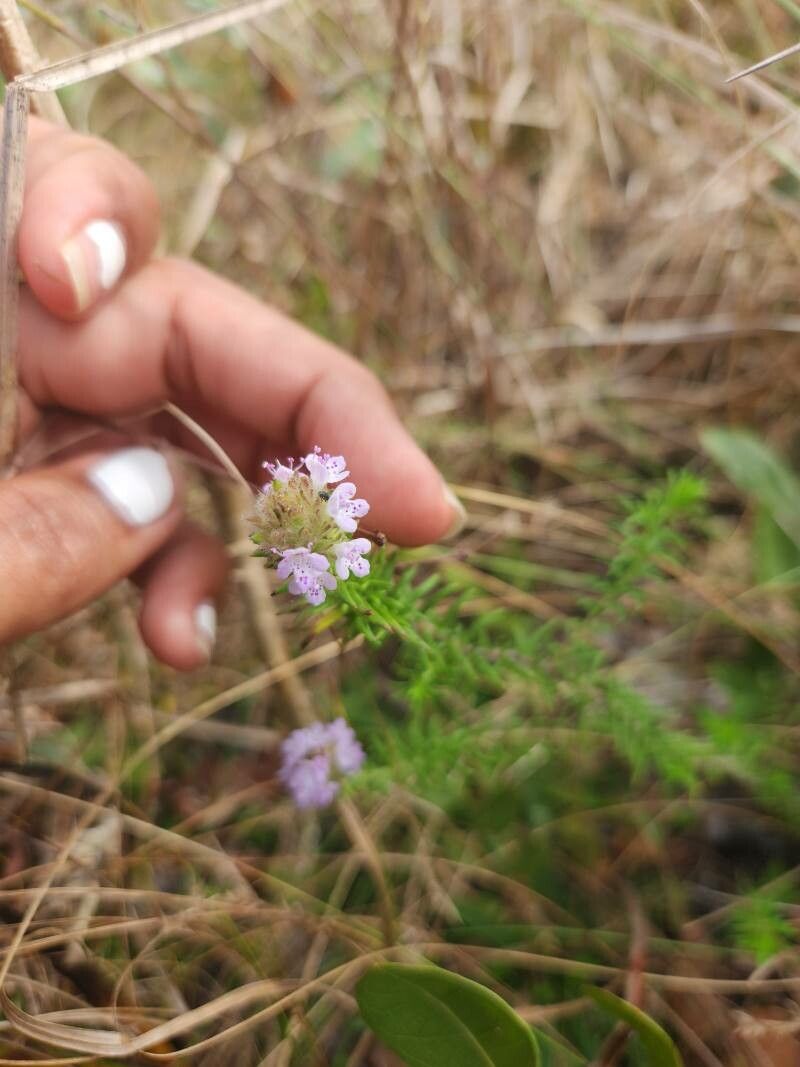
Oh, hello there! Grab your favorite mug; let’s chat about a little treasure I’ve come to adore: Piloblephis rigida. If you’re anything like me, you’re drawn to plants that offer a bit of sparkle, and this one delivers. Its delicate, almost ethereal blooms are such a delight against its sturdy, upright form. And the best part? Bringing more of these beauties into your garden through propagation is incredibly rewarding. Now, is it a walk in the park for absolute beginners? I’d say it’s a gentle stroll with a few interesting turns, but totally achievable with a little know-how.
The Best Time to Start
My favorite time to get propagating Piloblephis rigida is definitely late spring to early summer. The plant is actively growing then, which means it’s full of energy and ready to sprout new roots. You want to work with stems that are vibrant and healthy, not old and woody or still very soft and new. Look for stems that have at least one or two leaf nodes (where the leaves attach to the stem), as this is where the magic of root development really happens.
Supplies You’ll Need
Here’s what I always have on hand when I’m propagating:
- Sharp Pruning Shears or a Clean Knife: Essential for making clean cuts.
- Rooting Hormone (Optional, but Recommended): A little boost can speed things up. I prefer it in powder form.
- Potting Mix: A well-draining mix is crucial. I often use a blend of equal parts perlite and peat moss, or a good quality seed-starting mix.
- Small Pots or Trays: Clean containers are a must to prevent disease.
- Clear Plastic Bags or a Humidity Dome: To keep things consistently moist.
- Watering Can or Spray Bottle: For gentle watering.
- Labels and a Marker: So you don’t forget what you’ve planted!
Propagation Methods
For Piloblephis rigida, my go-to method is stem cuttings. It’s reliable and gives you the best chance for success.
Stem Cuttings:
- Select Your Cuttings: Choose healthy, non-flowering stems. You’re looking for pieces that are about 4-6 inches long.
- Make the Cut: Using your sharp shears or knife, make a clean cut just below a leaf node. This is where the potential for roots is strongest.
- Prepare the Cuttings: Gently remove the leaves from the bottom half of each cutting. If a cutting has any flowers or flower buds, pinch those off too. They can drain energy that the plant needs to focus on root growth.
- Apply Rooting Hormone: Dip the cut end of each stem into your rooting hormone. Tap off any excess.
- Plant the Cuttings: Fill your small pots or trays with the well-draining potting mix. Make a small hole in the center of the mix with your finger or a pencil. Insert the prepared cutting, making sure at least one leaf node is buried in the soil. Gently firm the soil around the stem.
- Water Gently: Water the mix lightly to settle the soil.
- Create a Humid Environment: Cover the pots with a clear plastic bag or a humidity dome. Make sure the bag doesn’t touch the leaves too much; you can prop it up with a few stakes if needed. Place the pots in a bright spot but out of direct, harsh sunlight.
The “Secret Sauce” (Pro Tips)
After years of tinkering, here are a few little tricks I’ve found make a big difference:
- Don’t Let the Leaves Touch the Water: If you opt for water propagation (which can work for Piloblephis rigida if you’re careful), make absolutely sure that no leaves are submerged. Any leaves in the water will just rot and can take the whole cutting down with them.
- Bottom Heat is Your Friend: If you have space, placing your pots on a gentle heating mat can significantly speed up root development. Piloblephis rigida loves a bit of warmth to encourage those roots to form. Think of it like a cozy little greenhouse floor.
- Air Circulation is Key: While you want to maintain humidity, it’s also important to provide a little air flow. Once a day, I like to briefly remove the plastic bag or lift the lid of the humidity dome to let fresh air in. This helps prevent fungal issues.
Aftercare & Troubleshooting
Once you start to see new leaf growth, that’s a great sign that roots are forming! Don’t be tempted to pull the cutting out to check; you can gently tug on it. If you feel resistance, roots are developing.
Once established, gradually acclimate your new plant to normal humidity by slowly opening the plastic bag over a few days. Continue to keep the soil consistently moist but not waterlogged.
The most common problem you might encounter is rot. If your cuttings look mushy or develop black spots, it’s usually a sign of too much moisture and not enough air circulation. In this case, it’s often best to discard the affected cutting and try again, paying closer attention to your watering and air flow. Sometimes a cutting just doesn’t take, and that’s okay too! It’s all part of the learning process.
A Little Patience Goes a Long Way
Propagating plants is a journey of observation and a little bit of faith. Don’t get discouraged if your first attempts aren’t perfect. Keep trying, pay attention to what your cuttings are telling you, and enjoy the marvelous process of bringing more natural beauty into your life. Happy gardening!
Resource: