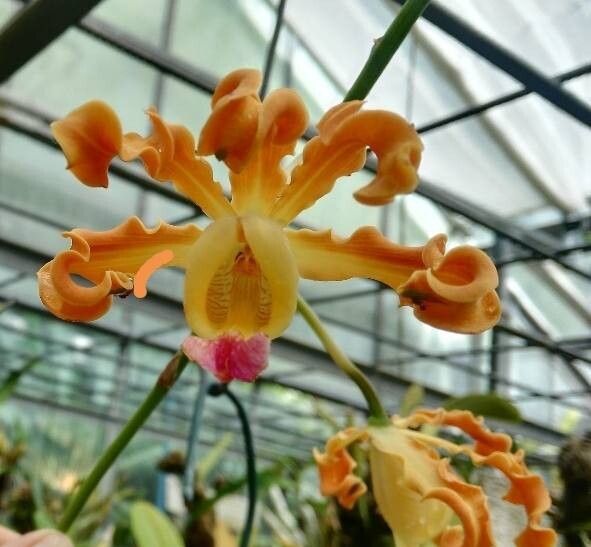
Well hello there, fellow plant enthusiast! It’s a joy to be sharing my greenhouse thoughts with you today. I’ve been coaxing new life from plants for two decades now, and one of the special surprises in my collection is the Myrmecophila brysiana. Its elegant, cascading growth and beautiful blooms are truly a sight to behold. And the best part? You can often share that beauty by propagating it yourself! It’s a deeply satisfying process that lets you multiply the joy your plants bring.
Now, about this specific plant: if you’re just dipping your toes into the world of orchid propagation, Myrmecophila brysiana might present a bit of a gentle learning curve. It’s not the most challenging out there, but it does appreciate a bit of focused care. Think of it as a delightful project rather than a walk in the park!
The Best Time to Start
For Myrmecophila brysiana, I find the late spring to early summer is your golden window. This is when the plant is in its active growth phase, energized after its rest period. If you can catch it right after it’s finished flowering, that’s even better. The pseudobulbs will be plump and full of stored energy, giving your new cuttings the best possible start.
Supplies You’ll Need
Gathering your tools beforehand makes the whole process so much smoother. Here’s what I always have on hand:
- Sharp, sterile pruning shears or a keen knife: A clean cut is paramount to prevent disease.
- Orchid bark mix: A well-draining blend, often with perlite or charcoal, is essential. I usually opt for a mix specifically formulated for sympodial orchids.
- Sphagnum moss: This holds moisture but also allows for good aeration.
- Rooting hormone (optional, but helpful): A powder or gel can give your cuttings a little extra boost.
- Small pots or community trays: Anything that provides good drainage and is the right size for your cuttings.
- Water sprayer: To keep things evenly moist without waterlogging.
- Clear plastic bags or humidity domes: To create a microclimate for your cuttings.
Propagation Methods
Myrmecophila brysiana is best propagated by division. This is the most reliable method for this orchid, as it involves separating existing, healthy plant parts that already have the potential to grow.
Division: Your Go-To Method
- Assess Your Plant: Look for a mature plant with at least three to four sturdy pseudobulbs. You want to ensure you’re separating divisions that have a good chance of establishing themselves.
- Gently Remove from Pot: Carefully tease your orchid out of its current pot. If it’s really stuck, you might need to gently break the pot or carefully use a blunt tool to loosen the root ball.
- Clean the Roots: This is a crucial step. Gently wash away all the old potting medium from the roots. You want to see clearly where the pseudobulbs connect and where the healthy roots are. It’s also a good time to inspect for any signs of rot or pests.
- Identify Division Points: Look for natural separations between groups of pseudobulbs. You’re aiming to create divisions that have at least two to three pseudobulbs and some healthy roots.
- Make the Cut: Using your sterilized pruning shears or knife, make a clean cut through the rhizome (the horizontal stem connecting the pseudobulbs). Aim for a smooth, decisive action.
- Optional: Apply Rooting Hormone: If you’re using rooting hormone, dip the cut end of the rhizome and any exposed roots into the powder or gel.
- Pot Up Your Divisions: Place each division in its own pot or a community tray filled with your prepared well-draining orchid bark mix. Ensure the pseudobulbs are sitting slightly above the surface of the mix.
- Water Lightly: Give your newly potted divisions a gentle watering. You want the potting medium to be moist, not soggy.
The “Secret Sauce” (Pro Tips)
Here are a couple of things I’ve learned over the years that make a real difference:
- Don’t Over-Pot: It’s tempting to give a new division a big pot, but smaller pots are better for young orchids. They help the potting medium dry out more evenly, reducing the risk of root rot. A pot where the roots just about fill it is ideal.
- The Power of Humidity (but Not Soggy): While you don’t want to drown your new divisions, they absolutely love humidity. Covering the pots with a clear plastic bag (with a few small air holes) or placing them under a humidity dome creates that perfect humid environment without the risk of waterlogging the potting mix. I also find lightly misting the leaves once a day can be beneficial, but always let the surface of the potting medium start to dry between waterings.
Aftercare & Troubleshooting
Once your divisions are potted, place them in a bright spot that receives indirect light. Avoid direct sun, as it can scorch their delicate new growth. Keep that humidity up, and water only when the potting medium is starting to feel dry to the touch.
You’ll know your division is happy when you start to see new root growth emerging from the base of the pseudobulbs. This can take a few weeks, so be patient!
The most common issue is rot. You’ll recognize it by blackened, mushy pseudobulbs or roots. If you spot this, act fast! Remove the affected parts with your sterile tool, reassess your watering habits, and maybe even repot into fresh, drier medium. Good air circulation is your best friend in preventing rot.
A Little Patience Goes a Long Way
Propagating Myrmecophila brysiana is a journey, not a race. There will be moments of doubt, but by providing the right conditions and a little extra care, you’ll be rewarded with new plants to admire and even share. So, gather your supplies, get your hands in that bark, and enjoy the magic of watching new life unfold. Happy growing!
Resource: